您现在的位置是:网站首页> .NET Core
.NET Core客户端学习笔记
- .NET Core
- 2025-09-08
- 5238人已阅读
.NET Core客户端学习笔记
***MAUI配置发布Android IOS等个平台独特的文件配置***
***Avalonia.NET编译Android配置签名***
.NET core MAUI编写Andorid服务并调用该服务的例子
MAUI学习篇,点击查看例子代码,点击查看微软在线maui文档
在.NET MAUI中使用CommunityToolkit.Mvvm显示ObservableCollection项的更改
用户界面
动画
页数
视图
显示数据
不用mac环境,如何使用Visual Studio在Windows中开发iOS应用
.NET Core MAUI 对接界面数据的更新显示的简单实现代码
net core MAUI的Model.NotifyPropertyChanged函数的使用
.net core MAUI弹出新页面,返回就页面时候获得那个弹出页面的数据
.net core MAUI中使用复杂listview的例子带数据绑定,删除编辑功能实现
MAUI中ContentPage与ContentView的区别
Avalonia .Net版的Flutter,全面跨平台
语法基于WPF,但是新增的语法糖比WPF好用太多。
也可以通过Avalonia XPF把原生WPF程序转成Avalonia程序实现跨平台。
按平台执行代码
#if ANDROID
using Android.Content;
using Android.Views;
using Android.Runtime;
#elif IOS
using UIKit;
#endif
using InvokePlatformCodeDemos.Services;
namespace InvokePlatformCodeDemos.Services.ConditionalCompilation
{
public class DeviceOrientationService
{
public DeviceOrientation GetOrientation()
{
#if ANDROID
IWindowManager windowManager = Android.App.Application.Context.GetSystemService(Context.WindowService).JavaCast<IWindowManager>();
SurfaceOrientation orientation = windowManager.DefaultDisplay.Rotation;
bool isLandscape = orientation == SurfaceOrientation.Rotation90 || orientation == SurfaceOrientation.Rotation270;
return isLandscape ? DeviceOrientation.Landscape : DeviceOrientation.Portrait;
#elif IOS
UIInterfaceOrientation orientation = UIApplication.SharedApplication.StatusBarOrientation;
bool isPortrait = orientation == UIInterfaceOrientation.Portrait || orientation == UIInterfaceOrientation.PortraitUpsideDown;
return isPortrait ? DeviceOrientation.Portrait : DeviceOrientation.Landscape;
#else
return DeviceOrientation.Undefined;
#endif
}
}
}
// 定义一个接口
public interface IDeviceService
{
void DoSomething();
}
// 为每个平台实现该接口
#if ANDROID
public class AndroidDeviceService : IDeviceService
{
public void DoSomething()
{
// Android 特定代码
}
}
#elif IOS
public class IosDeviceService : IDeviceService
{
public void DoSomething()
{
// iOS 特定代码
}
}
#elif WINDOWS
public class WindowsDeviceService : IDeviceService
{
public void DoSomething()
{
// Windows 特定代码
}
}
#elif MACCATALYST
public class MacCatalystDeviceService : IDeviceService
{
public void DoSomething()
{
// Mac Catalyst 特定代码
}
}
#endif
// 在需要的地方注入服务
public class MyPage : ContentPage
{
private readonly IDeviceService _deviceService;
public MyPage(IDeviceService deviceService)
{
_deviceService = deviceService;
// ...
}
private void DoWork()
{
_deviceService.DoSomething();
}
}
.NET Core MAUI调用Android原生API
在.NET MAUI中调用Android原生API需要使用Platform Specifics(平台特定功能)。以下是调用Android原生API的步骤:
1.在你的.NET MAUI项目中,创建一个名为"Platforms"的文件夹,并在其中创建一个名为"Android"的子文件夹。
2.在"Android"文件夹中创建一个新的类,用于封装你要调用的Android原生API。例如,假设你要调用Android的Toast API,可以创建一个名为"AndroidToast"的类:
using Android.Widget;
using Microsoft.Maui.Platform;
namespace YourNamespace.Platforms.Android
{
public static class AndroidToast
{
public static void ShowToast(string message, ToastLength length)
{
Toast.MakeText(Platform.CurrentActivity, message, length).Show();
}
}
}
3.在你的.NET MAUI项目中,你现在可以通过调用AndroidToast.ShowToast方法来显示Android原生的Toast消息:
#if ANDROID
AndroidToast.ShowToast("Hello from Android!", ToastLength.Short);
#endif
注意,我们使用了条件编译符号#if ANDROID来确保这段代码只在Android平台上运行。
如果你需要在Android平台上执行更复杂的操作,可以在AndroidToast类中添加更多的方法,并在需要时调用它们。
.NET core MAUI编写Andorid服务并调用该服务的例子
面是一个在.NET MAUI中编写Android服务并调用该服务的例子:
1.首先,在Android平台项目中创建一个服务类。例如,创建一个名为MyAndroidService的类,并继承自Android.App.Service:
using Android.App;
using Android.Content;
using Android.OS;
using Android.Util;
namespace MyApp.Droid.Services
{
[Service]
public class MyAndroidService : Service
{
public override IBinder OnBind(Intent intent)
{
return null;
}
public override StartCommandResult OnStartCommand(Intent intent, StartCommandFlags flags, int startId)
{
Log.Info("MyAndroidService", "Service started");
// 在这里执行服务的逻辑
return StartCommandResult.Sticky;
}
public override void OnDestroy()
{
Log.Info("MyAndroidService", "Service stopped");
base.OnDestroy();
}
}
}
在这个例子中,我们创建了一个简单的服务类,并重写了OnStartCommand和OnDestroy方法来处理服务的启动和停止。
2.在Android平台项目的AndroidManifest.xml文件中注册该服务:
<application ...>
...
<service android:name=".Services.MyAndroidService" />
</application>
3.在.NET MAUI项目中,创建一个用于启动和停止服务的接口。例如,创建一个名为IServiceController的接口:
public interface IServiceController
{
void StartService();
void StopService();
}
4.在Android平台项目中实现IServiceController接口:
using Android.Content;
using MyApp.Droid.Services;
using MyApp.Services;
[assembly: Xamarin.Forms.Dependency(typeof(ServiceController))]
namespace MyApp.Droid.Services
{
public class ServiceController : IServiceController
{
public void StartService()
{
var intent = new Intent(Android.App.Application.Context, typeof(MyAndroidService));
Android.App.Application.Context.StartService(intent);
}
public void StopService()
{
var intent = new Intent(Android.App.Application.Context, typeof(MyAndroidService));
Android.App.Application.Context.StopService(intent);
}
}
}
在这个实现中,我们使用StartService和StopService方法来启动和停止我们之前创建的MyAndroidService服务。
5.在.NET MAUI项目中,通过依赖服务来调用服务的启动和停止:
using MyApp.Services;
using Xamarin.Forms;
// ...
var serviceController = DependencyService.Get<IServiceController>();
serviceController.StartService(); // 启动服务
// ...
serviceController.StopService(); // 停止服务
在这个例子中,我们通过DependencyService.Get<IServiceController>()获取了IServiceController的实现,并调用了StartService和StopService方法来启动和停止服务。
这是一个简单的例子,演示了如何在.NET MAUI中编写和调用Android服务。你可以根据实际需求在服务中执行更复杂的任务,如后台数据处理、定期任务等。记住在Android平台项目中实现服务类和控制器接口,并在.NET MAUI项目中通过依赖服务来调用它们。
.NET core MAUI调用Android系统服务的例子
下面是一个在 .NET MAUI 中调用 Android 系统服务的示例,我们将调用 Android 的 NotificationManager 来发送通知:
首先,确保在您的 .NET MAUI 项目中引用了 Microsoft.Maui.ApplicationModel 命名空间。
创建一个名为 AndroidNotificationService 的类,用于封装 Android 通知服务的调用:
using Android.App;
using Android.Content;
using Android.OS;
using AndroidX.Core.App;
using Microsoft.Maui.ApplicationModel;
namespace YourNamespace
{
public class AndroidNotificationService
{
private const string ChannelId = "YourChannelId";
private const string ChannelName = "YourChannelName";
private const int NotificationId = 1;
public void ShowNotification(string title, string message)
{
if (Platform.CurrentActivity is Activity activity)
{
NotificationCompat.Builder builder = new NotificationCompat.Builder(activity, ChannelId)
.SetContentTitle(title)
.SetContentText(message)
.SetSmallIcon(Resource.Drawable.notification_icon)
.SetAutoCancel(true);
NotificationManager notificationManager = (NotificationManager)activity.GetSystemService(Context.NotificationService);
if (Build.VERSION.SdkInt >= BuildVersionCodes.O)
{
NotificationChannel channel = new NotificationChannel(ChannelId, ChannelName, NotificationImportance.Default);
notificationManager.CreateNotificationChannel(channel);
}
notificationManager.Notify(NotificationId, builder.Build());
}
}
}
}
在上面的示例中,AndroidNotificationService 类包含一个名为 ShowNotification 的方法,用于创建和发送 Android 通知。
在您的 .NET MAUI 页面或视图模型中,您可以通过创建 AndroidNotificationService 的实例并调用其方法来发送通知:
using Microsoft.Maui.ApplicationModel;
namespace YourNamespace
{
public partial class MainPage : ContentPage
{
public MainPage()
{
InitializeComponent();
}
private void SendNotificationButton_Clicked(object sender, EventArgs e)
{
if (Platform.CurrentActivity is Activity)
{
AndroidNotificationService notificationService = new AndroidNotificationService();
notificationService.ShowNotification("通知标题", "这是一条通知消息");
}
}
}
}
在上面的示例中,当点击名为 SendNotificationButton 的按钮时,会创建一个 AndroidNotificationService 的实例,并调用其 ShowNotification 方法来发送通知。
请注意以下几点:
在调用 Android 系统服务之前,需要检查 Platform.CurrentActivity 是否为 Activity 类型,以确保代码在 Android 平台上运行。
示例中使用了 AndroidX.Core.App 命名空间中的 NotificationCompat 类来创建通知,以确保与不同版本的 Android 兼容。
在 Android 8.0(API 级别 26)及更高版本中,需要先创建通知渠道,然后才能发送通知。示例中的代码已经处理了这种情况。
以上是一个在 .NET MAUI 中调用 Android 系统服务(通知服务)的示例。您可以根据需要调用其他 Android 系统服务,并将它们封装在类
MAUI学习篇
XAML写法
<Label Text="Hello, XAML!"
VerticalOptions="Center"
FontAttributes="Bold"
FontSize="18"
TextColor="Aqua" />
但是,有一种在 XAML 中设置属性的另一种方法:
XAML
<Label Text="Hello, XAML!"
VerticalOptions="Center"
FontAttributes="Bold"
FontSize="18">
<Label.TextColor>
Aqua
</Label.TextColor>
</Label>
平台差异定义
<ContentPage xmlns="http://schemas.microsoft.com/dotnet/2021/maui"
xmlns:x="http://schemas.microsoft.com/winfx/2009/xaml"
x:Class="...">
<ContentPage.Padding>
<OnPlatform x:TypeArguments="Thickness" Default="20">
<On Platform="iOS" Value="0,20,0,0" />
<On Platform="Android" Value="10,20,20,10" />
</OnPlatform>
</ContentPage.Padding>
...
</ContentPage>
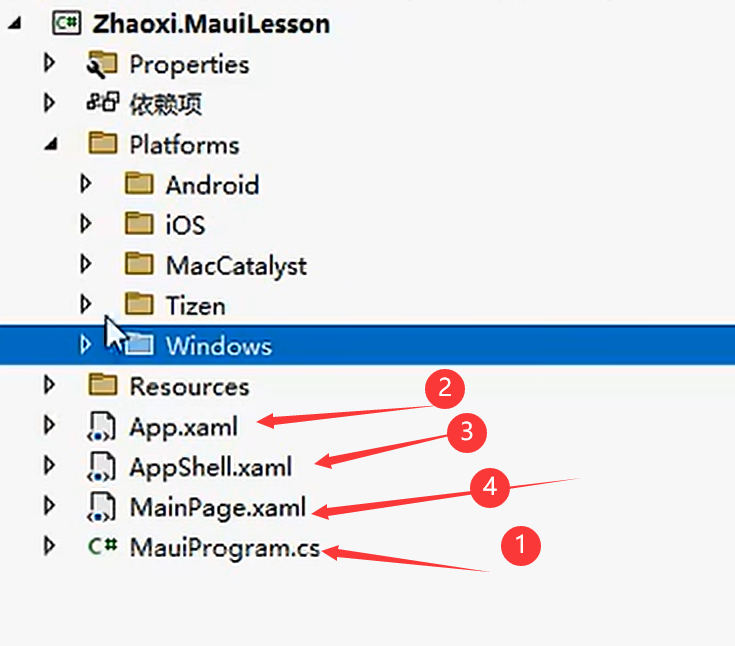
程序执行过程,通过Platforms下各平台口入函数调用MauiProgram.cs从MauiProgram.CreateMauiApp(),源码:protected override MauiApp CreateMauiApp() => MauiProgram.CreateMauiApp();
该函数创建App
public static MauiApp CreateMauiApp()
{
var builder = MauiApp.CreateBuilder();
builder
.UseMauiApp<App>()
.ConfigureFonts(fonts =>
{
fonts.AddFont("OpenSans-Regular.ttf", "OpenSansRegular");
fonts.AddFont("OpenSans-Semibold.ttf", "OpenSansSemibold");
}).ConfigureLifecycleEvents(events =>
{
...
}
}
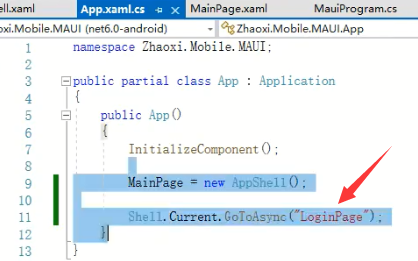
在App购置里生成主页
public App()
{
InitializeComponent();
MainPage = new AppShell();
}
AppShell 主页窗口
AppShell的xaml: 里面可以注册所有的页面路由
<?xml version="1.0" encoding="UTF-8" ?>
<Shell
x:Class="MauiApp1.AppShell"
xmlns="http://schemas.microsoft.com/dotnet/2021/maui"
xmlns:x="http://schemas.microsoft.com/winfx/2009/xaml"
xmlns:local="clr-namespace:MauiApp1"<!--定义了一个命名空间-->
Shell.FlyoutBehavior="Disabled"><!布局-->
<ShellContent
Title="中文" <!--标题-->
ContentTemplate="{DataTemplate local:MainPage}" <!--数据模版嵌入命名空间里的内容页MainPage-->
Route="MainPage" /> <!--路由名称-->
</Shell>
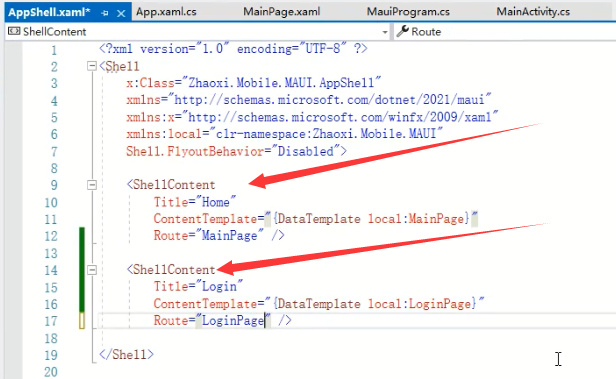
注册多个路由
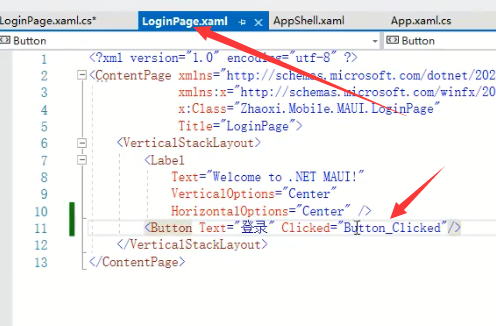
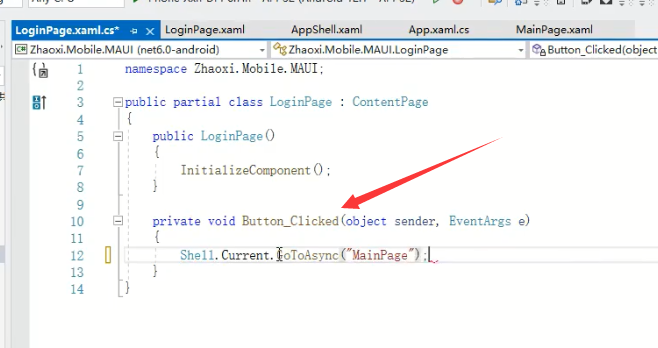
MainPage的xaml源码:
?xml version="1.0" encoding="utf-8" ?>
<ContentPage xmlns="http://schemas.microsoft.com/dotnet/2021/maui"
xmlns:x="http://schemas.microsoft.com/winfx/2009/xaml"
x:Class="MauiApp1.MainPage" Loaded="ContentPage_Loaded">
<ScrollView>
<VerticalStackLayout
Spacing="25"
Padding="30,0"
VerticalOptions="Center">
<Image
Source="dotnet_bot.png"
SemanticProperties.Description="Cute dot net bot waving hi to you!"
HeightRequest="200"
HorizontalOptions="Center" />
<Label
Text="Hello, World!"
SemanticProperties.HeadingLevel="Level1"
FontSize="32"
HorizontalOptions="Center" />
<Label
Text="Welcome to .NET Multi-platform App UI"
SemanticProperties.HeadingLevel="Level2"
SemanticProperties.Description="Welcome to dot net Multi platform App U I"
FontSize="18"
HorizontalOptions="Center" />
<Button
x:Name="CounterBtn" <!--按钮变量名-->
Text="Click me"
SemanticProperties.Hint="Counts the number of times you click"
Clicked="OnCounterClicked" <!--执行点击函数-->
HorizontalOptions="Center" />
</VerticalStackLayout>
</ScrollView>
</ContentPage>
MainPage的cs源码:
public partial class MainPage : ContentPage
{
int count = 0;
public MainPage()
{
InitializeComponent();
}
private void OnCounterClicked(object sender, EventArgs e)
{
count++;
if (count == 1)
CounterBtn.Text = $"Clicked {count} time";
else
CounterBtn.Text = $"Clicked {count} times";
SemanticScreenReader.Announce(CounterBtn.Text);
}
private void ContentPage_Loaded(object sender, EventArgs e)
{
#if WINDOWS
var winuiWindow = Window.Handler?.PlatformView as Microsoft.UI.Xaml.Window;
MauiWinUIWindow maui = winuiWindow as MauiWinUIWindow;
winuiWindow.ExtendsContentIntoTitleBar = false;
if (winuiWindow is null)
return;
var wndId = Microsoft.UI.Win32Interop.GetWindowIdFromWindow(maui.WindowHandle);
Microsoft.UI.Windowing.AppWindow appWindow = Microsoft.UI.Windowing.AppWindow.GetFromWindowId(wndId);
//var appWindow = maui.GetAppWindow();
if (appWindow is null)
return;
var customOverlappedPresenter = Microsoft.UI.Windowing.OverlappedPresenter.CreateForContextMenu();
appWindow.SetPresenter(customOverlappedPresenter);
#endif
}
}
右键->查看标记->返回到xaml的前端文件
右键->查看代码->返回到xaml的后台代码
xaml中的xmlns相当于C#中引入命名空间using ...
xmlns应该是xml namespace的缩写
xmlns:x="http://schemas.microsoft.com/winfx/2009/xaml" //x标记的命名空间
xmlns:local="clr-namespace:MauiApp1" //做一个local的命名空间
x:Class="MauiApp1.App"> //x命名空间下的Class空间
xmlns:controls="clr-namespace:MyCompany.Controls;assembly=MyCompany.Controls">
有了命名空间就可以免去写前缀
如:
xmlns="http://schemas.microsoft.com/dotnet/2021/maui"
<ScrollView>
...
</ScrollView>
如写成
xmlns:yy="http://schemas.microsoft.com/dotnet/2021/maui"
那么标签将写成
<yy:ScrollView>
...
</yy:ScrollView>
使用 XAML 标记扩展
除了本文中讨论的标记扩展外,.NET MAUI 中还包含以下标记扩展,并在其他文章中进行了讨论:
AppThemeBinding - 根据当前系统主题指定要使用的资源。 有关详细信息,请参阅 AppThemeBinding 标记扩展。
Binding - 在两个 对象的属性之间建立链接。 有关详细信息,请参阅 数据绑定。
DynamicResource - 响应资源字典中对象中的更改。 有关详细信息,请参阅 动态样式。
FontImage - 在可以显示 的任何视图中显示 ImageSource字体图标。 有关详细信息,请参阅 加载字体图标。
OnIdiom - 根据运行应用程序的设备的成语自定义 UI 外观。 有关详细信息,请参阅 基于设备成语自定义 UI 外观。
OnPlatform - 基于每个平台自定义 UI 外观。 有关详细信息,请参阅 基于平台自定义 UI 外观。
RelativeSource - 设置绑定源相对于绑定目标的位置。 有关详细信息,请参阅 相对绑定。
StaticResource - 引用资源字典中的对象。 有关详细信息,请参阅 资源字典。
TemplateBinding - 从控件模板执行数据绑定。 有关详细信息,请参阅 控件模板。
<StackLayout>
<Label Text="This text is green in light mode, and red in dark mode."
TextColor="{AppThemeBinding Light=Green, Dark=Red}" />
<Image Source="{AppThemeBinding Light=lightlogo.png, Dark=darklogo.png}" />
</StackLayout>
<ContentPage ...>
<ContentPage.Resources>
<Style x:Key="baseStyle"
TargetType="View">
<Setter Property="VerticalOptions" Value="Center" />
</Style>
<Style x:Key="blueSearchBarStyle"
TargetType="SearchBar"
BasedOn="{StaticResource baseStyle}">
<Setter Property="FontAttributes" Value="Italic" />
<Setter Property="PlaceholderColor" Value="Blue" />
</Style>
<Style x:Key="greenSearchBarStyle"
TargetType="SearchBar">
<Setter Property="FontAttributes" Value="None" />
<Setter Property="PlaceholderColor" Value="Green" />
</Style>
</ContentPage.Resources>
<StackLayout>
<SearchBar Placeholder="SearchBar demonstrating dynamic styles"
Style="{DynamicResource blueSearchBarStyle}" />
</StackLayout>
</ContentPage>
<Image BackgroundColor="#D1D1D1"
Source="{FontImage , FontFamily=Ionicons, Size=44}" />
<BoxView Color="{OnIdiom Yellow, Phone=Red, Tablet=Green, Desktop=Blue}"
WidthRequest="{OnIdiom 100, Phone=200, Tablet=300, Desktop=400}"
HeightRequest="{OnIdiom 100, Phone=200, Tablet=300, Desktop=400}"
HorizontalOptions="Center" />
<BoxView Color="{OnPlatform Yellow, iOS=Red, Android=Green}"
WidthRequest="{OnPlatform 250, iOS=200, Android=300}"
HeightRequest="{OnPlatform 250, iOS=200, Android=300}"
HorizontalOptions="Center" />
以下 XAML 显示在 App.xaml 文件中的应用程序级别ResourceDictionary中定义的资源:
<Application xmlns="http://schemas.microsoft.com/dotnet/2021/maui"
xmlns:x="http://schemas.microsoft.com/winfx/2009/xaml"
x:Class="ResourceDictionaryDemo.App">
<Application.Resources>
<Thickness x:Key="PageMargin">20</Thickness>
<!-- Colors -->
<Color x:Key="AppBackgroundColor">AliceBlue</Color>
<Color x:Key="NavigationBarColor">#1976D2</Color>
<Color x:Key="NavigationBarTextColor">White</Color>
<Color x:Key="NormalTextColor">Black</Color>
<!-- Images -->
<x:String x:Key="BackgroundImage">background</x:String>
<x:String x:Key="MenuIcon">menu.png</x:String>
<x:String x:Key="SearchIcon">search.png</x:String>
<!-- Implicit styles -->
<Style TargetType="NavigationPage">
<Setter Property="BarBackgroundColor"
Value="{StaticResource NavigationBarColor}" />
<Setter Property="BarTextColor"
Value="{StaticResource NavigationBarTextColor}" />
</Style>
<Style TargetType="ContentPage"
ApplyToDerivedTypes="True">
<Setter Property="BackgroundColor"
Value="{StaticResource AppBackgroundColor}" />
</Style>
</Application.Resources>
</Application>
使用资源
<ContentPage xmlns="http://schemas.microsoft.com/dotnet/2021/maui"
xmlns:x="http://schemas.microsoft.com/winfx/2009/xaml"
x:Class="ResourceDictionaryDemo.MainPage"
Title="Main page">
<StackLayout Margin="{StaticResource PageMargin}"
Spacing="6">
<StackLayout.Resources>
<!-- Implicit style -->
<Style TargetType="Button">
<Setter Property="FontSize" Value="14" />
<Setter Property="BackgroundColor" Value="#1976D2" />
<Setter Property="TextColor" Value="White" />
<Setter Property="CornerRadius" Value="5" />
</Style>
</StackLayout.Resources>
<Label Text="This app demonstrates consuming resources that have been defined in resource dictionaries." />
<Button Text="Navigate"
Clicked="OnNavigateButtonClicked" />
</StackLayout>
</ContentPage>
传递参数
可以使用以下 .NET MAUI XAML 语言基元将参数传递给构造函数和工厂方法:
x:Array,对应于 Array。
x:Boolean,对应于 Boolean。
x:Byte,对应于 Byte。
x:Char,对应于 Char。
x:DateTime,对应于 DateTime。
x:Decimal,对应于 Decimal。
x:Double,对应于 Double。
x:Int16,对应于 Int16。
x:Int32,对应于 Int32。
x:Int64,对应于 Int64。
x:Object,对应于 Object。
x:Single,对应于 Single。
x:String,对应于 String。
x:TimeSpan,对应于 TimeSpan。
传递构造函数参数
可以使用 特性将参数传递给非默认构造函数 x:Arguments 。 每个构造函数参数必须在表示参数类型的 XML 元素中分隔。
以下示例演示如何将 x:Arguments 特性与三个不同的 Color 构造函数结合使用:
XAML
复制
<BoxView HeightRequest="150"
WidthRequest="150"
HorizontalOptions="Center">
<BoxView.Color>
<Color>
<x:Arguments>
<x:Single>0.9</x:Single>
</x:Arguments>
</Color>
</BoxView.Color>
</BoxView>
<BoxView HeightRequest="150"
WidthRequest="150"
HorizontalOptions="Center">
<BoxView.Color>
<Color>
<x:Arguments>
<x:Single>0.25</x:Single>
<x:Single>0.5</x:Single>
<x:Single>0.75</x:Single>
</x:Arguments>
</Color>
</BoxView.Color>
</BoxView>
<BoxView HeightRequest="150"
WidthRequest="150"
HorizontalOptions="Center">
<BoxView.Color>
<Color>
<x:Arguments>
<x:Single>0.8</x:Single>
<x:Single>0.5</x:Single>
<x:Single>0.2</x:Single>
<x:Single>0.5</x:Single>
</x:Arguments>
</Color>
</BoxView.Color>
</BoxView>
标记中的 x:Arguments 元素数以及这些元素的类型必须与其中一个 Color 构造函数匹配。 具有单个参数的 Color 构造函数需要从 0 (黑色) 到 1 (白色) 的灰度 float 值。 具有三个参数的 Color 构造函数需要 float 0 到 1 的红色、绿色和蓝色值。 具有四个参数的 Color 构造函数将 alpha 通道添加为第四个 float 参数。
调用工厂方法
可以在 .NET MAUI XAML 中调用工厂方法,方法是使用 x:FactoryMethod 特性指定方法的名称,并使用 x:Arguments 特性指定其参数。 工厂方法是返回 public static 与定义方法的类或结构类型相同的对象或值的方法。
类 Color 定义了许多工厂方法,以下示例演示了调用其中三个方法:
XAML
复制
<BoxView HeightRequest="150"
WidthRequest="150"
HorizontalOptions="Center">
<BoxView.Color>
<Color x:FactoryMethod="FromRgba">
<x:Arguments>
<x:Byte>192</x:Byte>
<x:Byte>75</x:Byte>
<x:Byte>150</x:Byte>
<x:Byte>128</x:Byte>
</x:Arguments>
</Color>
</BoxView.Color>
</BoxView>
<BoxView HeightRequest="150"
WidthRequest="150"
HorizontalOptions="Center">
<BoxView.Color>
<Color x:FactoryMethod="FromHsla">
<x:Arguments>
<x:Double>0.23</x:Double>
<x:Double>0.42</x:Double>
<x:Double>0.69</x:Double>
<x:Double>0.7</x:Double>
</x:Arguments>
</Color>
</BoxView.Color>
</BoxView>
<BoxView HeightRequest="150"
WidthRequest="150"
HorizontalOptions="Center">
<BoxView.Color>
<Color x:FactoryMethod="FromHex">
<x:Arguments>
<x:String>#FF048B9A</x:String>
</x:Arguments>
</Color>
</BoxView.Color>
</BoxView>
标记中的 x:Arguments 元素数以及这些元素的类型必须与所调用的工厂方法的参数匹配。 工厂 FromRgba 方法需要四 byte 个参数,分别代表 0 到 255 的红色、绿色、蓝色和 alpha 值。 工厂 FromHsla 方法需要四 float 个参数,分别表示色调、饱和度、亮度和 alpha 值,范围分别为 0 到 1。 工厂 FromHex 方法需要一个 string 参数,该参数表示十六进制 (A) RGB 颜色。
指定泛型类型参数
可以使用 特性指定 x:TypeArguments 泛型类型的构造函数的泛型类型参数,如以下示例所示:
XAML
复制
<StackLayout>
<StackLayout.Margin>
<OnPlatform x:TypeArguments="Thickness">
<On Platform="iOS" Value="0,20,0,0" />
<On Platform="Android" Value="5, 10" />
</OnPlatform>
</StackLayout.Margin>
</StackLayout>
类 OnPlatform 是泛型类,必须使用与目标类型匹配的属性进行实例化 x:TypeArguments 。 On在 类中Platform, 特性可以接受单个string值或多个逗号分隔string值。 在此示例中, StackLayout.Margin 属性设置为特定于 Thickness平台的
在运行时加载 XAML
string navigationButtonXAML = "<Button Text=\"Navigate\" />";
Button navigationButton = new Button().LoadFromXaml(navigationButtonXAML);
...
stackLayout.Add(navigationButton);
string pageXAML = "<?xml version=\"1.0\" encoding=\"utf-8\"?>\r\n<ContentPage xmlns=\"http://schemas.microsoft.com/dotnet/2021/maui\"\nxmlns:x=\"http://schemas.microsoft.com/winfx/2009/xaml\"\nx:Class=\"LoadRuntimeXAML.CatalogItemsPage\"\nTitle=\"Catalog Items\">\n</ContentPage>";
ContentPage page = new ContentPage().LoadFromXaml(pageXAML);
await Navigation.PushAsync(page);
访问元素
string pageXAML = "<?xml version=\"1.0\" encoding=\"utf-8\"?>\r\n<ContentPage xmlns=\"http://schemas.microsoft.com/dotnet/2021/maui\"\nxmlns:x=\"http://schemas.microsoft.com/winfx/2009/xaml\"\nx:Class=\"LoadRuntimeXAML.CatalogItemsPage\"\nTitle=\"Catalog Items\">\n<StackLayout>\n<Label x:Name=\"monkeyName\"\n />\n</StackLayout>\n</ContentPage>";
ContentPage page = new ContentPage().LoadFromXaml(pageXAML);
Label monkeyLabel = page.FindByName<Label>("monkeyName");
monkeyLabel.Text = "Seated Monkey";
属性的可访问应用
<Image Source="dotnet_bot.png"
SemanticProperties.Description="Cute dot net bot waving hi to you!" />
可以在 C# 中设置它:
Image image = new Image { Source = "dotnet_bot.png" };
SemanticProperties.SetDescription(image, "Cute dot net bot waving hi to you!");
此外, SetValue 方法还可用于设置 Description 附加属性:
image.SetValue(SemanticProperties.DescriptionProperty, "Cute dot net bot waving hi to you!");
可以在另一个元素上定义元素的辅助功能信息。 例如,Switch 旁的 Label 可用于描述 Switch 所表示的内容。 这可以通过以下操作在 XAML 中实现:
<Label x:Name="label"
Text="Enable dark mode: " />
<Switch SemanticProperties.Description="{Binding Source={x:Reference label} Path=Text}" />
可在 C# 中设置如下
Label label = new Label
{
Text = "Enable dark mode: "
};
Switch mySwitch = new Switch();
SemanticProperties.SetDescription(mySwitch, label.Text);
跨平台生命周期事件
类 Window 定义以下跨平台生命周期事件:
事件 说明 采取的操作
Created 创建本机窗口后会引发此事件。 此时,跨平台窗口将具有本机窗口处理程序,但该窗口可能尚不可见。
Activated 当窗口已激活并且是或将成为焦点窗口时,将引发此事件。
Deactivated 当窗口不再是焦点窗口时,将引发此事件。 但是,该窗口可能仍可见。
Stopped 当窗口不再可见时,将引发此事件。 无法保证应用会从此状态恢复,因为它可能被操作系统终止。 断开与任何长时间运行的进程的连接,或取消可能消耗设备资源的任何挂起请求。
Resumed 当应用在停止后恢复时,将引发此事件。 此事件不会在首次启动应用时引发,并且仅当之前已引发该 Stopped 事件时才能引发。 订阅任何必需的事件,并刷新可见页面上的任何内容。
Destroying 当本机窗口被销毁和解除分配时,将引发此事件。 重新打开应用时,可以针对新的本机窗口使用相同的跨平台窗口。 删除已附加到本机窗口的任何事件订阅。
这些跨平台事件映射到不同的平台事件,下表显示了此映射:
事件 Android iOS Windows
Created OnPostCreate FinishedLaunching Created
Activated OnResume OnActivated Activated(CodeActivated 和 PointerActivated)
Deactivated OnPause OnResignActivation Activated (Deactivated)
Stopped OnStop DidEnterBackground VisibilityChanged
Resumed OnRestart WillEnterForeground Resumed
Destroying OnDestroy WillTerminate Closed
此外, Window 类还定义了在 Backgrounding 窗口关闭或进入后台状态时在 iOS 和 Mac Catalyst 上引发的事件。 此事件附带一个 BackgroundingEventArgs 对象,任何 string 状态都应保存到 State 对象的 属性,OS 将保留该属性 BackgroundingEventArgs ,直到恢复窗口为止。 当窗口恢复时,状态由 IActivationState 参数提供给 CreateWindow 替代。
除了这些事件, Window 类还具有以下可重写的生命周期方法:
OnCreated,在引发事件时调用 。Created
OnActivated,在引发事件时调用 。Activated
OnDeactivated,在引发事件时调用 。Deactivated
OnStopped,在引发事件时调用 。Stopped
OnResumed,在引发事件时调用 。Resumed
OnDestroying,在引发事件时调用 。Destroying
OnBackgrounding,在引发事件时调用 。Backgrounding
若要订阅Window生命周期事件,请App重写 CreateWindow 类中的 方法,以创建Window可以订阅事件的实例:
namespace MyMauiApp
{
public partial class App : Application
{
public App()
{
InitializeComponent();
MainPage = new MainPage();
}
protected override Window CreateWindow(IActivationState activationState)
{
Window window = base.CreateWindow(activationState);
window.Created += (s, e) =>
{
// Custom logic
};
return window;
}
}
}
或者,若要使用生命周期替代,请创建派生自 类的 Window 类
namespace MyMauiApp
{
public class MyWindow : Window
{
public MyWindow() : base()
{
}
public MyWindow(Page page) : base(page)
{
}
protected override void OnCreated()
{
// Register services
}
}
}
Window然后,可以通过重写CreateWindow类中的 App 方法来使用 派生类以返回MyWindow实例。
平台生命周期事件
.NET MAUI 定义为响应引发的平台生命周期事件而调用的委托。 可以使用命名方法或匿名函数为这些委托指定处理程序,这些函数在调用委托时执行。 此机制使应用能够在引发常见平台生命周期事件时收到通知
Android
下表列出了为响应引发的 Android 生命周期事件而调用的 .NET MAUI 委托:
委托 参数 说明 注释
OnActivityResult Android.App.Activity, int, Android.App.Result, Android.Content.Intent? 在启动的活动退出时调用。
OnApplicationConfigurationChanged Android.App.Application, Android.Content.Res.Configuration 在组件运行时设备配置更改时调用。
OnApplicationCreate Android.App.Application 在创建活动、服务或接收方对象(不包括内容提供程序 () )之前启动应用时调用。
OnApplicationCreating Android.App.Application 在应用启动时、活动、服务或接收器对象 (创建) 的内容提供程序之前调用。
OnApplicationLowMemory Android.App.Application 当系统内存不足且主动运行的进程应削减其内存使用率时调用。
OnApplicationTrimMemory Android.App.Application, Android.Content.TrimMemory 当操作系统确定现在是进程从进程中剪裁不需要的内存的好时机时调用。
OnBackPressed Android.App.Activity 在活动检测到按下后退键时调用。
OnConfigurationChanged Android.App.Activity, Android.Content.Res.Configuration 在活动运行时设备配置更改时调用。
OnCreate Android.App.Activity, Android.OS.Bundle? 创建活动时引发。
OnDestroy Android.App.Activity 在活动完成时调用,或因为系统正在临时销毁活动实例以节省空间。 始终调用超级类的实现。
OnNewIntent Android.App.Activity, Android.Content.Intent? 在活动堆栈顶部重新启动活动时(而不是正在启动的活动的新实例)时调用。
OnPause Android.App.Activity 在活动进入后台但尚未终止时调用。 始终调用超级类的实现。
OnPostCreate Android.App.Activity, Android.OS.Bundle? 在活动启动完成、调用 和 OnRestoreInstanceState 之后OnStart调用时调用。 始终调用超级类的实现。 这是一个仅限系统的事件,通常不应由应用使用。
OnPostResume Android.App.Activity 在活动恢复完成时调用,在调用后 OnResume 调用。 始终调用超级类的实现。 这是一个仅限系统的事件,通常不应由应用使用。
OnRequestPermissionsResult Android.App.Activity, int, string[], Android.Content.PM.Permission[] 作为请求权限的结果的回调调用。
OnRestart Android.App.Activity 在将当前活动重新显示给用户后 OnStop 调用, (用户已导航回该活动) 。 始终调用超级类的实现。
OnRestoreInstanceState Android.App.Activity, Android.OS.Bundle 从先前保存的状态重新初始化活动后 OnStart 调用。
OnResume Android.App.Activity 在 、 OnRestart或 OnPause之后OnRestoreInstanceState调用,以指示活动处于活动状态并已准备好接收输入。
OnSaveInstanceState Android.App.Activity, Android.OS.Bundle 调用 以从正在终止的活动中检索每个实例的状态,以便可以在 或 OnRestoreInstanceState中OnCreate还原状态。
OnStart Android.App.Activity 在活动停止后 OnCreate 或 OnRestart 之后调用,但现在正在向用户显示。 始终调用超级类的 实现。
OnStop Android.App.Activity 当活动对用户不再可见时调用。 始终调用超级类的 实现。
若要响应正在调用的 Android 生命周期委托,请MauiProgram对 MauiAppBuilder 类的 方法中的 CreateMauiapp 对象调用 ConfigureLifecycleEvents 方法。 然后,在 ILifecycleBuilder 对象上调用 AddAndroid 方法,并指定 Action 为所需委托注册处理程序的 :
using Microsoft.Maui.LifecycleEvents;
namespace PlatformLifecycleDemo
{
public static class MauiProgram
{
public static MauiApp CreateMauiApp()
{
var builder = MauiApp.CreateBuilder();
builder
.UseMauiApp<App>()
.ConfigureLifecycleEvents(events =>
{
#if ANDROID
events.AddAndroid(android => android
.OnActivityResult((activity, requestCode, resultCode, data) => LogEvent(nameof(AndroidLifecycle.OnActivityResult), requestCode.ToString()))
.OnStart((activity) => LogEvent(nameof(AndroidLifecycle.OnStart)))
.OnCreate((activity, bundle) => LogEvent(nameof(AndroidLifecycle.OnCreate)))
.OnBackPressed((activity) => LogEvent(nameof(AndroidLifecycle.OnBackPressed)) && false)
.OnStop((activity) => LogEvent(nameof(AndroidLifecycle.OnStop))));
#endif
static bool LogEvent(string eventName, string type = null)
{
System.Diagnostics.Debug.WriteLine($"Lifecycle event: {eventName}{(type == null ? string.Empty : $" ({type})")}");
return true;
}
});
return builder.Build();
}
}
}
iOS
下表列出了为响应引发的 iOS 生命周期事件而调用的 .NET MAUI 委托:
委托 参数 说明
ApplicationSignificantTimeChange UIKit.UIApplication 在发生重大时间更改(例如午夜、运营商更改时间或夏令时开始或停止)时调用。
ContinueUserActivity UIKit.UIApplication, Foundation.NSUserActivity, UIKit.UIApplicationRestorationHandler 当应用收到与用户活动关联的数据时调用,例如使用 Handoff 从其他设备传输活动。
DidEnterBackground UIKit.UIApplication 当应用进入后台时调用。
FinishedLaunching UIKit.UIApplication, Foundation.NSDictionary 在应用启动时调用。
OnActivated UIKit.UIApplication 在应用启动时和每次应用返回前台时调用。
OnResignActivation UIKit.UIApplication 在应用即将进入后台、暂停或用户收到电话呼叫或短信等中断时调用。
OpenUrl UIKit.UIApplication, Foundation.NSDictionary 当应用应打开指定的 URL 时调用。
PerformActionForShortcutItem UIKit.UIApplication, UIKit.UIApplicationShortcutItem, UIKit.UIOperationHandler 在启动主屏幕快速操作时调用。
SceneContinueUserActivity UIKit.UIScene, Foundation.NSUserActivity 调用以处理指定的 Handoff 相关活动。
SceneDidDisconnect UIKit.UIScene 从应用中删除场景时调用。
SceneDidEnterBackground UIKit.UIScene 当场景在后台运行且不在屏幕上时调用。
SceneDidFailToContinueUserActivity UIKit.UIScene, string, Foundation.NSError 调用以通知用户无法完成活动。
SceneDidUpdateUserActivity UIKit.UIScene, Foundation.NSUserActivity 在更新指定的活动时调用。
SceneOnActivated UIKit.UIScene 当场景处于活动状态并能够响应用户事件时调用。
SceneOnResignActivation UIKit.UIScene 当场景即将停用活动状态并停止响应用户事件时调用。
SceneOpenUrl UIKit.UIScene, Foundation.NSSet<UIKit.UIOpenUrlContext> 当场景要求打开一个或多个 URL 时调用。
SceneRestoreInteractionState UIKit.UIScene, Foundation.NSUserActivity 调用以还原活动状态。
SceneWillConnect UIKit.UIScene, UIKit.UISceneSession, UIKit.UISceneConnectionOptions 在将场景添加到应用时调用。
SceneWillContinueUserActivity UIKit.UIScene, string 调用以准备接收与移交相关的数据。
SceneWillEnterForeground UIKit.UIScene 当场景即将在前台运行并且对用户可见时调用。
WillEnterForeground UIKit.UIApplication 如果应用将从后台状态返回,则调用 。
WillFinishLaunching UIKit.UIApplication, Foundation.NSDictionary 在应用启动开始时调用,但尚未进行状态还原。
WillTerminate UIKit.UIApplication 如果应用因内存限制而终止,或由用户直接终止,则调用。
WindowSceneDidUpdateCoordinateSpace UIKit.UIWindowScene, UIKit.IUICoordinateSpace, UIKit.UIInterfaceOrientation, UIKit.UITraitCollection 当场景的大小、方向或特征更改时调用。
若要响应正在调用的 iOS 生命周期委托,请MauiProgram对 MauiAppBuilder 类的 ConfigureLifecycleEvents 方法中的 CreateMauiapp 对象调用 方法。 然后,在 ILifecycleBuilder 对象上调用 AddiOS 方法,并指定 Action 为所需委托注册处理程序的 :
using Microsoft.Maui.LifecycleEvents;
namespace PlatformLifecycleDemo
{
public static class MauiProgram
{
public static MauiApp CreateMauiApp()
{
var builder = MauiApp.CreateBuilder();
builder
.UseMauiApp<App>()
.ConfigureLifecycleEvents(events =>
{
#if IOS
events.AddiOS(ios => ios
.OnActivated((app) => LogEvent(nameof(iOSLifecycle.OnActivated)))
.OnResignActivation((app) => LogEvent(nameof(iOSLifecycle.OnResignActivation)))
.DidEnterBackground((app) => LogEvent(nameof(iOSLifecycle.DidEnterBackground)))
.WillTerminate((app) => LogEvent(nameof(iOSLifecycle.WillTerminate))));
#endif
static bool LogEvent(string eventName, string type = null)
{
System.Diagnostics.Debug.WriteLine($"Lifecycle event: {eventName}{(type == null ? string.Empty : $" ({type})")}");
return true;
}
});
return builder.Build();
}
}
}
Windows
下表列出了为响应引发的 Windows 生命周期事件而调用的 .NET MAUI 委托:
委托 参数 说明
OnActivated Microsoft.UI.Xaml.Window, Microsoft.UI.Xaml.WindowActivatedEventArgs 如果应用未恢复,则当引发平台 Activated 事件时调用。
OnClosed Microsoft.UI.Xaml.Window, Microsoft.UI.Xaml.WindowEventArgs 在引发平台 Closed 事件时调用。
OnLaunched Microsoft.UI.Xaml.Window, Microsoft.UI.Xaml.LaunchActivatedEventArgs 创建并激活本机窗口后,由 .NET MAUI 的 Application.OnLaunched 替代调用。
OnLaunching Microsoft.UI.Xaml.Window, Microsoft.UI.Xaml.LaunchActivatedEventArgs 在创建和激活本机窗口之前由 .NET MAUI 的 Application.OnLaunched 重写调用。
OnPlatformMessage Microsoft.UI.Xaml.Window, WindowsPlatformMessageEventArgs 在 .NET MAUI 接收特定的本机 Windows 消息时调用。
OnPlatformWindowSubclassed Microsoft.UI.Xaml.Window, WindowsPlatformWindowSubclassedEventArgs 在对 Win32 窗口进行子类化时由 .NET MAUI 调用。
OnResumed Microsoft.UI.Xaml.Window 在应用恢复时引发平台 Activated 事件时调用。
OnVisibilityChanged Microsoft.UI.Xaml.Window, Microsoft.UI.Xaml.WindowVisibilityChangedEventArgs 在引发平台 VisibilityChanged 事件时调用。
OnWindowCreated Microsoft.UI.Xaml.Window 为跨平台 Window创建本机窗口时调用。
.NET MAUI 使用 OnPlatformMessage 委托将特定的本机 Windows 消息公开为生命周期事件。 WindowsPlatformMessageEventArgs此委托附带的 对象包括 类型MessageIduint的属性。 可以检查此属性的值,以确定哪个消息已传递到应用窗口。 有关 Windows 消息的详细信息,请参阅 Windows 消息 (Win32 和 C++) 入门 。 有关窗口消息常量的列表,请参阅 窗口通知。
若要响应正在调用的 Windows 生命周期委托,请MauiProgram对 MauiAppBuilder 类的 方法中的 CreateMauiApp 对象调用 ConfigureLifecycleEvents 方法。 然后,在 ILifecycleBuilder 对象上调用 AddWindows 方法,并指定 Action 为所需委托注册处理程序的 :
C#
复制
using Microsoft.Maui.LifecycleEvents;
namespace PlatformLifecycleDemo
{
public static class MauiProgram
{
public static MauiApp CreateMauiApp()
{
var builder = MauiApp.CreateBuilder();
builder
.UseMauiApp<App>()
.ConfigureLifecycleEvents(events =>
{
#if WINDOWS
events.AddWindows(windows => windows
.OnActivated((window, args) => LogEvent(nameof(WindowsLifecycle.OnActivated)))
.OnClosed((window, args) => LogEvent(nameof(WindowsLifecycle.OnClosed)))
.OnLaunched((window, args) => LogEvent(nameof(WindowsLifecycle.OnLaunched)))
.OnLaunching((window, args) => LogEvent(nameof(WindowsLifecycle.OnLaunching)))
.OnVisibilityChanged((window, args) => LogEvent(nameof(WindowsLifecycle.OnVisibilityChanged)))
.OnPlatformMessage((window, args) =>
{
if (args.MessageId == Convert.ToUInt32("031A", 16))
{
// System theme has changed
}
}));
#endif
static bool LogEvent(string eventName, string type = null)
{
System.Diagnostics.Debug.WriteLine($"Lifecycle event: {eventName}{(type == null ? string.Empty : $" ({type})")}");
return true;
}
});
return builder.Build();
}
}
}
检索 Window 对象
平台代码可以使用 扩展方法从平台生命周期事件GetWindow中检索应用Window的对象
using Microsoft.Maui.LifecycleEvents;
namespace PlatformLifecycleDemo
{
public static class MauiProgram
{
public static MauiApp CreateMauiApp()
{
var builder = MauiApp.CreateBuilder();
builder
.UseMauiApp<App>()
.ConfigureLifecycleEvents(events =>
{
#if WINDOWS
events.AddWindows(windows => windows
.OnClosed((window, args) =>
{
IWindow appWindow = window.GetWindow();
}));
#endif
});
return builder.Build();
}
}
}
自定义生命周期事件
示例
当本机应用窗口首次呈现或更改其呈现大小时,将发生 WinUI 3 Window.SizeChanged 事件。 .NET MAUI 不会将此平台事件公开为生命周期事件。 但是,当使用以下方法引发此平台事件时,应用可以接收通知:
为 Window.SizeChanged 平台生命周期事件注册事件处理程序:
C#
复制
using Microsoft.Maui.LifecycleEvents;
...
public static MauiApp CreateMauiApp()
{
var builder = MauiApp.CreateBuilder();
builder
.UseMauiApp<App>()
.ConfigureLifecycleEvents(events =>
{
#if WINDOWS
events.AddWindows(windows => windows
.OnWindowCreated(window =>
{
window.SizeChanged += OnSizeChanged;
}));
#endif
});
return builder.Build();
}
using Microsoft.Maui.LifecycleEvents;
...
#if WINDOWS
static void OnSizeChanged(object sender, Microsoft.UI.Xaml.WindowSizeChangedEventArgs args)
{
ILifecycleEventService service = MauiWinUIApplication.Current.Services.GetRequiredService<ILifecycleEventService>();
service.InvokeEvents(nameof(Microsoft.UI.Xaml.Window.SizeChanged));
}
#endif
或
using Microsoft.Maui.LifecycleEvents;
namespace PlatformLifecycleDemo
{
public static class MauiProgram
{
public static MauiApp CreateMauiApp()
{
var builder = MauiApp.CreateBuilder();
builder
.UseMauiApp<App>()
.ConfigureLifecycleEvents(events =>
{
#if WINDOWS
events.AddWindows(windows => windows
.OnWindowCreated(window =>
{
window.SizeChanged += OnSizeChanged;
}));
events.AddEvent(nameof(Microsoft.UI.Xaml.Window.SizeChanged), () => LogEvent("Window SizeChanged"));
#endif
static bool LogEvent(string eventName, string type = null)
{
System.Diagnostics.Debug.WriteLine($"Lifecycle event: {eventName}{(type == null ? string.Empty : $" ({type})")}");
return true;
}
});
return builder.Build();
}
}
}
Windows
创建窗口
默认情况下,将 属性设置为 类中的 App 对象时,MainPage.NET MAUI 会创建Window一个 Page 对象。 但是,还可以重写 CreateWindow 类中的 App 方法以创建 Window 对象:
namespace MyMauiApp
{
public partial class App : Application
{
public App()
{
InitializeComponent();
MainPage = new MainPage();
}
protected override Window CreateWindow(IActivationState activationState)
{
Window window = base.CreateWindow(activationState);
// Manipulate Window object
return window;
}
}
}
Window虽然 类具有默认构造函数和接受Page参数的构造函数(表示应用的根页),但你也可以调用基CreateWindow方法以返回 .NET MAUI 创建Window的对象。
此外,还可以创建自己的 Window派生对象:
namespace MyMauiApp
{
public class MyWindow : Window
{
public MyWindow() : base()
{
}
public MyWindow(Page page) : base(page)
{
}
// Override Window methods
}
}
Window然后,可以通过在 App 类的 重写中创建 MyWindowCreateWindow 对象来使用 派生类。
无论对象的创建方式 Window 如何,它都将是应用中根页的父级。
多窗口支持
可以在 Android、iPad 上的 iOS (iPadOS) 、Mac Catalyst 和 Windows 上同时打开多个窗口。 这可以通过创建 Window 对象并使用 对象上的 Application 方法打开它OpenWindow来实现:
Window secondWindow = new Window(new MyPage());
Application.Current.OpenWindow(secondWindow);
Application.Current.Windows类型的IReadOnlyList<Window>集合维护对向 对象注册Application的所有Window对象的引用。
可以使用 方法关闭 Application.Current.CloseWindow Windows:
// Close a specific window
Application.Current.CloseWindow(secondWindow);
// Close the active window
Application.Current.CloseWindow(GetParentWindow());
多窗口支持适用于 Android 和 Windows,无需其他配置。 但是,iPadOS 和 Mac Catalyst 需要其他配置
iPadOS 和 macOS 配置
若要在 iPadOS 和 Mac Catalyst 上使用多窗口支持,请将名为 的 SceneDelegate 类添加到 平台 > iOS 和 平台 > MacCatalyst 文件夹:
using Foundation;
using Microsoft.Maui;
using UIKit;
namespace MyMauiApp;
[Register("SceneDelegate")]
public class SceneDelegate : MauiUISceneDelegate
{
}
然后,在 XML 编辑器中,打开 Platforms > iOS > Info.plist 文件和 Platforms > MacCatalyst > Info.plist 文件,并将以下 XML 添加到每个文件的末尾
<key>UIApplicationSceneManifest</key>
<dict>
<key>UIApplicationSupportsMultipleScenes</key>
<true/>
<key>UISceneConfigurations</key>
<dict>
<key>UIWindowSceneSessionRoleApplication</key>
<array>
<dict>
<key>UISceneConfigurationName</key>
<string>__MAUI_DEFAULT_SCENE_CONFIGURATION__</string>
<key>UISceneDelegateClassName</key>
<string>SceneDelegate</string>
</dict>
</array>
</dict>
定位窗口并调整其大小
public partial class App : Application
{
public App()
{
InitializeComponent();
}
protected override Window CreateWindow(IActivationState activationState) =>
new Window(new AppShell())
{
Width = 700,
Height = 500,
X = 100,
Y = 100
};
}
或者,可以通过从任何页面、布局或视图中访问 Window 属性来定位窗口并调整其大小。 例如,以下代码演示如何将窗口置于屏幕中心:
// Get display size
var displayInfo = DeviceDisplay.Current.MainDisplayInfo;
// Center the window
Window.X = (displayInfo.Width / displayInfo.Density - Window.Width) / 2;
Window.Y = (displayInfo.Height / displayInfo.Density - Window.Height) / 2;
布局控制
AbsoluteLayout
AbsoluteLayout 类定义了以下属性:
LayoutBounds,类型 Rect为 ,它是一个附加属性,表示子级的位置和大小。 此属性的默认值为 (0,0,AutoSize,AutoSize) 。
LayoutFlags,类型 AbsoluteLayoutFlags为 ,它是一个附加属性,指示是否按比例解释用于定位子元素和大小的布局边界的属性。 此属性的默认值为 AbsoluteLayoutFlags.None
绝对定位和大小调整
<ContentPage xmlns="http://schemas.microsoft.com/dotnet/2021/maui"
xmlns:x="http://schemas.microsoft.com/winfx/2009/xaml"
x:Class="AbsoluteLayoutDemos.Views.XAML.StylishHeaderDemoPage"
Title="Stylish header demo">
<AbsoluteLayout Margin="20">
<BoxView Color="Silver"
AbsoluteLayout.LayoutBounds="0, 10, 200, 5" />
<BoxView Color="Silver"
AbsoluteLayout.LayoutBounds="0, 20, 200, 5" />
<BoxView Color="Silver"
AbsoluteLayout.LayoutBounds="10, 0, 5, 65" />
<BoxView Color="Silver"
AbsoluteLayout.LayoutBounds="20, 0, 5, 65" />
<Label Text="Stylish Header"
FontSize="24"
AbsoluteLayout.LayoutBounds="30, 25" />
</AbsoluteLayout>
</ContentPage>
比例定位和大小调整
AbsoluteLayoutFlags 枚举定义下列成员:
None,指示值将被解释为绝对值。 这是附加属性 AbsoluteLayout.LayoutFlags 的默认值。
XProportional,指示 x 值将被解释为成比例值,同时将所有其他值视为绝对值。
YProportional,指示 y 值将被解释为成比例值,同时将所有其他值视为绝对值。
WidthProportional,指示 width 值将被解释为成比例值,同时将所有其他值视为绝对值。
HeightProportional,指示 height 值将被解释为成比例值,同时将所有其他值视为绝对值。
PositionProportional,指示 x 和 y 值将解释为成比例,而大小值解释为绝对值。
SizeProportional,指示 width 和 height 值将解释为成比例,而位置值解释为绝对值。
All,指示所有值都将解释为成比例值。
<ContentPage xmlns="http://schemas.microsoft.com/dotnet/2021/maui"
xmlns:x="http://schemas.microsoft.com/winfx/2009/xaml"
x:Class="AbsoluteLayoutDemos.Views.XAML.ProportionalDemoPage"
Title="Proportional demo">
<AbsoluteLayout>
<BoxView Color="Blue"
AbsoluteLayout.LayoutBounds="0.5,0,100,25"
AbsoluteLayout.LayoutFlags="PositionProportional" />
<BoxView Color="Green"
AbsoluteLayout.LayoutBounds="0,0.5,25,100"
AbsoluteLayout.LayoutFlags="PositionProportional" />
<BoxView Color="Red"
AbsoluteLayout.LayoutBounds="1,0.5,25,100"
AbsoluteLayout.LayoutFlags="PositionProportional" />
<BoxView Color="Black"
AbsoluteLayout.LayoutBounds="0.5,1,100,25"
AbsoluteLayout.LayoutFlags="PositionProportional" />
<Label Text="Centered text"
AbsoluteLayout.LayoutBounds="0.5,0.5,110,25"
AbsoluteLayout.LayoutFlags="PositionProportional" />
</AbsoluteLayout>
</ContentPage>
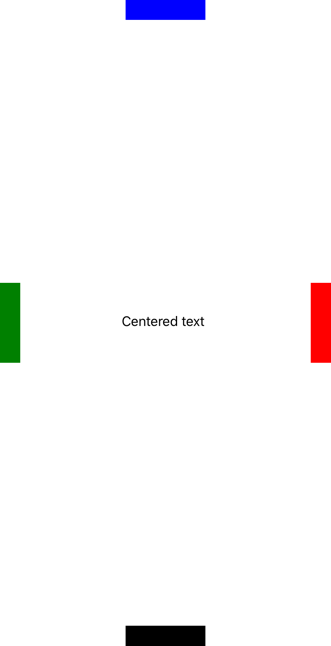
等效 C# 代码如下所示:
public class ProportionalDemoPage : ContentPage
{
public ProportionalDemoPage()
{
BoxView blue = new BoxView { Color = Colors.Blue };
AbsoluteLayout.SetLayoutBounds(blue, new Rect(0.5, 0, 100, 25));
AbsoluteLayout.SetLayoutFlags(blue, AbsoluteLayoutFlags.PositionProportional);
BoxView green = new BoxView { Color = Colors.Green };
AbsoluteLayout.SetLayoutBounds(green, new Rect(0, 0.5, 25, 100));
AbsoluteLayout.SetLayoutFlags(green, AbsoluteLayoutFlags.PositionProportional);
BoxView red = new BoxView { Color = Colors.Red };
AbsoluteLayout.SetLayoutBounds(red, new Rect(1, 0.5, 25, 100));
AbsoluteLayout.SetLayoutFlags(red, AbsoluteLayoutFlags.PositionProportional);
BoxView black = new BoxView { Color = Colors.Black };
AbsoluteLayout.SetLayoutBounds(black, new Rect(0.5, 1, 100, 25));
AbsoluteLayout.SetLayoutFlags(black, AbsoluteLayoutFlags.PositionProportional);
Label label = new Label { Text = "Centered text" };
AbsoluteLayout.SetLayoutBounds(label, new Rect(0.5, 0.5, 110, 25));
AbsoluteLayout.SetLayoutFlags(label, AbsoluteLayoutFlags.PositionProportional);
Title = "Proportional demo";
Content = new AbsoluteLayout
{
Children = { blue, green, red, black, label }
};
}
}
BindableLayout
可绑定布局使派生自 Layout 类的任何布局类可以通过绑定到项集合来生成其内容,并可以选择使用 DataTemplate设置每个项的外观。
可绑定布局由 BindableLayout 类提供,该类公开以下附加属性:
ItemsSource – 指定要由布局显示的项的集合 IEnumerable 。
ItemTemplate – 指定要 DataTemplate 应用于布局所显示项集合中的每个项的 。
ItemTemplateSelector – 指定 DataTemplateSelector 用于在运行时为项选择 DataTemplate的
此外, BindableLayout 类公开以下可绑定属性:
EmptyView– 指定当string属性为 null时ItemsSource或属性指定的ItemsSource集合为 null 或为空时将显示的 或 视图。 默认值为 null。
EmptyViewTemplate– 指定当DataTemplate属性为 null时或属性指定的集合为 null 或为空时ItemsSource将显示的 ItemsSource 。 默认值为 null。
所有这些属性都可以附加到 AbsoluteLayout、、FlexLayout、GridStackLayoutHorizontalStackLayout、 和 VerticalStackLayout 类,这些类都派生自 Layout 类。
当属性 BinableLayout.ItemsSource 设置为项的集合并附加到 Layout派生类时,集合中的每个项都会添加到 Layout派生类中以供显示。 然后, Layout当基础集合发生更改时,派生类将更新其子视图。
仅当要显示的项集合较小且不需要滚动和选择时,才应使用可绑定布局。 虽然可以通过在 中 ScrollView包装可绑定布局来提供滚动,但不建议这样做,因为可绑定布局缺少 UI 虚拟化。 需要滚动时,应使用包含 UI 虚拟化的可滚动视图,例如 ListView 或 CollectionView。 未能遵守此建议可能会导致性能问题。
使用数据填充可绑定布局
通过将可绑定布局的 属性设置为 ItemsSource 实现 IEnumerable的任何集合,并将其 Layout附加到 派生类,可以使用数据填充该布局:
<Grid BindableLayout.ItemsSource="{Binding Items}" />
定义项外观
可以通过将附加属性设置为 BindableLayout.ItemTemplateDataTemplate来定义可绑定布局中每个项的外观:
<StackLayout BindableLayout.ItemsSource="{Binding User.TopFollowers}"
Orientation="Horizontal"
...>
<BindableLayout.ItemTemplate>
<DataTemplate>
<Image Source="{Binding}"
Aspect="AspectFill"
WidthRequest="44"
HeightRequest="44"
... />
</DataTemplate>
</BindableLayout.ItemTemplate>
</StackLayout>

FlexLayout
FlexLayout 类定义了以下属性:
AlignContent,类型 FlexAlignContent为 ,它确定布局引擎在已布局多行的子元素之间和周围分布空间的方式。 此属性的默认值为 Stretch。 有关详细信息,请参阅 AlignContent。
AlignItems,类型 FlexAlignItems为 ,指示布局引擎如何沿十字轴在子级之间和周围分布空间。 此属性的默认值为 Stretch。 有关详细信息,请参阅 AlignItems。
Direction,类型 FlexDirection为 ,用于定义子级的方向和主轴。 此属性的默认值为 Row。 有关详细信息,请参阅 方向。
JustifyContent,类型 FlexJustify为 ,指定沿主轴在子级之间和周围分布空间的方式。 此属性的默认值为 Start。 有关详细信息,请参阅 JustifyContent。
Position,属于 类型 FlexPosition,用于确定子级的位置是彼此相对的,还是通过使用固定值。 此属性的默认值为 Relative。
Wrap,类型 FlexWrap为 ,控制子级是布局在单行还是多行中。 此属性的默认值为 NoWrap。 有关详细信息,请参阅 Wrap。
AlignSelf,类型 FlexAlignSelf为 ,它是一个附加属性,指示布局引擎如何沿十字轴为特定子级在子级之间和周围分配空间。 此属性的默认值为 Auto。 有关详细信息,请参阅 AlignSelf。
Basis,类型 FlexBasis为 ,它是一个附加属性,在根据其他属性值分配可用空间之前定义子级的初始主大小。 此属性的默认值为 Auto。 有关详细信息,请参阅 Basis。
Grow,类型 float为 ,它是一个附加属性,指定子级应在主轴上使用的可用空间量。 此属性的默认值为 0.0。 验证回调可确保在设置属性时,其值大于或等于 0。 有关详细信息,请参阅 增长。
Order,类型 int为 ,它是一个附加属性,用于确定子级应放置在容器中的其他子级之前还是之后。 此属性的默认值为 0。 有关详细信息,请参阅 Order。
Shrink,类型 float为 ,它是一个附加属性,用于控制子级应如何收缩,以便所有子级都可以容纳在容器中。 此属性的默认值为 1.0。 验证回调可确保在设置属性时,其值大于或等于 0。
方向和对齐方式
Direction可以在 上FlexLayout设置 、Wrap、JustifyContent、AlignContentAlignItems、 和 Position 可绑定属性,以控制所有子级的方向和对齐方式。
方向
Direction类型的 FlexDirection属性定义子级的方向和主轴。 FlexDirection 枚举定义下列成员:
Column,指示子级应垂直堆叠。
ColumnReverse 在 XAML) 中 (或“列反向”,指示子级应按反向顺序垂直堆叠。
Row,指示子级应水平堆叠。 这是 Direction 属性的默认值。
RowReverse 在 XAML) 中 (或“行反向”,指示子级应按反向顺序水平堆叠。
当 属性 Direction 设置为 Column、 或 ColumnReverse时,主轴将为 y 轴,项将垂直堆叠。 当 属性 Direction 设置为 Row或 RowReverse时,主轴将为 x 轴,子级将水平堆叠。
包装
Wrap类型的 FlexWrap属性控制子级是单行布局还是多行布局。 FlexWrap 枚举定义下列成员:
NoWrap,指示子项在单个行中布局。 这是 Wrap 属性的默认值。
Wrap,指示根据需要以多行方式排列项。
Reverse 在 XAML) 中 (或“环绕反向”,这指示项根据需要以相反的顺序以多行布局。
Wrap当 属性设置为 NoWrap 且主轴受约束,并且主轴不够宽或不够高,无法容纳所有子级时,FlexLayout将尝试使项更小。 可以使用附加的可绑定属性控制子级的 Shrink 收缩因子。
当 属性 Wrap 设置为 Wrap 或 WrapReverse时, AlignContent 属性可用于指定行的分布方式。
JustifyContent
JustifyContent类型FlexJustify为 的 属性指定沿主坐标轴在子级之间和周围分布的空间的方式。 FlexJustify 枚举定义下列成员:
Start 在 XAML) 中 (或“弹性启动”,指示子级应在开头对齐。 这是 JustifyContent 属性的默认值。
Center,指示子级应围绕中心对齐。
End XAML) 中的 (或“弹性端”,指示子级应在末尾对齐。
SpaceBetween XAML) 中的 (或“间隔”,指示子级应均匀分布,第一个子级位于开头,最后一个子级位于末尾。
SpaceAround XAML) 中的 (或“环绕空间”,指示子级应均匀分布,第一个和最后一个子元素的空间大小为一半。
SpaceEvenly,指示子级应均匀分布,所有子级周围都有相等的空间。
AlignItems
AlignItems类型FlexAlignItems为 的 属性指示布局引擎如何沿十字轴在子级之间和周围分布空间。 FlexAlignItems 枚举定义下列成员:
Stretch,指示子级应伸展。这是 属性的 AlignItems 默认值。
Center,指示子级应围绕中心对齐。
Start 在 XAML) 中 (或“弹性启动”,指示子级应在开头对齐。
End XAML) 中的 (或“弹性端”,指示子级应在末尾对齐。
这是指示子项在十字轴上的对齐方式的两个属性之一。 在每一行中,子项在每个项的开头、中心或末尾拉伸或对齐。
对于任何单个子级, AlignItems 可以使用附加的 AlignSelf 可绑定属性重写设置。
AlignContent
AlignContent类型FlexAlignContent为 的属性确定布局引擎如何在多行上布局的子级之间和周围分布空间。 FlexAlignContent 枚举定义下列成员:
Stretch,指示子级应伸展。这是 属性的 AlignContent 默认值。
Center,指示子级应围绕中心对齐。
Start 在 XAML) 中 (或“弹性启动”,指示子级应在开头对齐。
End XAML) 中的 (或“弹性端”,指示子级应在末尾对齐。
SpaceBetween XAML) 中的 (或“间隔”,指示子级应均匀分布,第一个子级位于开头,最后一个子级位于末尾。
SpaceAround XAML) 中的 (或“环绕空间”,指示子级应均匀分布,第一个和最后一个子元素的空间大小为一半。
SpaceEvenly,指示子级应均匀分布,所有子级周围都有相等的空间。
AlignContent当只有一行或一列时, 属性无效。
子对齐和大小调整
AlignSelf可以在 的子FlexLayout级上设置 、Order、Basis、 Grow和 Shrink 附加的可绑定属性,以控制子方向、对齐方式和大小调整。
AlignSelf
AlignSelf类型FlexAlignSelf为 的 属性指示布局引擎如何沿十字轴为特定子级在子级之间和周围分配空间。 FlexAlignSelf 枚举定义下列成员:
Auto,指示子级应根据其父级的对齐值进行对齐。 这是 AlignSelf 属性的默认值。
Stretch,指示子级应伸展。
Center,指示子级应围绕中心对齐。
Start 在 XAML) 中 (或“弹性启动”,指示子元素应在开头对齐。
End XAML) 中的 (或“flex-end”,指示子元素应在末尾对齐。
对于 的任何单个子级 FlexLayout,此属性将 AlignItems 替代 上设置的属性 FlexLayout。 的 Auto 默认设置表示使用 AlignItems 设置。
在 XAML 中,此属性在子级上设置,而不引用其 FlexLayout 父级:
XAML
复制
<Label FlexLayout.AlignSelf="Center"
... />
订单
类型Orderint为 的属性可用于更改 的子级的FlexLayout排列顺序。 此属性的默认值为 0。
通常,子级按添加到 的顺序排列 FlexLayout。 但是,可以通过在一个或多个子级上将此属性设置为非零整数值来重写此顺序。 然后, FlexLayout 会根据其 Order 属性值排列其子级。 具有相同属性值的 Order 子级按添加到 的顺序排列 FlexLayout。
基准
Basis类型FlexBasis为 的属性定义主轴上子级的初始大小,然后根据其他属性值分布可用空间。 此属性指定的值是沿父 FlexLayout级 的坐标轴的大小。 因此,当子项按行排列时,此属性指示子项的宽度,或子项按列排列时子项的高度。 此属性称为 basis ,因为它指定作为所有后续布局基础的大小。
类型 FlexBasis 是一种结构,它允许以与设备无关的单位或以 大小百 FlexLayout分比的形式指定大小。 属性的 Basis 默认值为 Auto,这意味着使用子级请求的宽度或高度。
在 XAML 中,可以将数字用于与设备无关的单位的大小:
XAML
<Label FlexLayout.Basis="40"
... />
在 XAML 中,可以按如下所示指定百分比:
XAML
<Label FlexLayout.Basis="25%"
... />
成长
Grow类型float为 的 属性指定子级应在主轴上使用的可用空间量。 此属性的默认值为 0.0,其值必须大于或等于 0。
Grow当 属性设置为 NoWrap 并且Wrap子行的总宽度小于 的FlexLayout宽度,或者子级列的高度小于 时,FlexLayout将使用 属性。 属性 Grow 指示如何在子级之间分配剩余空间。 如果为单个子级提供正 Grow 值,则该子级将占用所有剩余空间。 或者,还可以在两个或多个子级之间分配剩余空间。
收缩
Shrink类型float为 的 属性控制子级的收缩方式,以便所有子级都适合容器中。 此属性的默认值为 1.0,其值必须大于或等于 0。
Shrink当 属性设置为 NoWrap 且子行的聚合宽度大于 的FlexLayout宽度,或者单个子级列的聚合高度大于 的高度时Wrap,FlexLayout将使用 属性。 通常, FlexLayout 将通过限制这些子的大小来显示这些子项。 属性 Shrink 可以指示哪些子级在按其完整大小显示时具有优先级。
示例
以下示例演示 的 FlexLayout常见用法。
堆栈
FlexLayout可以替代 StackLayout:
XAML
<ContentPage xmlns="http://schemas.microsoft.com/dotnet/2021/maui"
xmlns:x="http://schemas.microsoft.com/winfx/2009/xaml"
x:Class="FlexLayoutDemos.Views.SimpleStackPage"
Title="Simple Stack">
<FlexLayout Direction="Column"
AlignItems="Center"
JustifyContent="SpaceEvenly">
<Label Text="FlexLayout in Action"
FontSize="18" />
<Image Source="dotnet_bot_branded.png"
HeightRequest="300" />
<Button Text="Do-Nothing Button" />
<Label Text="Another Label" />
</FlexLayout>
</ContentPage>
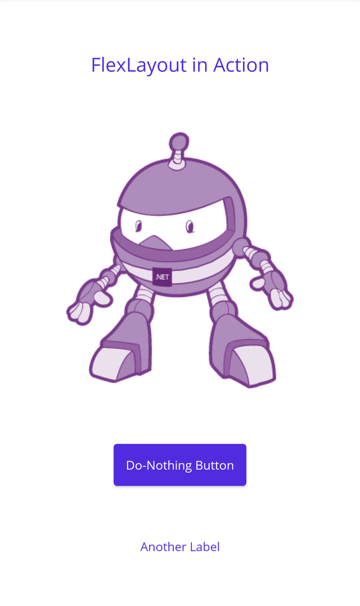
在此示例中, Direction 属性设置为 Column,这会导致 的子级 FlexLayout 排列在单个列中。 属性 AlignItems 设置为 Center,这会导致每个子级水平居中。 属性 JustifyContent 设置为 SpaceEvenly ,该属性在所有子级之间平均分配所有子级(位于第一个子级上方和最后一个子级下方)之间的所有剩余垂直空间:
自动换行项
FlexLayout可以将子级换行到其他行或列:
XAML
<ContentPage xmlns="http://schemas.microsoft.com/dotnet/2021/maui"
xmlns:x="http://schemas.microsoft.com/winfx/2009/xaml"
x:Class="FlexLayoutDemos.Views.PhotoWrappingPage"
Title="Photo Wrapping">
<Grid>
<ScrollView>
<FlexLayout x:Name="flexLayout"
Wrap="Wrap"
JustifyContent="SpaceAround" />
</ScrollView>
...
</Grid>
</ContentPage>
在此示例中, Direction 的 FlexLayout 属性未设置,因此其默认设置为 Row,这意味着子级按行排列,主坐标轴为水平。 属性 Wrap 设置为 Wrap,如果子元素太多而无法容纳在行上,则会导致子级换行到下一行。 属性 JustifyContent 设置为 SpaceAround ,它分配主轴上的所有剩余空间,以便每个子级被相同数量的空间包围

此示例的代码隐藏文件检索照片集合并将其添加到 。FlexLayout
此外, FlexLayout 是 的子级 ScrollView。 因此,如果页面上的行太多,则 ScrollView 具有默认 Orientation 属性 Vertical ,并允许垂直滚动。
页面布局
Web 设计中有一个名为 “圣杯 ”的标准布局,因为它是一种非常可取的布局格式,但通常很难完美实现。 布局由页面顶部的页眉和底部的页脚组成,两者都延伸到页面的全宽。 占据页面中心是主要内容,但通常与内容左侧的柱形菜单和补充信息 (有时称为一个) 右侧的 边区 。 可以使用 实现 FlexLayout此布局。
以下示例演示使用嵌套在另一个 FlexLayout 布局中实现此布局:
XAML
<ContentPage xmlns="http://schemas.microsoft.com/dotnet/2021/maui"
xmlns:x="http://schemas.microsoft.com/winfx/2009/xaml"
x:Class="FlexLayoutDemos.Views.HolyGrailLayoutPage"
Title="Holy Grail Layout">
<FlexLayout Direction="Column">
<!-- Header -->
<Label Text="HEADER"
FontSize="18"
BackgroundColor="Aqua"
HorizontalTextAlignment="Center" />
<!-- Body -->
<FlexLayout FlexLayout.Grow="1">
<!-- Content -->
<Label Text="CONTENT"
FontSize="18"
BackgroundColor="Gray"
HorizontalTextAlignment="Center"
VerticalTextAlignment="Center"
FlexLayout.Grow="1" />
<!-- Navigation items-->
<BoxView FlexLayout.Basis="50"
FlexLayout.Order="-1"
Color="Blue" />
<!-- Aside items -->
<BoxView FlexLayout.Basis="50"
Color="Green" />
</FlexLayout>
<!-- Footer -->
<Label Text="FOOTER"
FontSize="18"
BackgroundColor="Pink"
HorizontalTextAlignment="Center" />
</FlexLayout>
</ContentPage>
导航和侧边区域在左侧和右侧呈现 BoxView 。 第一 FlexLayout 个具有垂直主坐标轴,并且包含三个子级排列在一列中。 它们是页眉、页面正文和页脚。 嵌套 FlexLayout 有一个水平主坐标轴,其中三个子级排列在一行中:
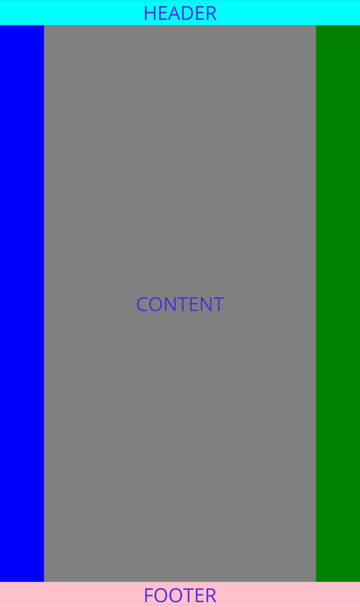
在此示例中,第 Order 一 BoxView 个 属性设置为小于其同级的值,以使其显示为行中的第一项。 在 Basis 两个 BoxView 对象上设置 属性,使其宽度为 50 个与设备无关的单位。 在 Grow 嵌套 FlexLayout 上设置 属性,以指示这 FlexLayout 应占用外部 FlexLayout内的所有未使用的垂直空间。 此外,在 Grow 表示内容的 上 Label 设置 属性,以指示此内容将占用嵌套 FlexLayout内所有未使用的水平空间。
Grid
Grid不应将 与表混淆,并且不用于显示表格数据。 与 HTML 表不同, 用于 Grid 布局内容。 若要显示表格数据,请考虑使用 ListView 或 CollectionView。
Grid 类定义了以下属性:
Column,类型 int为 ,它是一个附加属性,指示父 Grid内视图的列对齐方式。 此属性的默认值为 0。 验证回调可确保在设置 属性时,其值大于或等于 0。
ColumnDefinitions,类型 ColumnDefinitionCollection为 ,是定义网格列宽度的对象列表 ColumnDefinition 。
ColumnSpacing,类型 double为 ,指示网格列之间的距离。 此属性的默认值为 0。
ColumnSpan,类型 int为 ,它是一个附加属性,指示视图在父 Grid内跨越的列总数。 此属性的默认值为 1。 验证回调可确保在设置 属性时,其值大于或等于 1。
Row,类型 int为 ,它是指示父 Grid内视图的行对齐方式的附加属性。 此属性的默认值为 0。 验证回调可确保在设置 属性时,其值大于或等于 0。
RowDefinitions,类型 RowDefinitionCollection为 ,是定义网格行高度的对象列表 RowDefinition 。
RowSpacing,类型 double为 ,指示网格行之间的距离。 此属性的默认值为 0。
RowSpan,类型 int为 ,它是一个附加属性,指示视图在父 Grid内跨越的行总数。 此属性的默认值为 1。 验证回调可确保在设置 属性时,其值大于或等于 1。
这些属性由 BindableProperty 对象提供支持,这意味着这些属性可以是数据绑定的目标和样式。
行和列
默认情况下, Grid 包含一行和一列:
XAML
<ContentPage xmlns="http://schemas.microsoft.com/dotnet/2021/maui"
xmlns:x="http://schemas.microsoft.com/winfx/2009/xaml"
x:Class="GridTutorial.MainPage">
<Grid Margin="20,35,20,20">
<Label Text="By default, a Grid contains one row and one column." />
</Grid>
</ContentPage>
在此示例中, Grid 包含自动定位在单个位置的单个子级 Label :
默认 .NET MAUI 网格布局。
的布局行为Grid可以使用 和 ColumnDefinitions 属性定义RowDefinitions,这些属性分别是 和 ColumnDefinition 对象的集合RowDefinition。 这些集合定义 的行和列特征,对于 中的Grid每一行应包含一个 GridRowDefinition 对象,以及 中每个列的Grid一个 ColumnDefinition 对象。
类 RowDefinition 定义 Height 类型的 GridLength属性,类 ColumnDefinition 定义 Width 类型的 GridLength属性。 结构 GridLength 根据枚举指定行高或列宽 GridUnitType ,该枚举具有三个成员:
Absolute – 行高或列宽是一个与设备无关的单位值, (XAML) 中的数字。
Auto – 根据 XAML) 中 (Auto 的单元格内容自动调整行高或列宽。
Star – 剩余行高度或列宽按比例分配 (XAML) 中的后跟 * 数字。
Grid属性为 Height 的Auto行以与垂直 StackLayout相同的方式约束该行中视图的高度。 同样,属性为 Width 的 Auto 列的工作方式与水平 StackLayout非常相似。
以下 XAML 演示如何创建 Grid 包含三行和两列的 :
XAML
复制
<ContentPage xmlns="http://schemas.microsoft.com/dotnet/2021/maui"
xmlns:x="http://schemas.microsoft.com/winfx/2009/xaml"
x:Class="GridDemos.Views.XAML.BasicGridPage"
Title="Basic Grid demo">
<Grid>
<Grid.RowDefinitions>
<RowDefinition Height="2*" />
<RowDefinition Height="*" />
<RowDefinition Height="100" />
</Grid.RowDefinitions>
<Grid.ColumnDefinitions>
<ColumnDefinition Width="*" />
<ColumnDefinition Width="*" />
</Grid.ColumnDefinitions>
...
</Grid>
</ContentPage>
在此示例中, Grid 的总体高度是页面的高度。 知道 Grid 第三行的高度是 100 个与设备无关的单位。 它从自身高度中减去该高度,并根据星号前的数字,按比例在第一行和第二行之间分配剩余高度。 在此示例中,第一行的高度是第二行的两倍。
这两个 ColumnDefinition 对象都将 设置为 *Width ,这与 1*相同,这意味着屏幕宽度在两列下方平均划分
子视图可以定位在具有 Grid.Column 和 Grid.Row 附加属性的特定Grid单元格中。 此外,若要使子视图跨多个行和列,请使用 Grid.RowSpan 和 Grid.ColumnSpan 附加属性。
以下 XAML 显示了相同的 Grid 定义,并且还在特定 Grid 单元格中放置子视图:
XAML
<ContentPage xmlns="http://schemas.microsoft.com/dotnet/2021/maui"
xmlns:x="http://schemas.microsoft.com/winfx/2009/xaml"
x:Class="GridDemos.Views.XAML.BasicGridPage"
Title="Basic Grid demo">
<Grid>
<Grid.RowDefinitions>
<RowDefinition Height="2*" />
<RowDefinition />
<RowDefinition Height="100" />
</Grid.RowDefinitions>
<Grid.ColumnDefinitions>
<ColumnDefinition />
<ColumnDefinition />
</Grid.ColumnDefinitions>
<BoxView Color="Green" />
<Label Text="Row 0, Column 0"
HorizontalOptions="Center"
VerticalOptions="Center" />
<BoxView Grid.Column="1"
Color="Blue" />
<Label Grid.Column="1"
Text="Row 0, Column 1"
HorizontalOptions="Center"
VerticalOptions="Center" />
<BoxView Grid.Row="1"
Color="Teal" />
<Label Grid.Row="1"
Text="Row 1, Column 0"
HorizontalOptions="Center"
VerticalOptions="Center" />
<BoxView Grid.Row="1"
Grid.Column="1"
Color="Purple" />
<Label Grid.Row="1"
Grid.Column="1"
Text="Row1, Column 1"
HorizontalOptions="Center"
VerticalOptions="Center" />
<BoxView Grid.Row="2"
Grid.ColumnSpan="2"
Color="Red" />
<Label Grid.Row="2"
Grid.ColumnSpan="2"
Text="Row 2, Columns 0 and 1"
HorizontalOptions="Center"
VerticalOptions="Center" />
</Grid>
</ContentPage>
在此示例中,所有三 Grid 行都由 BoxView 和 Label 视图占用。 第三行高 100 个与设备无关的单位,前两行占用剩余空间 (第一行是第二行) 的两倍。 这两列的宽度相等,将 除 Grid 以两半。 BoxView第三行中的 跨两列:
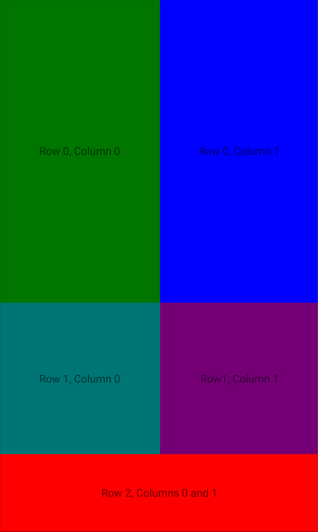
此外,中的 Grid 子视图可以共享单元格。 子项在 XAML 中的显示顺序是子项在 中 Grid放置的顺序。 在前面的示例中, Label 这些对象仅可见,因为它们是在对象之上呈现的 BoxView 。 Label如果对象呈现在BoxView对象之上,则这些对象将不可见。
等效 C# 代码如下:
C#
复制
public class BasicGridPage : ContentPage
{
public BasicGridPage()
{
Grid grid = new Grid
{
RowDefinitions =
{
new RowDefinition { Height = new GridLength(2, GridUnitType.Star) },
new RowDefinition(),
new RowDefinition { Height = new GridLength(100) }
},
ColumnDefinitions =
{
new ColumnDefinition(),
new ColumnDefinition()
}
};
// Row 0
// The BoxView and Label are in row 0 and column 0, and so only need to be added to the
// Grid to obtain the default row and column settings.
grid.Add(new BoxView
{
Color = Colors.Green
});
grid.Add(new Label
{
Text = "Row 0, Column 0",
HorizontalOptions = LayoutOptions.Center,
VerticalOptions = LayoutOptions.Center
});
// This BoxView and Label are in row 0 and column 1, which are specified as arguments
// to the Add method.
grid.Add(new BoxView
{
Color = Colors.Blue
}, 1, 0);
grid.Add(new Label
{
Text = "Row 0, Column 1",
HorizontalOptions = LayoutOptions.Center,
VerticalOptions = LayoutOptions.Center
}, 1, 0);
// Row 1
// This BoxView and Label are in row 1 and column 0, which are specified as arguments
// to the Add method overload.
grid.Add(new BoxView
{
Color = Colors.Teal
}, 0, 1);
grid.Add(new Label
{
Text = "Row 1, Column 0",
HorizontalOptions = LayoutOptions.Center,
VerticalOptions = LayoutOptions.Center
}, 0, 1);
// This BoxView and Label are in row 1 and column 1, which are specified as arguments
// to the Add method overload.
grid.Add(new BoxView
{
Color = Colors.Purple
}, 1, 1);
grid.Add(new Label
{
Text = "Row1, Column 1",
HorizontalOptions = LayoutOptions.Center,
VerticalOptions = LayoutOptions.Center
}, 1, 1);
// Row 2
// Alternatively, the BoxView and Label can be positioned in cells with the Grid.SetRow
// and Grid.SetColumn methods.
BoxView boxView = new BoxView { Color = Colors.Red };
Grid.SetRow(boxView, 2);
Grid.SetColumnSpan(boxView, 2);
Label label = new Label
{
Text = "Row 2, Column 0 and 1",
HorizontalOptions = LayoutOptions.Center,
VerticalOptions = LayoutOptions.Center
};
Grid.SetRow(label, 2);
Grid.SetColumnSpan(label, 2);
grid.Add(boxView);
grid.Add(label);
Title = "Basic Grid demo";
Content = grid;
}
}
在代码中,若要指定对象的高度 RowDefinition 和对象的宽度 ColumnDefinition ,请使用 结构的值 GridLength ,通常与 GridUnitType 枚举结合使用。
简化行和列定义
在 XAML 中,可以使用简化的语法指定 的 Grid 行和列特征,而无需为每个行和列定义 RowDefinition 和 ColumnDefinition 对象。 相反, RowDefinitions 和 ColumnDefinitions 属性可以设置为包含逗号分隔 GridUnitType 值的字符串,而 .NET MAUI 中内置的类型转换器将创建 RowDefinition 和 ColumnDefinition 对象:
XAML
复制
<Grid RowDefinitions="1*, Auto, 25, 14, 20"
ColumnDefinitions="*, 2*, Auto, 300">
...
</Grid>
在此示例中, Grid 有五行和四列。 第三行、第四行和第五行设置为绝对高度,第二行自动调整其内容的大小。 然后将剩余高度分配给第一行。
第四列设置为绝对宽度,第三列会自动调整其内容的大小。 剩余宽度根据星号前的数字在第一列和第二列之间按比例分配。 在此示例中,第二列的宽度是第一列 (的两倍,因为 * 与) 相同 1* 。
行和列之间的间距
默认情况下, Grid 行和列之间没有空格。 这可以通过分别设置 RowSpacing 和 ColumnSpacing 属性来更改:
XAML
复制
<ContentPage xmlns="http://schemas.microsoft.com/dotnet/2021/maui"
xmlns:x="http://schemas.microsoft.com/winfx/2009/xaml"
x:Class="GridDemos.Views.XAML.GridSpacingPage"
Title="Grid spacing demo">
<Grid RowSpacing="6"
ColumnSpacing="6">
...
</Grid>
</ContentPage>
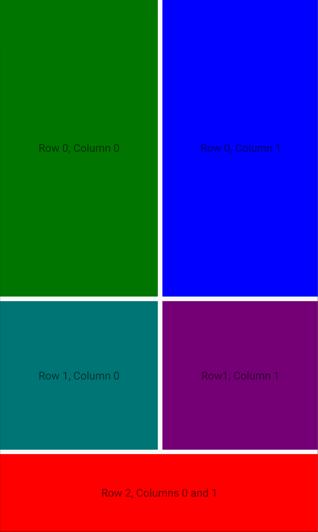
此示例创建一个 , Grid 其行和列由 6 个与设备无关的空间单位分隔:
提示
RowSpacing和 ColumnSpacing 属性可以设置为负值,使单元格内容重叠。
等效 C# 代码如下:
C#
复制
public class GridSpacingPage : ContentPage
{
public GridSpacingPage()
{
Grid grid = new Grid
{
RowSpacing = 6,
ColumnSpacing = 6,
...
};
...
Content = grid;
}
}
对齐方式
中的 Grid 子视图可以由 HorizontalOptions 和 VerticalOptions 属性定位在其单元格内。 这些属性可以设置为结构中的以下字段 LayoutOptions :
Start
Center
End
Fill
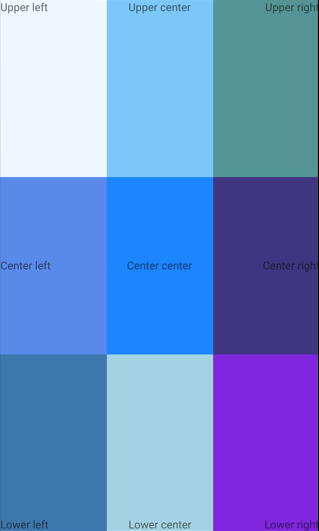
以下 XAML 创建具有九个 Grid 等大小单元格的 ,并在每个单元格中以不同的对齐方式放置 Label 一个 :
XAML
复制
<ContentPage xmlns="http://schemas.microsoft.com/dotnet/2021/maui"
xmlns:x="http://schemas.microsoft.com/winfx/2009/xaml"
x:Class="GridDemos.Views.XAML.GridAlignmentPage"
Title="Grid alignment demo">
<Grid>
<Grid.RowDefinitions>
<RowDefinition />
<RowDefinition />
<RowDefinition />
</Grid.RowDefinitions>
<Grid.ColumnDefinitions>
<ColumnDefinition />
<ColumnDefinition />
<ColumnDefinition />
</Grid.ColumnDefinitions>
<BoxView Color="AliceBlue" />
<Label Text="Upper left"
HorizontalOptions="Start"
VerticalOptions="Start" />
<BoxView Grid.Column="1"
Color="LightSkyBlue" />
<Label Grid.Column="1"
Text="Upper center"
HorizontalOptions="Center"
VerticalOptions="Start"/>
<BoxView Grid.Column="2"
Color="CadetBlue" />
<Label Grid.Column="2"
Text="Upper right"
HorizontalOptions="End"
VerticalOptions="Start" />
<BoxView Grid.Row="1"
Color="CornflowerBlue" />
<Label Grid.Row="1"
Text="Center left"
HorizontalOptions="Start"
VerticalOptions="Center" />
<BoxView Grid.Row="1"
Grid.Column="1"
Color="DodgerBlue" />
<Label Grid.Row="1"
Grid.Column="1"
Text="Center center"
HorizontalOptions="Center"
VerticalOptions="Center" />
<BoxView Grid.Row="1"
Grid.Column="2"
Color="DarkSlateBlue" />
<Label Grid.Row="1"
Grid.Column="2"
Text="Center right"
HorizontalOptions="End"
VerticalOptions="Center" />
<BoxView Grid.Row="2"
Color="SteelBlue" />
<Label Grid.Row="2"
Text="Lower left"
HorizontalOptions="Start"
VerticalOptions="End" />
<BoxView Grid.Row="2"
Grid.Column="1"
Color="LightBlue" />
<Label Grid.Row="2"
Grid.Column="1"
Text="Lower center"
HorizontalOptions="Center"
VerticalOptions="End" />
<BoxView Grid.Row="2"
Grid.Column="2"
Color="BlueViolet" />
<Label Grid.Row="2"
Grid.Column="2"
Text="Lower right"
HorizontalOptions="End"
VerticalOptions="End" />
</Grid>
</ContentPage>
在此示例中, Label 每行中的对象垂直对齐方式相同,但使用不同的水平对齐方式。 或者,这可以视为 Label 每列中的对象以相同的水平对齐方式,但使用不同的垂直对齐方式:
等效 C# 代码如下:
C#
复制
public class GridAlignmentPage : ContentPage
{
public GridAlignmentPage()
{
Grid grid = new Grid
{
RowDefinitions =
{
new RowDefinition(),
new RowDefinition(),
new RowDefinition()
},
ColumnDefinitions =
{
new ColumnDefinition(),
new ColumnDefinition(),
new ColumnDefinition()
}
};
// Row 0
grid.Add(new BoxView
{
Color = Colors.AliceBlue
});
grid.Add(new Label
{
Text = "Upper left",
HorizontalOptions = LayoutOptions.Start,
VerticalOptions = LayoutOptions.Start
});
grid.Add(new BoxView
{
Color = Colors.LightSkyBlue
}, 1, 0);
grid.Add(new Label
{
Text = "Upper center",
HorizontalOptions = LayoutOptions.Center,
VerticalOptions = LayoutOptions.Start
}, 1, 0);
grid.Add(new BoxView
{
Color = Colors.CadetBlue
}, 2, 0);
grid.Add(new Label
{
Text = "Upper right",
HorizontalOptions = LayoutOptions.End,
VerticalOptions = LayoutOptions.Start
}, 2, 0);
// Row 1
grid.Add(new BoxView
{
Color = Colors.CornflowerBlue
}, 0, 1);
grid.Add(new Label
{
Text = "Center left",
HorizontalOptions = LayoutOptions.Start,
VerticalOptions = LayoutOptions.Center
}, 0, 1);
grid.Add(new BoxView
{
Color = Colors.DodgerBlue
}, 1, 1);
grid.Add(new Label
{
Text = "Center center",
HorizontalOptions = LayoutOptions.Center,
VerticalOptions = LayoutOptions.Center
}, 1, 1);
grid.Add(new BoxView
{
Color = Colors.DarkSlateBlue
}, 2, 1);
grid.Add(new Label
{
Text = "Center right",
HorizontalOptions = LayoutOptions.End,
VerticalOptions = LayoutOptions.Center
}, 2, 1);
// Row 2
grid.Add(new BoxView
{
Color = Colors.SteelBlue
}, 0, 2);
grid.Add(new Label
{
Text = "Lower left",
HorizontalOptions = LayoutOptions.Start,
VerticalOptions = LayoutOptions.End
}, 0, 2);
grid.Add(new BoxView
{
Color = Colors.LightBlue
}, 1, 2);
grid.Add(new Label
{
Text = "Lower center",
HorizontalOptions = LayoutOptions.Center,
VerticalOptions = LayoutOptions.End
}, 1, 2);
grid.Add(new BoxView
{
Color = Colors.BlueViolet
}, 2, 2);
grid.Add(new Label
{
Text = "Lower right",
HorizontalOptions = LayoutOptions.End,
VerticalOptions = LayoutOptions.End
}, 2, 2);
Title = "Grid alignment demo";
Content = grid;
}
}
嵌套网格对象
Grid可用作包含嵌套子Grid对象的父布局或其他子布局。 嵌套Grid对象时,Grid.Row、 Grid.ColumnGrid.RowSpan和 Grid.ColumnSpan 附加属性始终引用视图在其父 Grid中的位置。
以下 XAML 演示嵌套 Grid 对象的示例:
XAML
复制
<ContentPage xmlns="http://schemas.microsoft.com/dotnet/2021/maui"
xmlns:x="http://schemas.microsoft.com/winfx/2009/xaml"
xmlns:converters="clr-namespace:GridDemos.Converters"
x:Class="GridDemos.Views.XAML.ColorSlidersGridPage"
Title="Nested Grids demo">
<ContentPage.Resources>
<converters:DoubleToIntConverter x:Key="doubleToInt" />
<Style TargetType="Label">
<Setter Property="HorizontalTextAlignment"
Value="Center" />
</Style>
</ContentPage.Resources>
<Grid>
<Grid.RowDefinitions>
<RowDefinition Height="500" />
<RowDefinition Height="Auto" />
</Grid.RowDefinitions>
<BoxView x:Name="boxView"
Color="Black" />
<Grid Grid.Row="1"
Margin="20">
<Grid.RowDefinitions>
<RowDefinition />
<RowDefinition />
<RowDefinition />
<RowDefinition />
<RowDefinition />
<RowDefinition />
</Grid.RowDefinitions>
<Slider x:Name="redSlider"
ValueChanged="OnSliderValueChanged" />
<Label Grid.Row="1"
Text="{Binding Source={x:Reference redSlider},
Path=Value,
Converter={StaticResource doubleToInt},
ConverterParameter=255,
StringFormat='Red = {0}'}" />
<Slider x:Name="greenSlider"
Grid.Row="2"
ValueChanged="OnSliderValueChanged" />
<Label Grid.Row="3"
Text="{Binding Source={x:Reference greenSlider},
Path=Value,
Converter={StaticResource doubleToInt},
ConverterParameter=255,
StringFormat='Green = {0}'}" />
<Slider x:Name="blueSlider"
Grid.Row="4"
ValueChanged="OnSliderValueChanged" />
<Label Grid.Row="5"
Text="{Binding Source={x:Reference blueSlider},
Path=Value,
Converter={StaticResource doubleToInt},
ConverterParameter=255,
StringFormat='Blue = {0}'}" />
</Grid>
</Grid>
</ContentPage>
在此示例中,根 Grid 在其第一行中包含 , BoxView 第二行中包含子 Grid 项。 子 Grid 项包含 Slider 操作 由 BoxView显示的颜色的对象,以及 Label 显示每个 Slider的值的对象:
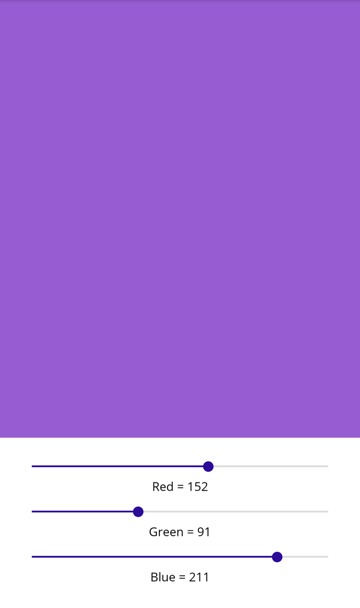
重要
嵌套 Grid 对象和其他布局越深,嵌套布局对性能的影响就越大。
等效 C# 代码如下:
C#
复制
public class ColorSlidersGridPage : ContentPage
{
BoxView boxView;
Slider redSlider;
Slider greenSlider;
Slider blueSlider;
public ColorSlidersGridPage()
{
// Create an implicit style for the Labels
Style labelStyle = new Style(typeof(Label))
{
Setters =
{
new Setter { Property = Label.HorizontalTextAlignmentProperty, Value = TextAlignment.Center }
}
};
Resources.Add(labelStyle);
// Root page layout
Grid rootGrid = new Grid
{
RowDefinitions =
{
new RowDefinition { HeightRequest = 500 },
new RowDefinition()
}
};
boxView = new BoxView { Color = Colors.Black };
rootGrid.Add(boxView);
// Child page layout
Grid childGrid = new Grid
{
Margin = new Thickness(20),
RowDefinitions =
{
new RowDefinition(),
new RowDefinition(),
new RowDefinition(),
new RowDefinition(),
new RowDefinition(),
new RowDefinition()
}
};
DoubleToIntConverter doubleToInt = new DoubleToIntConverter();
redSlider = new Slider();
redSlider.ValueChanged += OnSliderValueChanged;
childGrid.Add(redSlider);
Label redLabel = new Label();
redLabel.SetBinding(Label.TextProperty, new Binding("Value", converter: doubleToInt, converterParameter: "255", stringFormat: "Red = {0}", source: redSlider));
Grid.SetRow(redLabel, 1);
childGrid.Add(redLabel);
greenSlider = new Slider();
greenSlider.ValueChanged += OnSliderValueChanged;
Grid.SetRow(greenSlider, 2);
childGrid.Add(greenSlider);
Label greenLabel = new Label();
greenLabel.SetBinding(Label.TextProperty, new Binding("Value", converter: doubleToInt, converterParameter: "255", stringFormat: "Green = {0}", source: greenSlider));
Grid.SetRow(greenLabel, 3);
childGrid.Add(greenLabel);
blueSlider = new Slider();
blueSlider.ValueChanged += OnSliderValueChanged;
Grid.SetRow(blueSlider, 4);
childGrid.Add(blueSlider);
Label blueLabel = new Label();
blueLabel.SetBinding(Label.TextProperty, new Binding("Value", converter: doubleToInt, converterParameter: "255", stringFormat: "Blue = {0}", source: blueSlider));
Grid.SetRow(blueLabel, 5);
childGrid.Add(blueLabel);
// Place the child Grid in the root Grid
rootGrid.Add(childGrid, 0, 1);
Title = "Nested Grids demo";
Content = rootGrid;
}
void OnSliderValueChanged(object sender, ValueChangedEventArgs e)
{
boxView.Color = new Color(redSlider.Value, greenSlider.Value, blueSlider.Value);
}
}
HorizontalStackLayout
定义 HorizontalStackLayout 以下属性:
Spacing,类型 double为 ,指示每个子视图之间的空间量。 此属性的默认值为 0。
此属性由 BindableProperty 对象提供支持,这意味着它可以是数据绑定的目标和样式。
以下 XAML 演示如何创建 HorizontalStackLayout 包含不同子视图的 :
XAML
<ContentPage xmlns="http://schemas.microsoft.com/dotnet/2021/maui"
xmlns:x="http://schemas.microsoft.com/winfx/2009/xaml"
x:Class="StackLayoutDemos.Views.HorizontalStackLayoutPage">
<HorizontalStackLayout Margin="20">
<Rectangle Fill="Red"
HeightRequest="30"
WidthRequest="30" />
<Label Text="Red"
FontSize="18" />
</HorizontalStackLayout>
</ContentPage>
此示例创建 HorizontalStackLayout 包含 Rectangle 和 Label 对象的 。 默认情况下,子视图之间没有空格

子视图之间的间距
可以通过将 属性设置为 Spacing 值double来更改 中HorizontalStackLayout子视图之间的间距:
复制
<ContentPage xmlns="http://schemas.microsoft.com/dotnet/2021/maui"
xmlns:x="http://schemas.microsoft.com/winfx/2009/xaml"
x:Class="StackLayoutDemos.Views.HorizontalStackLayoutPage">
<HorizontalStackLayout Margin="20"
Spacing="10">
<Rectangle Fill="Red"
HeightRequest="30"
WidthRequest="30" />
<Label Text="Red"
FontSize="18" />
</HorizontalStackLayout>
</ContentPage>
此示例创建一个 HorizontalStackLayout ,其中包含 Rectangle 和 一个 Label 对象,它们之间有 10 个与设备无关的空间单位:

子视图的位置和大小
中 HorizontalStackLayout 子视图的大小和位置取决于子视图和 HeightRequestWidthRequest 属性的值及其属性的值 VerticalOptions 。 在 中 HorizontalStackLayout,当子视图的大小未显式设置时,将展开以填充可用高度。
VerticalOptions的 属性HorizontalStackLayout及其子视图可以设置为 结构中的LayoutOptions字段,这封装了对齐布局首选项。 此布局首选项确定子视图在其父布局中的位置和大小。
以下 XAML 示例设置 中每个子视图的 HorizontalStackLayout对齐首选项:
XAML
<ContentPage xmlns="http://schemas.microsoft.com/dotnet/2021/maui"
xmlns:x="http://schemas.microsoft.com/winfx/2009/xaml"
x:Class="StackLayoutDemos.Views.HorizontalStackLayoutPage">
<HorizontalStackLayout Margin="20"
HeightRequest="200">
<Label Text="Start"
BackgroundColor="Gray"
VerticalOptions="Start" />
<Label Text="Center"
BackgroundColor="Gray"
VerticalOptions="Center" />
<Label Text="End"
BackgroundColor="Gray"
VerticalOptions="End" />
<Label Text="Fill"
BackgroundColor="Gray"
VerticalOptions="Fill" />
</HorizontalStackLayout>
</ContentPage>
在此示例中,对 对象设置了对齐首选项, Label 以控制它们在 中 HorizontalStackLayout的位置。 、、 和 字段用于定义父 HorizontalStackLayout内对象的对齐方式Label:FillEndCenterStart
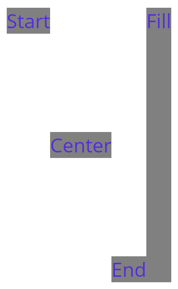 。
。
HorizontalStackLayout仅遵循与布局方向相反的子视图的对齐首选项。 因此, 中的LabelHorizontalStackLayout子视图将其VerticalOptions属性设置为对齐字段之一:
Start,它将 定位 Label 在 的 HorizontalStackLayout开头。
Center,在 中HorizontalStackLayout垂直居中Label。
End,它将 定位 Label 在 的 HorizontalStackLayout末尾。
Fill,这可确保 Label 填充 的高度 HorizontalStackLayout。
嵌套 HorizontalStackLayout 对象
HorizontalStackLayout可用作包含其他嵌套子布局的父布局。
以下 XAML 演示在 中HorizontalStackLayout嵌套 VerticalStackLayout 对象的示例:
XAML
<ContentPage xmlns="http://xamarin.com/schemas/2014/forms"
xmlns:x="http://schemas.microsoft.com/winfx/2009/xaml"
x:Class="StackLayoutDemos.Views.HorizontalStackLayoutPage">
<HorizontalStackLayout Margin="20"
Spacing="6">
<Label Text="Primary colors:" />
<VerticalStackLayout Spacing="6">
<Rectangle Fill="Red"
WidthRequest="30"
HeightRequest="30" />
<Rectangle Fill="Yellow"
WidthRequest="30"
HeightRequest="30" />
<Rectangle Fill="Blue"
WidthRequest="30"
HeightRequest="30" />
</VerticalStackLayout>
<Label Text="Secondary colors:" />
<VerticalStackLayout Spacing="6">
<Rectangle Fill="Green"
WidthRequest="30"
HeightRequest="30" />
<Rectangle Fill="Orange"
WidthRequest="30"
HeightRequest="30" />
<Rectangle Fill="Purple"
WidthRequest="30"
HeightRequest="30" />
</VerticalStackLayout>
</HorizontalStackLayout>
</ContentPage>
在此示例中,父级 HorizontalStackLayout 包含两个嵌套 VerticalStackLayout 对象:
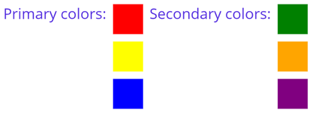
StackLayout
StackLayout 类定义了以下属性:
Orientation,属于 类型 StackOrientation,表示子视图的定位方向。 此属性的默认值为 Vertical。
Spacing,类型 double为 ,指示每个子视图之间的空间量。 此属性的默认值为 0。
这些属性由 BindableProperty 对象支持,这意味着属性可以是数据绑定的目标和样式。
垂直方向
以下 XAML 演示如何创建包含不同子视图的垂直方向 StackLayout :
XAML
复制
<ContentPage xmlns="http://schemas.microsoft.com/dotnet/2021/maui"
xmlns:x="http://schemas.microsoft.com/winfx/2009/xaml"
x:Class="StackLayoutDemos.Views.XAML.VerticalStackLayoutPage"
Title="Vertical StackLayout demo">
<StackLayout Margin="20">
<Label Text="Primary colors" />
<BoxView Color="Red"
HeightRequest="40" />
<BoxView Color="Yellow"
HeightRequest="40" />
<BoxView Color="Blue"
HeightRequest="40" />
<Label Text="Secondary colors" />
<BoxView Color="Green"
HeightRequest="40" />
<BoxView Color="Orange"
HeightRequest="40" />
<BoxView Color="Purple"
HeightRequest="40" />
</StackLayout>
</ContentPage>
此示例创建一个包含 Label 和 BoxView 对象的垂直StackLayout对象。 默认情况下,子视图之间没有空格:
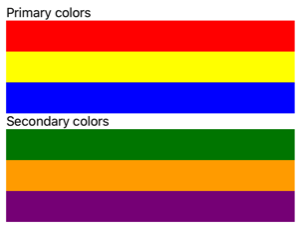
等效 C# 代码如下:
C#
复制
public class VerticalStackLayoutPage : ContentPage
{
public VerticalStackLayoutPage()
{
Title = "Vertical StackLayout demo";
StackLayout stackLayout = new StackLayout { Margin = new Thickness(20) };
stackLayout.Add(new Label { Text = "Primary colors" });
stackLayout.Add(new BoxView { Color = Colors.Red, HeightRequest = 40 });
stackLayout.Add(new BoxView { Color = Colors.Yellow, HeightRequest = 40 });
stackLayout.Add(new BoxView { Color = Colors.Blue, HeightRequest = 40 });
stackLayout.Add(new Label { Text = "Secondary colors" });
stackLayout.Add(new BoxView { Color = Colors.Green, HeightRequest = 40 });
stackLayout.Add(new BoxView { Color = Colors.Orange, HeightRequest = 40 });
stackLayout.Add(new BoxView { Color = Colors.Purple, HeightRequest = 40 });
Content = stackLayout;
}
}
备注
属性的值 Margin 表示元素与其相邻元素之间的距离。 有关详细信息,请参阅 位置控件。
水平方向
以下 XAML 演示如何通过将 属性Orientation设置为 Horizontal来创建水平方向StackLayout的 :
XAML
复制
<ContentPage xmlns="http://schemas.microsoft.com/dotnet/2021/maui"
xmlns:x="http://schemas.microsoft.com/winfx/2009/xaml"
x:Class="StackLayoutDemos.Views.XAML.HorizontalStackLayoutPage"
Title="Horizontal StackLayout demo">
<StackLayout Margin="20"
Orientation="Horizontal"
HorizontalOptions="Center">
<BoxView Color="Red"
WidthRequest="40" />
<BoxView Color="Yellow"
WidthRequest="40" />
<BoxView Color="Blue"
WidthRequest="40" />
<BoxView Color="Green"
WidthRequest="40" />
<BoxView Color="Orange"
WidthRequest="40" />
<BoxView Color="Purple"
WidthRequest="40" />
</StackLayout>
</ContentPage>
此示例创建一个水平 StackLayout 包含 BoxView 对象,子视图之间没有空格:
等效 C# 代码如下:
C#
复制
public class HorizontalStackLayoutPage : ContentPage
{
public HorizontalStackLayoutPage()
{
Title = "Horizontal StackLayout demo";
StackLayout stackLayout = new StackLayout
{
Margin = new Thickness(20),
Orientation = StackOrientation.Horizontal,
HorizontalOptions = LayoutOptions.Center
};
stackLayout.Add(new BoxView { Color = Colors.Red, WidthRequest = 40 });
stackLayout.Add(new BoxView { Color = Colors.Yellow, WidthRequest = 40 });
stackLayout.Add(new BoxView { Color = Colors.Blue, WidthRequest = 40 });
stackLayout.Add(new BoxView { Color = Colors.Green, WidthRequest = 40 });
stackLayout.Add(new BoxView { Color = Colors.Orange, WidthRequest = 40 });
stackLayout.Add(new BoxView { Color = Colors.Purple, WidthRequest = 40 });
Content = stackLayout;
}
}
子视图之间的间距
可以通过将 属性设置为 Spacing 值double来更改 中StackLayout子视图之间的间距:
XAML
复制
<ContentPage xmlns="http://schemas.microsoft.com/dotnet/2021/maui"
xmlns:x="http://schemas.microsoft.com/winfx/2009/xaml"
x:Class="StackLayoutDemos.Views.XAML.StackLayoutSpacingPage"
Title="StackLayout Spacing demo">
<StackLayout Margin="20"
Spacing="6">
<Label Text="Primary colors" />
<BoxView Color="Red"
HeightRequest="40" />
<BoxView Color="Yellow"
HeightRequest="40" />
<BoxView Color="Blue"
HeightRequest="40" />
<Label Text="Secondary colors" />
<BoxView Color="Green"
HeightRequest="40" />
<BoxView Color="Orange"
HeightRequest="40" />
<BoxView Color="Purple"
HeightRequest="40" />
</StackLayout>
</ContentPage>
此示例创建一个垂直 StackLayout 包含 Label 和 BoxView 对象,这些对象之间具有六个与设备无关的垂直空间单位:
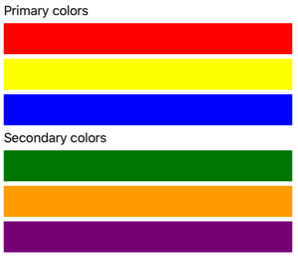
提示
可以将 Spacing 属性设置为负值,使子视图重叠。
等效 C# 代码如下:
C#
复制
public class StackLayoutSpacingPage : ContentPage
{
public StackLayoutSpacingPage()
{
Title = "StackLayout Spacing demo";
StackLayout stackLayout = new StackLayout
{
Margin = new Thickness(20),
Spacing = 6
};
stackLayout.Add(new Label { Text = "Primary colors" });
stackLayout.Add(new BoxView { Color = Colors.Red, HeightRequest = 40 });
stackLayout.Add(new BoxView { Color = Colors.Yellow, HeightRequest = 40 });
stackLayout.Add(new BoxView { Color = Colors.Blue, HeightRequest = 40 });
stackLayout.Add(new Label { Text = "Secondary colors" });
stackLayout.Add(new BoxView { Color = Colors.Green, HeightRequest = 40 });
stackLayout.Add(new BoxView { Color = Colors.Orange, HeightRequest = 40 });
stackLayout.Add(new BoxView { Color = Colors.Purple, HeightRequest = 40 });
Content = stackLayout;
}
}
子视图的位置和大小
中StackLayout子视图的大小和位置取决于子视图 和 WidthRequestHeightRequest 属性的值及其 和 VerticalOptions 属性的值HorizontalOptions。 在垂直 StackLayout中,当子视图的大小未显式设置时,将展开以填充可用宽度。 同样,在水平 StackLayout中,当子视图的大小未显式设置时,将展开以填充可用高度。
HorizontalOptions及其子视图的 StackLayout和 VerticalOptions 属性可以设置为 结构中的LayoutOptions字段,这封装对齐布局首选项。 此布局首选项确定子视图在其父布局中的位置和大小。
以下 XAML 示例设置 中每个子视图的 StackLayout对齐首选项:
XAML
复制
<ContentPage xmlns="http://schemas.microsoft.com/dotnet/2021/maui"
xmlns:x="http://schemas.microsoft.com/winfx/2009/xaml"
x:Class="StackLayoutDemos.Views.XAML.AlignmentPage"
Title="Alignment demo">
<StackLayout Margin="20"
Spacing="6">
<Label Text="Start"
BackgroundColor="Gray"
HorizontalOptions="Start" />
<Label Text="Center"
BackgroundColor="Gray"
HorizontalOptions="Center" />
<Label Text="End"
BackgroundColor="Gray"
HorizontalOptions="End" />
<Label Text="Fill"
BackgroundColor="Gray"
HorizontalOptions="Fill" />
</StackLayout>
</ContentPage>
在此示例中,对 对象设置了对齐首选项, Label 以控制它们在 中 StackLayout的位置。 、、 和 字段用于定义父 StackLayout内对象的对齐方式Label:FillEndCenterStart

StackLayout 仅遵循与 StackLayout 方向相反的子视图的对齐方式首选项。 因此,垂直方向的 StackLayout 中的 Label 子视图将其 HorizontalOptions 属性设置为对齐方式字段中的其中一种:
Start,它将 定位 Label 在 的 StackLayout左侧。
Center,它将 Label 置于 StackLayout 中心。
End,它将 定位 Label 在 的 StackLayout右侧。
Fill,确保 Label 填充到 StackLayout 的宽度。
等效 C# 代码如下:
C#
复制
public class AlignmentPage : ContentPage
{
public AlignmentPage()
{
Title = "Alignment demo";
StackLayout stackLayout = new StackLayout
{
Margin = new Thickness(20),
Spacing = 6
};
stackLayout.Add(new Label { Text = "Start", BackgroundColor = Colors.Gray, HorizontalOptions = LayoutOptions.Start });
stackLayout.Add(new Label { Text = "Center", BackgroundColor = Colors.Gray, HorizontalOptions = LayoutOptions.Center });
stackLayout.Add(new Label { Text = "End", BackgroundColor = Colors.Gray, HorizontalOptions = LayoutOptions.End });
stackLayout.Add(new Label { Text = "Fill", BackgroundColor = Colors.Gray, HorizontalOptions = LayoutOptions.Fill });
Content = stackLayout;
}
}
有关对齐的详细信息,请参阅 对齐布局中的视图。
嵌套的 StackLayout 对象
StackLayout可用作包含嵌套子StackLayout对象的父布局或其他子布局。
以下 XAML 演示嵌套 StackLayout 对象的示例:
XAML
复制
<ContentPage xmlns="http://schemas.microsoft.com/dotnet/2021/maui"
xmlns:x="http://schemas.microsoft.com/winfx/2009/xaml"
x:Class="StackLayoutDemos.Views.XAML.CombinedStackLayoutPage"
Title="Combined StackLayouts demo">
<StackLayout Margin="20">
...
<Frame BorderColor="Black"
Padding="5">
<StackLayout Orientation="Horizontal"
Spacing="15">
<BoxView Color="Red"
WidthRequest="40" />
<Label Text="Red"
FontSize="18"
VerticalOptions="Center" />
</StackLayout>
</Frame>
<Frame BorderColor="Black"
Padding="5">
<StackLayout Orientation="Horizontal"
Spacing="15">
<BoxView Color="Yellow"
WidthRequest="40" />
<Label Text="Yellow"
FontSize="18"
VerticalOptions="Center" />
</StackLayout>
</Frame>
<Frame BorderColor="Black"
Padding="5">
<StackLayout Orientation="Horizontal"
Spacing="15">
<BoxView Color="Blue"
WidthRequest="40" />
<Label Text="Blue"
FontSize="18"
VerticalOptions="Center" />
</StackLayout>
</Frame>
...
</StackLayout>
</ContentPage>
在此示例中,父StackLayout对象包含对象内的Frame嵌套StackLayout对象。 父 StackLayout 对象垂直方向,而子 StackLayout 对象水平方向:
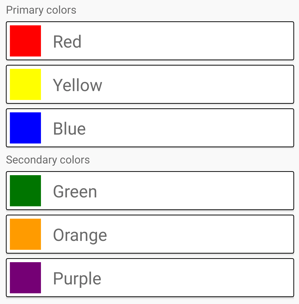
重要
嵌套 StackLayout 对象和其他布局越深,嵌套布局对性能的影响就越大。
等效 C# 代码如下:
C#
复制
public class CombinedStackLayoutPage : ContentPage
{
public CombinedStackLayoutPage()
{
Title = "Combined StackLayouts demo";
Frame frame1 = new Frame
{
BorderColor = Colors.Black,
Padding = new Thickness(5)
};
StackLayout frame1StackLayout = new StackLayout
{
Orientation = StackOrientation.Horizontal,
Spacing = 15
};
frame1StackLayout.Add(new BoxView { Color = Colors.Red, WidthRequest = 40 });
frame1StackLayout.Add(new Label { Text = "Red", FontSize = 22, VerticalOptions = LayoutOptions.Center });
frame1.Content = frame1StackLayout;
Frame frame2 = new Frame
{
BorderColor = Colors.Black,
Padding = new Thickness(5)
};
StackLayout frame2StackLayout = new StackLayout
{
Orientation = StackOrientation.Horizontal,
Spacing = 15
};
frame2StackLayout.Add(new BoxView { Color = Colors.Yellow, WidthRequest = 40 });
frame2StackLayout.Add(new Label { Text = "Yellow", FontSize = 22, VerticalOptions = LayoutOptions.Center });
frame2.Content = frame2StackLayout;
Frame frame3 = new Frame
{
BorderColor = Colors.Black,
Padding = new Thickness(5)
};
StackLayout frame3StackLayout = new StackLayout
{
Orientation = StackOrientation.Horizontal,
Spacing = 15
};
frame3StackLayout.Add(new BoxView { Color = Colors.Blue, WidthRequest = 40 });
frame3StackLayout.Add(new Label { Text = "Blue", FontSize = 22, VerticalOptions = LayoutOptions.Center });
frame3.Content = frame3StackLayout;
...
StackLayout stackLayout = new StackLayout { Margin = new Thickness(20) };
stackLayout.Add(new Label { Text = "Primary colors" });
stackLayout.Add(frame1);
stackLayout.Add(frame2);
stackLayout.Add(frame3);
stackLayout.Add(new Label { Text = "Secondary colors" });
stackLayout.Add(frame4);
stackLayout.Add(frame5);
stackLayout.Add(frame6);
Content = stackLayout;
}
}
VerticalStackLayout
定义 VerticalStackLayout 以下属性:
Spacing,类型 double为 ,指示每个子视图之间的空间量。 此属性的默认值为 0。
此属性由 BindableProperty 对象提供支持,这意味着它可以是数据绑定的目标和样式。
以下 XAML 演示如何创建 VerticalStackLayout 包含不同子视图的 :
XAML
<ContentPage xmlns="http://schemas.microsoft.com/dotnet/2021/maui"
xmlns:x="http://schemas.microsoft.com/winfx/2009/xaml"
x:Class="StackLayoutDemos.Views.VerticalStackLayoutPage">
<VerticalStackLayout Margin="20">
<Label Text="Primary colors" />
<Rectangle Fill="Red"
HeightRequest="30"
WidthRequest="300" />
<Rectangle Fill="Yellow"
HeightRequest="30"
WidthRequest="300" />
<Rectangle Fill="Blue"
HeightRequest="30"
WidthRequest="300" />
<Label Text="Secondary colors" />
<Rectangle Fill="Green"
HeightRequest="30"
WidthRequest="300" />
<Rectangle Fill="Orange"
HeightRequest="30"
WidthRequest="300" />
<Rectangle Fill="Purple"
HeightRequest="30"
WidthRequest="300" />
</VerticalStackLayout>
</ContentPage>
此示例创建一个 VerticalStackLayout 包含 Label 和 Rectangle 对象的 。 默认情况下,子视图之间没有空格:
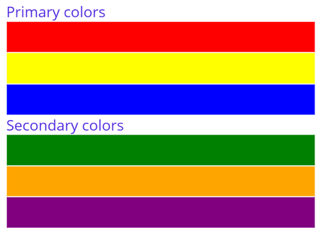
备注
属性的值 Margin 表示元素与其相邻元素之间的距离。 有关详细信息,请参阅 位置控件。
子视图之间的间距
可以通过将 属性设置为 Spacing 值double来更改 中VerticalStackLayout子视图之间的间距:
XAML
<ContentPage xmlns="http://schemas.microsoft.com/dotnet/2021/maui"
xmlns:x="http://schemas.microsoft.com/winfx/2009/xaml"
x:Class="StackLayoutDemos.Views.VerticalStackLayoutPage">
<VerticalStackLayout Margin="20"
Spacing="10">
<Label Text="Primary colors" />
<Rectangle Fill="Red"
HeightRequest="30"
WidthRequest="300" />
<Rectangle Fill="Yellow"
HeightRequest="30"
WidthRequest="300" />
<Rectangle Fill="Blue"
HeightRequest="30"
WidthRequest="300" />
<Label Text="Secondary colors" />
<Rectangle Fill="Green"
HeightRequest="30"
WidthRequest="300" />
<Rectangle Fill="Orange"
HeightRequest="30"
WidthRequest="300" />
<Rectangle Fill="Purple"
HeightRequest="30"
WidthRequest="300" />
</VerticalStackLayout>
</ContentPage>
此示例创建一个 VerticalStackLayout 包含 Label 和 Rectangle 对象的 ,这些对象在子视图之间具有 10 个与设备无关的空间单位:
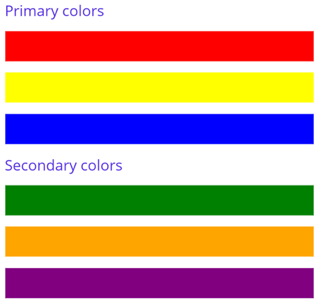
提示
可以将 Spacing 属性设置为负值,使子视图重叠。
子视图的位置和大小
中 VerticalStackLayout 子视图的大小和位置取决于子视图和 HeightRequestWidthRequest 属性的值及其属性的值 HorizontalOptions 。 在 中 VerticalStackLayout,当子视图的大小未显式设置时,将展开以填充可用宽度。
HorizontalOptions的 属性VerticalStackLayout及其子视图可以设置为 结构中的LayoutOptions字段,这封装了对齐布局首选项。 此布局首选项确定子视图在其父布局中的位置和大小。
提示
除非需要, HorizontalOptions 否则不要设置 的 VerticalStackLayout 属性。 的默认值 LayoutOptions.Fill 可实现最佳布局优化。 更改此属性会付出代价并消耗内存,即使将其设置回默认值也是如此。
以下 XAML 示例设置 中每个子视图的 VerticalStackLayout对齐首选项:
XAML
<ContentPage xmlns="http://schemas.microsoft.com/dotnet/2021/maui"
xmlns:x="http://schemas.microsoft.com/winfx/2009/xaml"
x:Class="StackLayoutDemos.Views.VerticalStackLayoutPage">
<VerticalStackLayout Margin="20"
Spacing="6">
<Label Text="Start"
BackgroundColor="Gray"
HorizontalOptions="Start" />
<Label Text="Center"
BackgroundColor="Gray"
HorizontalOptions="Center" />
<Label Text="End"
BackgroundColor="Gray"
HorizontalOptions="End" />
<Label Text="Fill"
BackgroundColor="Gray"
HorizontalOptions="Fill" />
</VerticalStackLayout>
</ContentPage>
在此示例中,对 对象设置了对齐首选项, Label 以控制它们在 中 VerticalStackLayout的位置。 、、 和 字段用于定义父 VerticalStackLayout内对象的对齐方式Label:FillEndCenterStart

VerticalStackLayout仅遵循与布局方向相反的子视图的对齐首选项。 因此, 中的LabelVerticalStackLayout子视图将其HorizontalOptions属性设置为对齐字段之一:
Start,它将 定位 Label 在 的 VerticalStackLayout左侧。
Center,它将 Label 置于 VerticalStackLayout 中心。
End,它将 定位 Label 在 的 VerticalStackLayout右侧。
Fill,确保 Label 填充到 VerticalStackLayout 的宽度。
嵌套 VerticalStackLayout 对象
VerticalStackLayout可用作包含其他嵌套子布局的父布局。
以下 XAML 演示在 中VerticalStackLayout嵌套 HorizontalStackLayout 对象的示例:
XAML
<ContentPage xmlns="http://xamarin.com/schemas/2014/forms"
xmlns:x="http://schemas.microsoft.com/winfx/2009/xaml"
x:Class="StackLayoutDemos.Views.VerticalStackLayoutPage">
<VerticalStackLayout Margin="20"
Spacing="6">
<Label Text="Primary colors" />
<Frame BorderColor="Black"
Padding="5">
<HorizontalStackLayout Spacing="15">
<Rectangle Fill="Red"
HeightRequest="30"
WidthRequest="30" />
<Label Text="Red"
FontSize="18" />
</HorizontalStackLayout>
</Frame>
<Frame BorderColor="Black"
Padding="5">
<HorizontalStackLayout Spacing="15">
<Rectangle Fill="Yellow"
HeightRequest="30"
WidthRequest="30" />
<Label Text="Yellow"
FontSize="18" />
</HorizontalStackLayout>
</Frame>
<Frame BorderColor="Black"
Padding="5">
<HorizontalStackLayout Spacing="15">
<Rectangle Fill="Blue"
HeightRequest="30"
WidthRequest="30" />
<Label Text="Blue"
FontSize="18" />
</HorizontalStackLayout>
</Frame>
</VerticalStackLayout>
</ContentPage>
在此示例中,父VerticalStackLayout级在 对象中包含Frame嵌套HorizontalStackLayout对象:
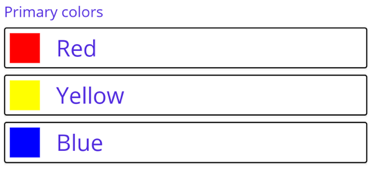
重要
嵌套布局对象越深,嵌套布局对性能的影响就越大。
VerticalStackLayout HoriaontalStackLayout StackLayout Grid AbsoluteLayout FlexLayout
一些属性
WidthRequest:宽
HeightRequest:高
VerticalOptions="FillAndExpand"
HorizontalOptions="FillAndExpand"
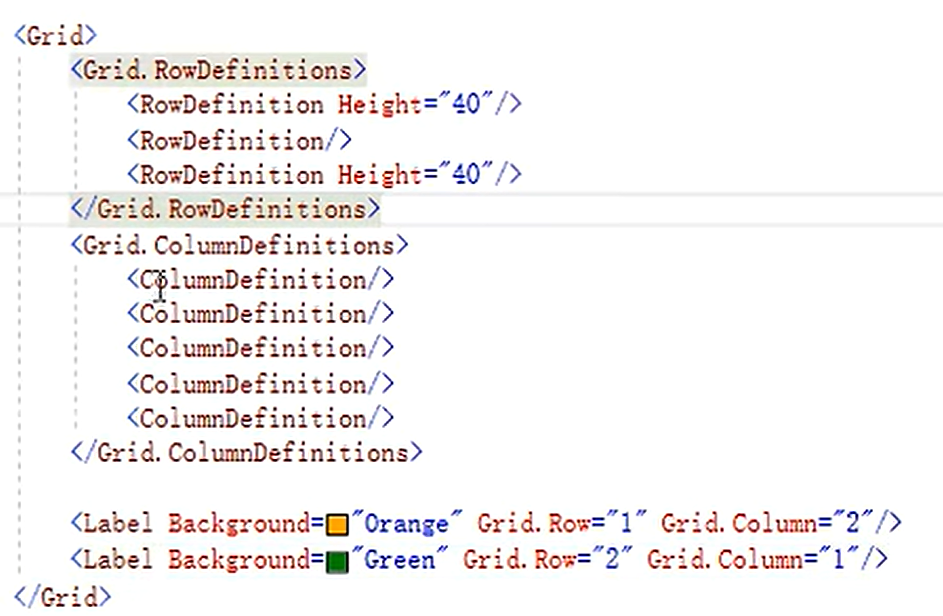
3行5列
其中指定了第一行和第三行行高40,第二行未设置行高自适应
统一样式
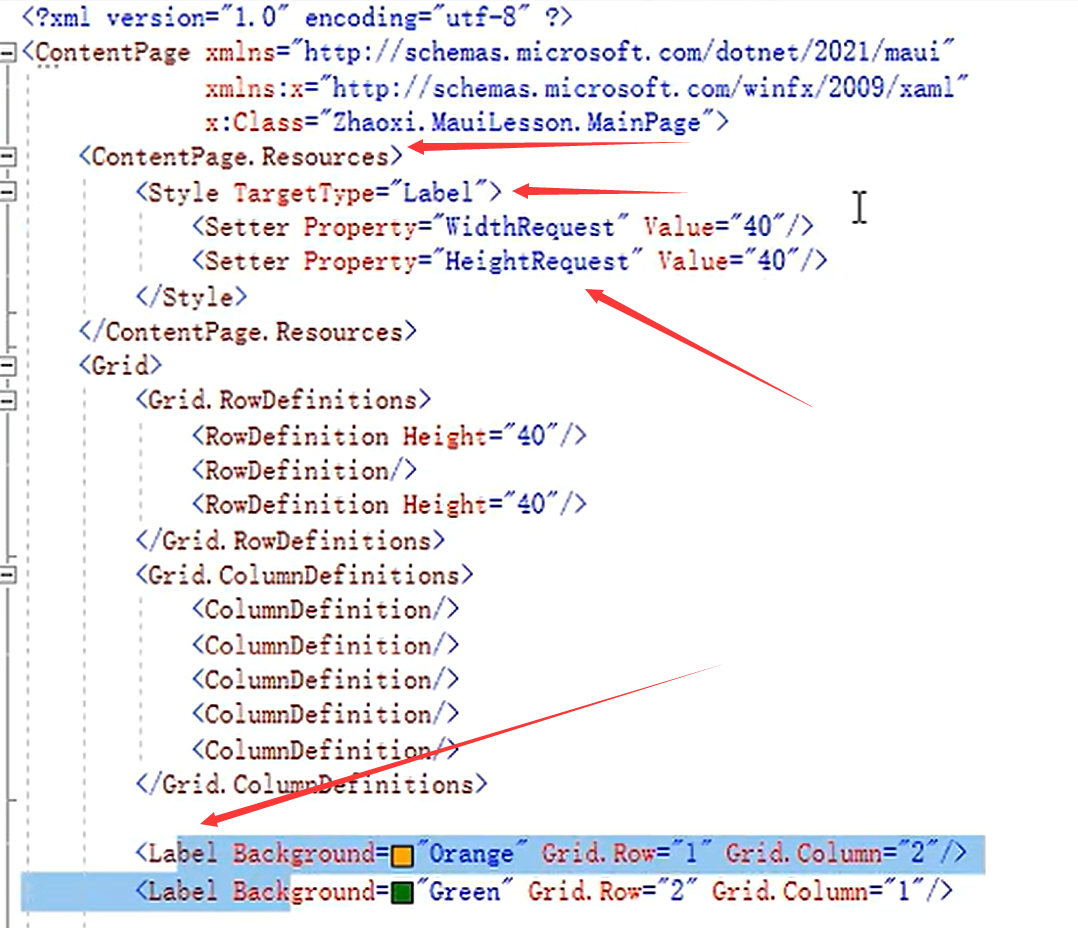
控件模版
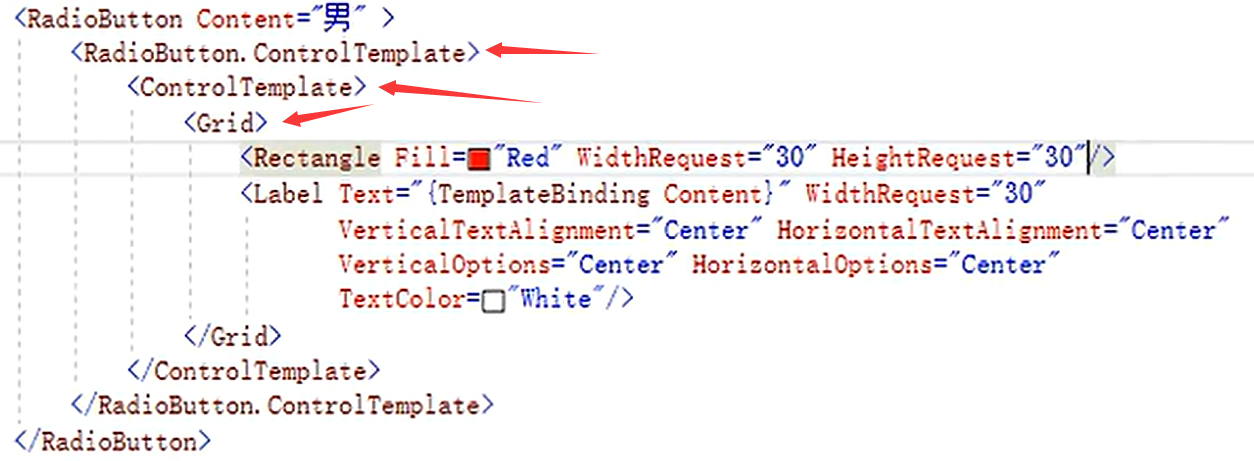
MVVM数据绑定
基本绑定
<ContentPage xmlns="http://schemas.microsoft.com/dotnet/2021/maui"
xmlns:x="http://schemas.microsoft.com/winfx/2009/xaml"
x:Class="DataBindingDemos.BasicCodeBindingPage"
Title="Basic Code Binding">
<StackLayout Padding="10, 0">
<Label x:Name="label"
Text="TEXT"
FontSize="48"
HorizontalOptions="Center"
VerticalOptions="Center" />
<Slider x:Name="slider"
Maximum="360"
VerticalOptions="Center" />
</StackLayout>
</ContentPage>
public partial class BasicCodeBindingPage : ContentPage
{
public BasicCodeBindingPage()
{
InitializeComponent();
label.BindingContext = slider;
label.SetBinding(Label.RotationProperty, "Value");
}
}
Label 对象是绑定目标,因此它是设置该属性和调用该方法的对象。 BindingContext 属性指示绑定源 Slider。 SetBinding 方法在绑定目标上进行调用,但需同时指定目标属性和源属性。 目标属性指定为 BindableProperty 对象:Label.RotationProperty。 源属性指定为字符串,并指示 Slider 的 Value 属性。
或者,可以在 XAML 中指定数据绑定:
<ContentPage xmlns="http://schemas.microsoft.com/dotnet/2021/maui"
xmlns:x="http://schemas.microsoft.com/winfx/2009/xaml"
x:Class="DataBindingDemos.BasicXamlBindingPage"
Title="Basic XAML Binding">
<StackLayout Padding="10, 0">
<Label Text="TEXT"
FontSize="80"
HorizontalOptions="Center"
VerticalOptions="Center"
BindingContext="{x:Reference Name=slider}"
Rotation="{Binding Path=Value}" />
<Slider x:Name="slider"
Maximum="360"
VerticalOptions="Center" />
</StackLayout>
</ContentPage>
没有绑定上下文的绑定
<ContentPage xmlns="http://schemas.microsoft.com/dotnet/2021/maui"
xmlns:x="http://schemas.microsoft.com/winfx/2009/xaml"
x:Class="DataBindingDemos.AlternativeCodeBindingPage"
Title="Alternative Code Binding">
<StackLayout Padding="10, 0">
<Label x:Name="label"
Text="TEXT"
FontSize="40"
HorizontalOptions="Center"
VerticalOptions="CenterAndExpand" />
<Slider x:Name="slider"
Minimum="-2"
Maximum="2"
VerticalOptions="CenterAndExpand" />
</StackLayout>
</ContentPage>
public partial class AlternativeCodeBindingPage : ContentPage
{
public AlternativeCodeBindingPage()
{
InitializeComponent();
label.SetBinding(Label.ScaleProperty, new Binding("Value", source: slider));
}
}
或者,可以在 XAML 中指定数据绑定:
<ContentPage xmlns="http://schemas.microsoft.com/dotnet/2021/maui"
xmlns:x="http://schemas.microsoft.com/winfx/2009/xaml"
x:Class="DataBindingDemos.AlternativeXamlBindingPage"
Title="Alternative XAML Binding">
<StackLayout Padding="10, 0">
<Label Text="TEXT"
FontSize="40"
HorizontalOptions="Center"
VerticalOptions="Center"
Scale="{Binding Source={x:Reference slider},
Path=Value}" />
<Slider x:Name="slider"
Minimum="-2"
Maximum="2"
VerticalOptions="Center" />
</StackLayout>
</ContentPage>

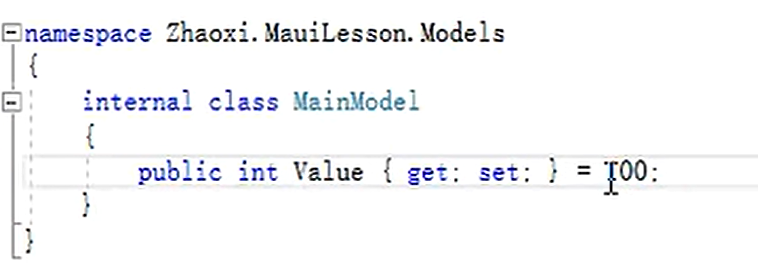
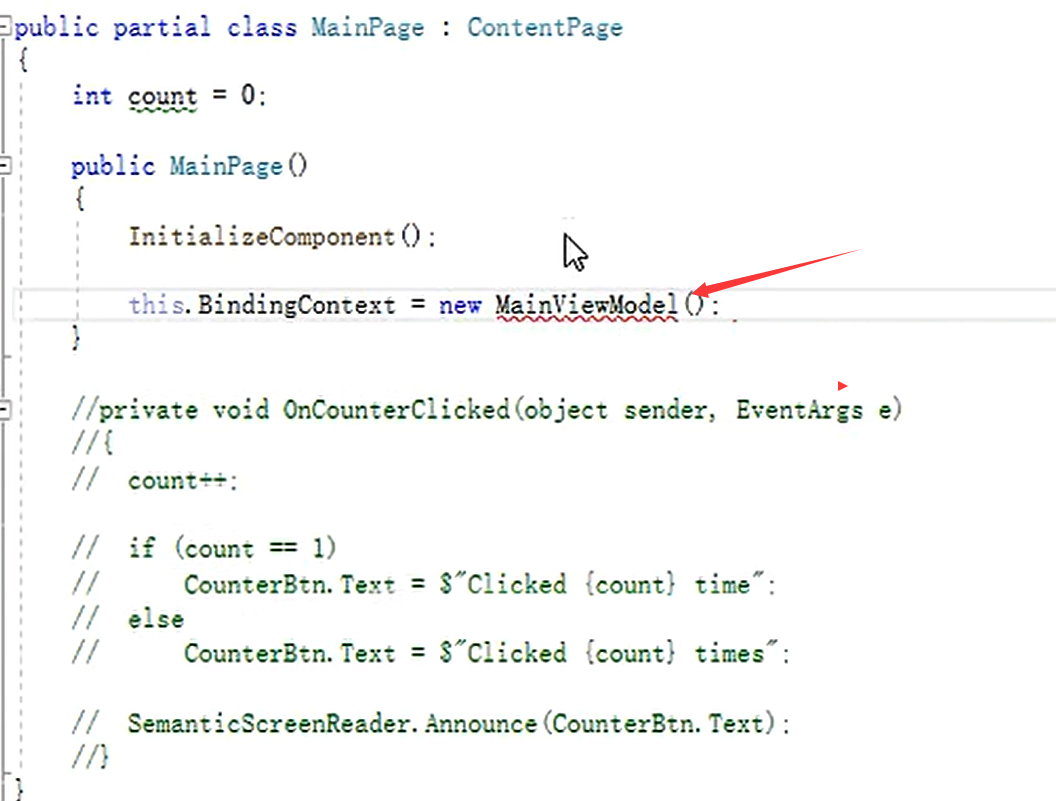
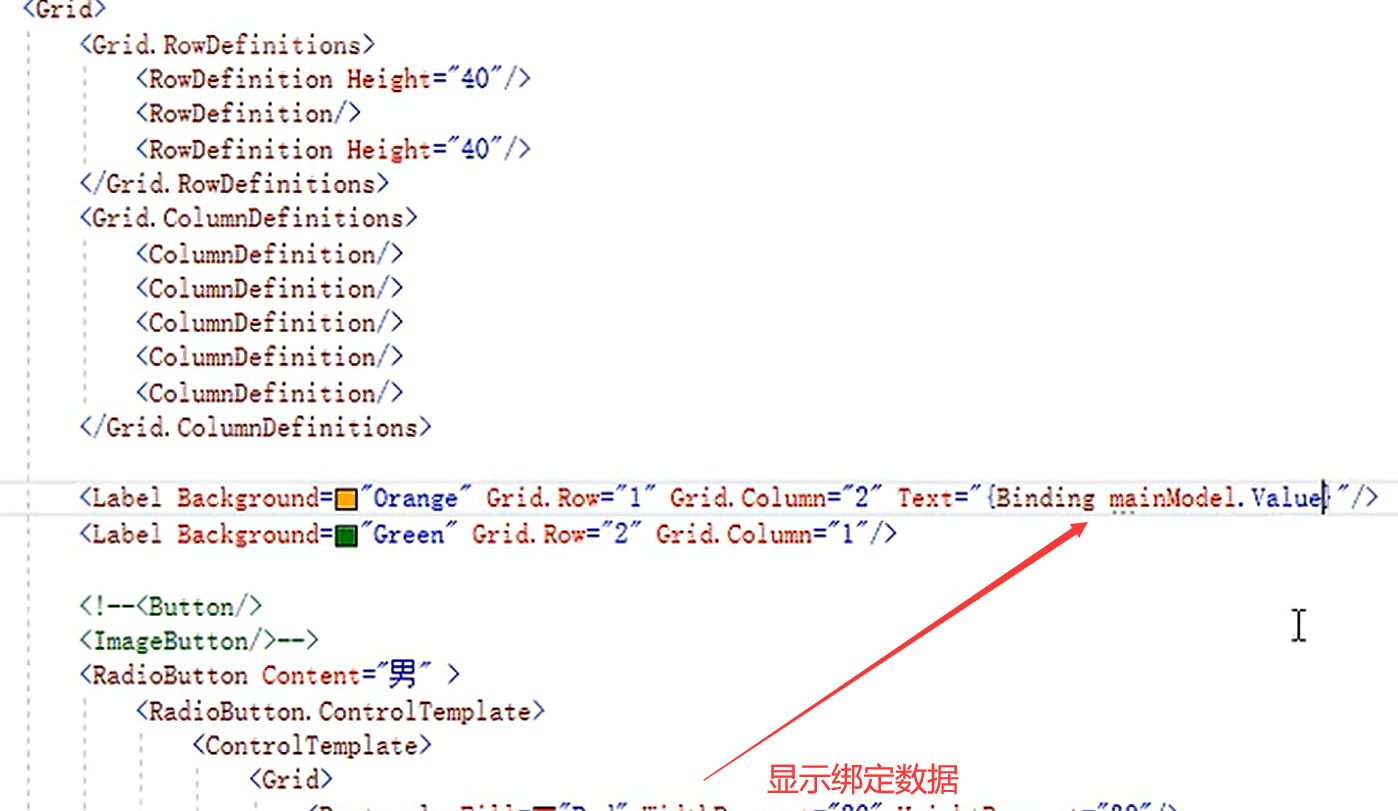
视图到视图绑定
以下示例包含 一个 视图和两Label个Slider视图,其中一个视图由 Slider 值旋转,另一个视图显示Slider值:
XAML
复制
<ContentPage xmlns="http://schemas.microsoft.com/dotnet/2021/maui"
xmlns:x="http://schemas.microsoft.com/winfx/2009/xaml"
x:Class="XamlSamples.SliderBindingsPage"
Title="Slider Bindings Page">
<StackLayout>
<Label Text="ROTATION"
BindingContext="{x:Reference slider}"
Rotation="{Binding Path=Value}"
FontAttributes="Bold"
FontSize="18"
HorizontalOptions="Center"
VerticalOptions="Center" />
<Slider x:Name="slider"
Maximum="360"
VerticalOptions="Center" />
<Label
BindingContext="{x:Reference slider}"
Text="{Binding Value, StringFormat='The angle is {0:F0} degrees'}"
FontAttributes="Bold"
FontSize="18"
HorizontalOptions="Center"
VerticalOptions="Center" />
</StackLayout>
</ContentPage>
包含Slider由两Label个x:Name视图使用标记扩展引用的属性x:Reference。 绑定 x:Reference 扩展定义名为 Name 的属性,以设置为引用元素的名称,在本例 slider中为 。 但是,ReferenceExtension定义标记扩展的x:Reference类也为 Name定义 属性ContentProperty,这意味着它不是显式必需的。
标记Binding扩展本身可以有多个属性,就像 和 Binding 类一BindingBase样。 ContentProperty的 Binding 为 Path,但如果路径是标记扩展中的第一项,则可以省略标记扩展的Binding“Path=”部分。
第二个 Binding 标记扩展设置 StringFormat 属性。 在 .NET MAUI 中,绑定不执行任何隐式类型转换,如果需要将非字符串对象显示为字符串,则必须提供类型转换器或使用 StringFormat。
另一种绑定ListView数据
namespace XamlSamples
{
public class NamedColor
{
public string Name { get; private set; }
public string FriendlyName { get; private set; }
public Color Color { get; private set; }
// Expose the Color fields as properties
public float Red => Color.Red;
public float Green => Color.Green;
public float Blue => Color.Blue;
public static IEnumerable<NamedColor> All { get; private set; }
static NamedColor()
{
List<NamedColor> all = new List<NamedColor>();
StringBuilder stringBuilder = new StringBuilder();
// Loop through the public static fields of the Color structure.
foreach (FieldInfo fieldInfo in typeof(Colors).GetRuntimeFields())
{
if (fieldInfo.IsPublic &&
fieldInfo.IsStatic &&
fieldInfo.FieldType == typeof(Color))
{
// Convert the name to a friendly name.
string name = fieldInfo.Name;
stringBuilder.Clear();
int index = 0;
foreach (char ch in name)
{
if (index != 0 && Char.IsUpper(ch))
{
stringBuilder.Append(' ');
}
stringBuilder.Append(ch);
index++;
}
// Instantiate a NamedColor object.
NamedColor namedColor = new NamedColor
{
Name = name,
FriendlyName = stringBuilder.ToString(),
Color = (Color)fieldInfo.GetValue(null)
};
// Add it to the collection.
all.Add(namedColor);
}
}
all.TrimExcess();
All = all;
}
}
}
<ContentPage xmlns="http://schemas.microsoft.com/dotnet/2021/maui"
xmlns:x="http://schemas.microsoft.com/winfx/2009/xaml"
xmlns:local="clr-namespace:XamlSamples;assembly=XamlSamples"
x:Class="XamlSamples.ListViewDemoPage"
Title="ListView Demo Page">
<ListView ItemsSource="{x:Static local:NamedColor.All}" />
</ContentPage>
ListView显示自定义
<ListView ItemsSource="{x:Static local:NamedColor.All}">
<ListView.ItemTemplate>
<DataTemplate>
<ViewCell>
<Label Text="{Binding FriendlyName}" />
</ViewCell>
</DataTemplate>
</ListView.ItemTemplate>
</ListView>
简单的MVVM
<ContentPage xmlns="http://schemas.microsoft.com/dotnet/2021/maui"
xmlns:x="http://schemas.microsoft.com/winfx/2009/xaml"
xmlns:sys="clr-namespace:System;assembly=netstandard"
x:Class="XamlSamples.OneShotDateTimePage"
Title="One-Shot DateTime Page">
<VerticalStackLayout BindingContext="{x:Static sys:DateTime.Now}"
Spacing="25" Padding="30,0"
VerticalOptions="Center" HorizontalOptions="Center">
<Label Text="{Binding Year, StringFormat='The year is {0}'}" />
<Label Text="{Binding StringFormat='The month is {0:MMMM}'}" />
<Label Text="{Binding Day, StringFormat='The day is {0}'}" />
<Label Text="{Binding StringFormat='The time is {0:T}'}" />
</VerticalStackLayout>
</ContentPage>
在此示例中,检索 DateTime 到的值设置为 BindingContext 上的 StackLayout。 在元素上设置 BindingContext 时,它将由该元素的所有子元素继承。 这意味着 的所有子级 StackLayout 都具有相同的 BindingContext,并且它们可以包含到该对象的属性的绑定:
交互式 MVVM
using System.ComponentModel;
using System.Runtime.CompilerServices;
namespace XamlSamples;
class HslViewModel: INotifyPropertyChanged
{
public event PropertyChangedEventHandler PropertyChanged;
private float _hue, _saturation, _luminosity;
private Color _color;
public float Hue
{
get => _hue;
set
{
if (_hue != value)
Color = Color.FromHsla(value, _saturation, _luminosity);
}
}
public float Saturation
{
get => _saturation;
set
{
if (_saturation != value)
Color = Color.FromHsla(_hue, value, _luminosity);
}
}
public float Luminosity
{
get => _luminosity;
set
{
if (_luminosity != value)
Color = Color.FromHsla(_hue, _saturation, value);
}
}
public Color Color
{
get => _color;
set
{
if (_color != value)
{
_color = value;
_hue = _color.GetHue();
_saturation = _color.GetSaturation();
_luminosity = _color.GetLuminosity();
OnPropertyChanged("Hue");
OnPropertyChanged("Saturation");
OnPropertyChanged("Luminosity");
OnPropertyChanged(); // reports this property
}
}
}
public void OnPropertyChanged([CallerMemberName] string name = "") =>
PropertyChanged?.Invoke(this, new PropertyChangedEventArgs(name));
}
<ContentPage xmlns="http://schemas.microsoft.com/dotnet/2021/maui"
xmlns:x="http://schemas.microsoft.com/winfx/2009/xaml"
xmlns:local="clr-namespace:XamlSamples"
x:Class="XamlSamples.HslColorScrollPage"
Title="HSL Color Scroll Page">
<ContentPage.BindingContext>
<local:HslViewModel Color="Aqua" />
</ContentPage.BindingContext>
<VerticalStackLayout Padding="10, 0, 10, 30">
<BoxView Color="{Binding Color}"
HeightRequest="100"
WidthRequest="100"
HorizontalOptions="Center" />
<Label Text="{Binding Hue, StringFormat='Hue = {0:F2}'}"
HorizontalOptions="Center" />
<Slider Value="{Binding Hue}"
Margin="20,0,20,0" />
<Label Text="{Binding Saturation, StringFormat='Saturation = {0:F2}'}"
HorizontalOptions="Center" />
<Slider Value="{Binding Saturation}"
Margin="20,0,20,0" />
<Label Text="{Binding Luminosity, StringFormat='Luminosity = {0:F2}'}"
HorizontalOptions="Center" />
<Slider Value="{Binding Luminosity}"
Margin="20,0,20,0" />
</VerticalStackLayout>
</ContentPage>
MVVM行为绑定
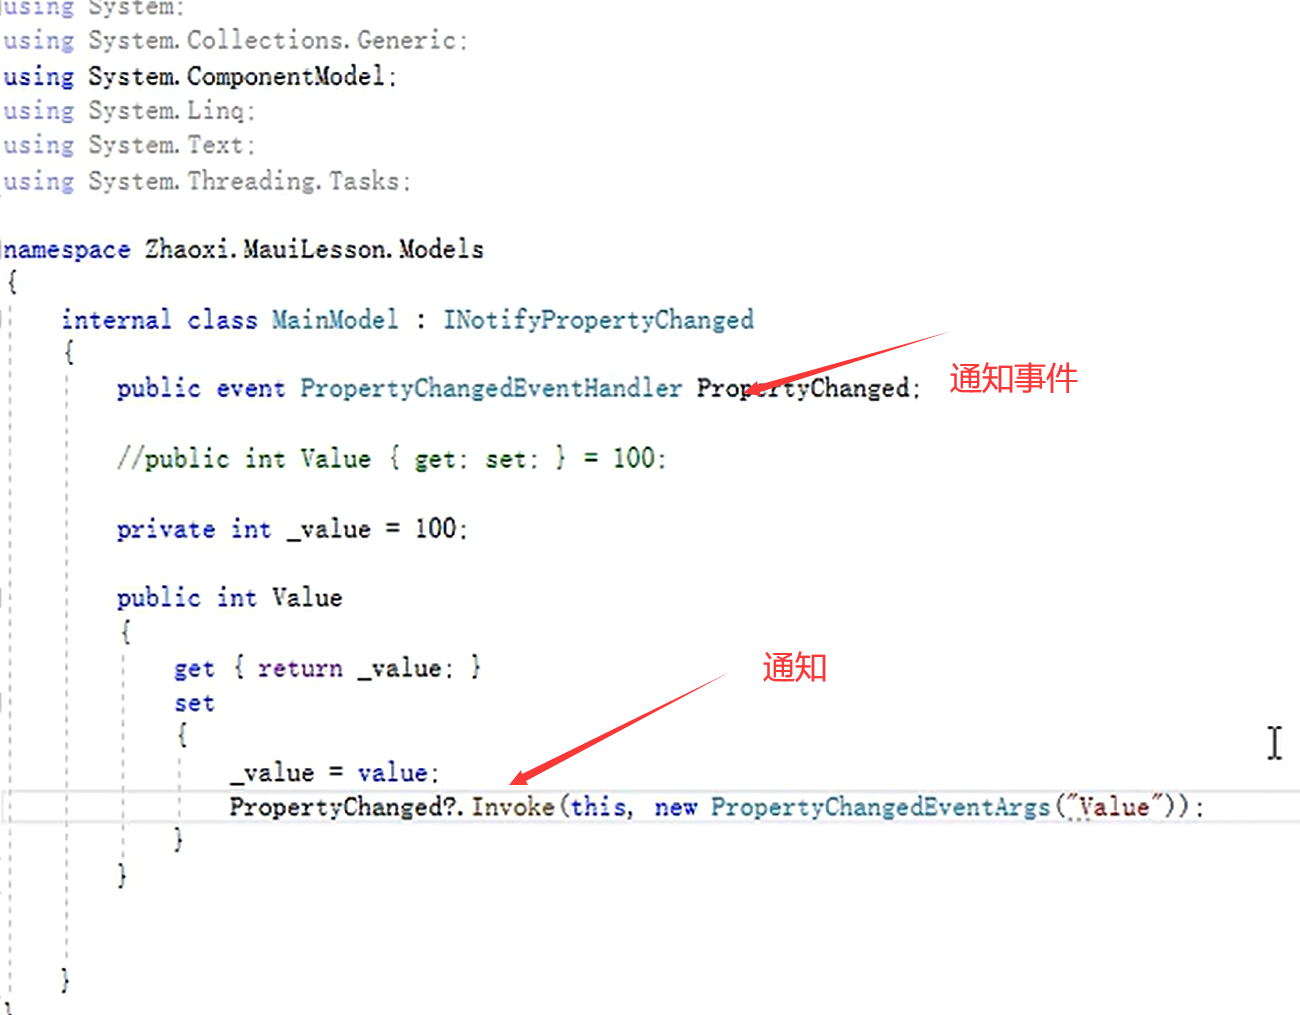
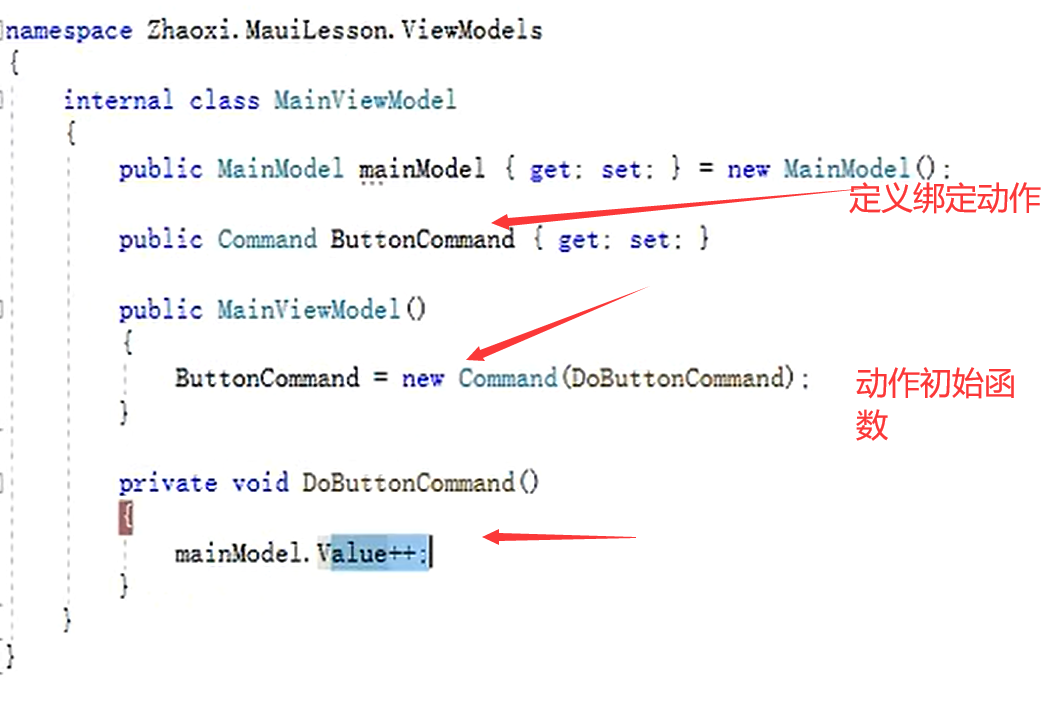

平台集成差异化
设备功能
权限设置 位置 访问联系人。。。
差异化处理
弹窗
this.DisplayAlert(...);
随时弹窗
Application.Current.MainPage.DisplayAlert(...);
跳转到新页
button.Clicked += async (sender, args) =>
{
await Navigation.PushAsync(new HelloXamlPage());
};
MAUI控件
最受期待的 .NET MAUI 控件之一:MediaElemen 现已发布。有了 MediaElement,您可以轻松地在 .NET MAUI 应用程序中播放音频和视频
1.概要
本章将继续介绍.NET MAUI中的常用基础控件,让刚刚接触MAUI的小伙伴有写基础的认识,心里有底开发起来将得心应手。下面将列出一些常用的基础控件:
控件名 中文名称 说明
Button 按钮 与WPF中的基础用法无太大变化
CheckBox 单选框 与WPF中的基础用法无太大变化
ListView 列表 类似WPF中列表控件“ListBox”
ImageButton 图片按钮 WPF中没有该控件,通常需要开发者手动实现,MAUI中已经包含在基础控件中。
Entry 输入框 类似WPF中的输入框控件“TextBox”
TableView 选项卡 类似WPF中"TabControl"
DisplayAlert 消息框 类似WPF中“MessageBox”
2.详细内容
(1)Button点击查看原文
xaml语法:
<Button Text="我是Btn" WidthRequest="200" HeightRequest="50" Command="{Binding OkCommand}" CommandParameter="{Binding}"/>
uncheck状态
check状态
xaml语法:
<CheckBox IsChecked="True"/>
(3)ListView查看原文
xaml语法1:
<ListView ItemsSource="{Binding Temps}" HeightRequest="500" WidthRequest="300"/>
xaml语法2:
<ListView HeightRequest="500" WidthRequest="300">
<ListView.ItemTemplate>
<DataTemplate>
<ViewCell>
<Label Text="我是listview item1" TextColor="Red"></Label>
</ViewCell>
</DataTemplate>
</ListView.ItemTemplate>
</ListView>
<ListView ItemsSource="{Binding Monkeys}">
<ListView.ItemTemplate>
<DataTemplate>
<ViewCell>
<Grid Padding="10">
<Grid.RowDefinitions>
<RowDefinition Height="Auto" />
<RowDefinition Height="Auto" />
</Grid.RowDefinitions>
<Grid.ColumnDefinitions>
<ColumnDefinition Width="Auto" />
<ColumnDefinition Width="Auto" />
</Grid.ColumnDefinitions>
<Image Grid.RowSpan="2"
Source="{Binding ImageUrl}"
Aspect="AspectFill"
HeightRequest="60"
WidthRequest="60" />
<Label Grid.Column="1"
Text="{Binding Name}"
FontAttributes="Bold" />
<Label Grid.Row="1"
Grid.Column="1"
Text="{Binding Location}"
FontAttributes="Italic"
VerticalOptions="End" />
</Grid>
</ViewCell>
</DataTemplate>
</ListView.ItemTemplate>
</ListView>
using System;
using System.Collections.Generic;
using Microsoft.Maui.Controls;
namespace FormsGallery
{
class ListViewDemoPage : ContentPage
{
class Person
{
public Person(string name, DateTime birthday, Color favoriteColor)
{
this.Name = name;
this.Birthday = birthday;
this.FavoriteColor = favoriteColor;
}
public string Name { private set; get; }
public DateTime Birthday { private set; get; }
public Color FavoriteColor { private set; get; }
};
public ListViewDemoPage()
{
Label header = new Label
{
Text = "ListView",
FontSize = Device.GetNamedSize (NamedSize.Large, typeof(Label)),
HorizontalOptions = LayoutOptions.Center
};
// Define some data.
List<Person> people = new List<Person>
{
new Person("Abigail", new DateTime(1975, 1, 15), Color.Aqua),
new Person("Bob", new DateTime(1976, 2, 20), Color.Black),
// ...etc.,...
new Person("Yvonne", new DateTime(1987, 1, 10), Color.Purple),
new Person("Zachary", new DateTime(1988, 2, 5), Color.Red)
};
// Create the ListView.
ListView listView = new ListView
{
// Source of data items.
ItemsSource = people,
// Define template for displaying each item.
// (Argument of DataTemplate constructor is called for
// each item; it must return a Cell derivative.)
ItemTemplate = new DataTemplate(() =>
{
// Create views with bindings for displaying each property.
Label nameLabel = new Label();
nameLabel.SetBinding(Label.TextProperty, "Name");
Label birthdayLabel = new Label();
birthdayLabel.SetBinding(Label.TextProperty,
new Binding("Birthday", BindingMode.OneWay,
null, null, "Born {0:d}"));
BoxView boxView = new BoxView();
boxView.SetBinding(BoxView.ColorProperty, "FavoriteColor");
// Return an assembled ViewCell.
return new ViewCell
{
View = new StackLayout
{
Padding = new Thickness(0, 5),
Orientation = StackOrientation.Horizontal,
Children =
{
boxView,
new StackLayout
{
VerticalOptions = LayoutOptions.Center,
Spacing = 0,
Children =
{
nameLabel,
birthdayLabel
}
}
}
}
};
})
};
// Accomodate iPhone status bar.
this.Padding = new Thickness(10, Device.OnPlatform(20, 0, 0), 10, 5);
// Build the page.
this.Content = new StackLayout
{
Children =
{
header,
listView
}
};
}
}
}
xaml语法:
<ImageButton Source="/img/1.jpg" WidthRequest="200" HeightRequest="50" Command="{Binding OkCommand}" CommandParameter="{Binding}"/>
(5)Entry点击查看原文
xaml语法:
<Entry Text="我是输入框" WidthRequest="100" HeightRequest="50"/>
(6) TableView点击查看原文
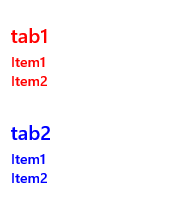
xaml语法:
<TableView HasUnevenRows="True">
<TableView.Root>
<TableSection TextColor="Red" Title="Tab1">
//Cell里也可以放其他内容
<TextCell TextColor="Red" Text="Item1"></TextCell>
<TextCell TextColor="Red" Text="Item2" IsEnabled="False"></TextCell>
</TableSection>
<TableSection TextColor="Blue" Title="Tab2">
<TextCell TextColor="Blue" Text="Item1"></TextCell>
<TextCell TextColor="Blue" Text="Item2" Detail="test">
<TextCell.ContextActions>
<MenuItem Text="More"></MenuItem>
<MenuItem Text="Delete"></MenuItem>
</TextCell.ContextActions>
</TextCell>
</TableSection>
</TableView.Root>
</TableView>
(7) DisplayAlert
C#语法:
DisplayAlert("新消息","新年快乐","ok");
bool answer = await DisplayAlert("Question?", "Would you like to play a game", "Yes", "No");
Debug.WriteLine("Answer: " + answer);
指导用户完成任务
操作表向用户提供一组有关如何继续执行任务的替代项。 若要显示操作工作表,请在 DisplayActionSheet 任何 Page上使用 方法,将消息和按钮标签作为字符串传递:
string action = await DisplayActionSheet("ActionSheet: Send to?", "Cancel", null, "Email", "Twitter", "Facebook");
Debug.WriteLine("Action: " + action);
操作表将以模式方式显示:
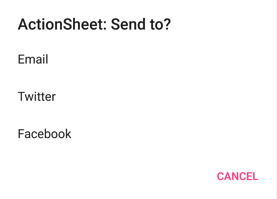
用户点击其中一个按钮后,按钮标签将作为 string返回。
操作表还支持销毁按钮,该按钮表示破坏性行为。 销毁按钮可以指定为 方法的第三个 DisplayActionSheet 字符串参数,也可以保留 null。 以下示例指定销毁按钮:
async void OnActionSheetCancelDeleteClicked(object sender, EventArgs e)
{
string action = await DisplayActionSheet("ActionSheet: SavePhoto?", "Cancel", "Delete", "Photo Roll", "Email");
Debug.WriteLine("Action: " + action);
}
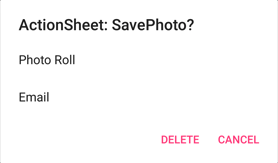
显示提示
若要显示提示,请对任何 Page调用 DisplayPromptAsync ,并将标题和消息作为string参数传递:
string result = await DisplayPromptAsync("Question 1", "What's your name?");
提示以模式方式显示:
如果点击“确定”按钮,则输入的响应将作为 string返回。 如果点击了“取消”按钮, null 则返回 。
方法的完整参数列表 DisplayPromptAsync 为:
title,类型 string为 ,是提示中显示的标题。
message,类型 string为 ,是提示中显示的消息。
accept,类型 string为 ,是接受按钮的文本。 这是一个可选参数,其默认值为 OK。
cancel,类型 string为 ,是取消按钮的文本。 这是一个可选参数,其默认值为 Cancel。
placeholder,属于 类型 string,是提示中显示的占位符文本。 这是一个可选参数,其默认值为 null。
maxLength,属于 类型 int,是用户响应的最大长度。 这是一个可选参数,其默认值为 -1。
keyboard,属于 类型 Keyboard,是用于用户响应的键盘类型。 这是一个可选参数,其默认值为 Keyboard.Default。
initialValue,属于 类型 string,是一个预定义的响应,将显示该响应,并且可以对其进行编辑。 这是一个可选参数,其默认值为空 string。
以下示例演示如何设置一些可选参数:
string result = await DisplayPromptAsync("Question 2", "What's 5 + 5?", initialValue: "10", maxLength: 2, keyboard: Keyboard.Numeric);
此代码显示预定义的响应 10,将可以输入的字符数限制为 2,并显示用户输入的数字键盘:
TabbedPage
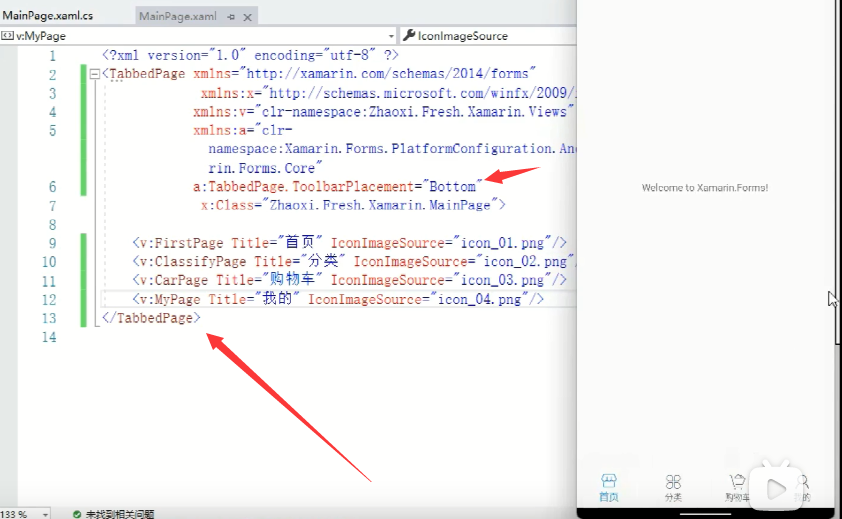
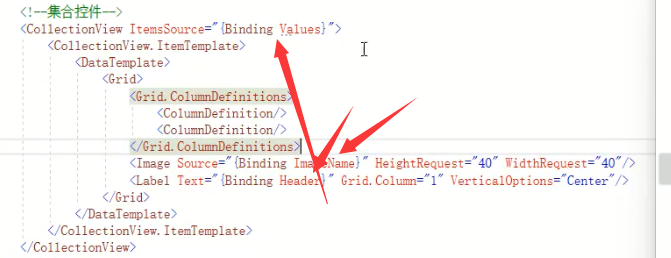
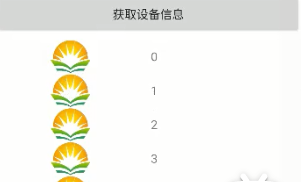
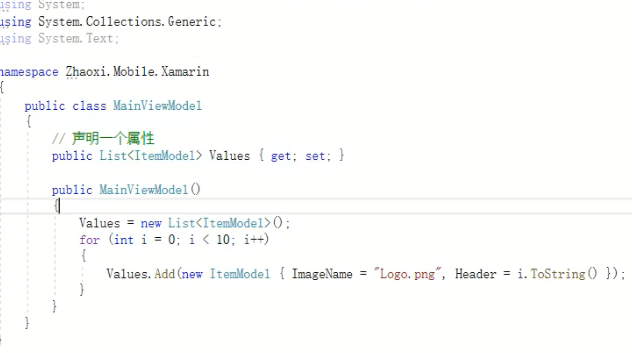
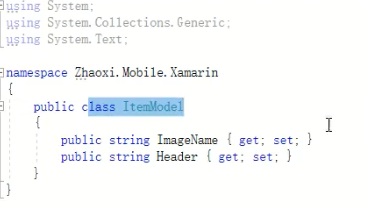
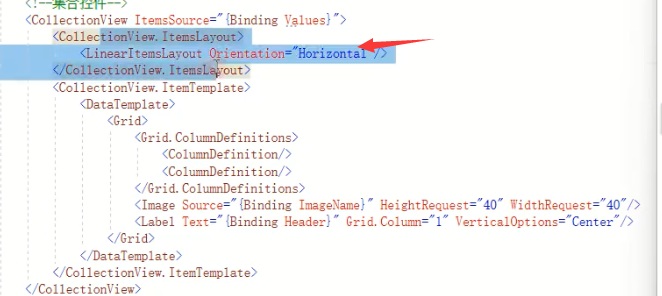

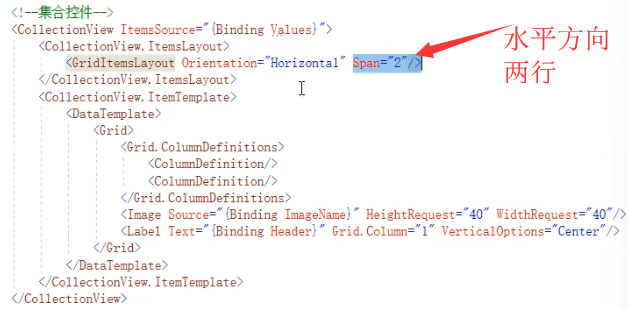
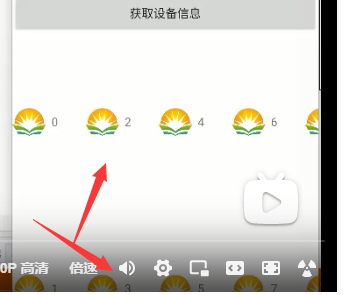
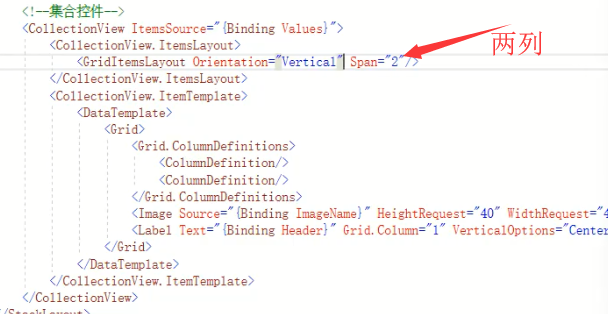
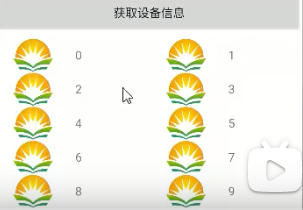
TabBar
<?xml version="1.0" encoding="UTF-8" ?>
<Shell
x:Class="Notes.AppShell"
xmlns="http://schemas.microsoft.com/dotnet/2021/maui"
xmlns:x="http://schemas.microsoft.com/winfx/2009/xaml"
xmlns:local="clr-namespace:Notes"
Shell.FlyoutBehavior="Disabled">
<TabBar>
<ShellContent
Title="Notes"
ContentTemplate="{DataTemplate local:NotePage}"
Icon="{OnPlatform 'icon_notes.png', iOS='icon_notes_ios.png', MacCatalyst='icon_notes_ios.png'}" />
<ShellContent
Title="About"
ContentTemplate="{DataTemplate local:AboutPage}"
Icon="{OnPlatform 'icon_about.png', iOS='icon_about_ios.png', MacCatalyst='icon_about_ios.png'}" />
</TabBar>
</Shell>
AboutPage.xaml
<?xml version="1.0" encoding="utf-8" ?>
<ContentPage xmlns="http://schemas.microsoft.com/dotnet/2021/maui"
xmlns:x="http://schemas.microsoft.com/winfx/2009/xaml"
x:Class="Notes.AboutPage">
<VerticalStackLayout Spacing="10" Margin="10">
<HorizontalStackLayout Spacing="10">
<Image Source="dotnet_bot.png"
SemanticProperties.Description="The dot net bot waving hello!"
HeightRequest="64" />
<Label FontSize="22" FontAttributes="Bold" Text="Notes" VerticalOptions="End" />
<Label FontSize="22" Text="v1.0" VerticalOptions="End" />
</HorizontalStackLayout>
<Label Text="This app is written in XAML and C# with .NET MAUI." />
<Button Text="Learn more..." Clicked="LearnMore_Clicked" />
</VerticalStackLayout>
</ContentPage>
NotePage.xaml
<?xml version="1.0" encoding="utf-8" ?>
<ContentPage xmlns="http://schemas.microsoft.com/dotnet/2021/maui"
xmlns:x="http://schemas.microsoft.com/winfx/2009/xaml"
x:Class="Notes.NotePage"
Title="Note">
<VerticalStackLayout Spacing="10" Margin="5">
<Editor x:Name="TextEditor"
Placeholder="Enter your note"
HeightRequest="100" />
<Grid ColumnDefinitions="*,*" ColumnSpacing="4">
<Button Text="Save"
Clicked="SaveButton_Clicked" />
<Button Grid.Column="1"
Text="Delete"
Clicked="DeleteButton_Clicked" />
</Grid>
</VerticalStackLayout>
</ContentPage>
NotePage.cs
namespace Notes;
public partial class NotePage : ContentPage
{
string _fileName = Path.Combine(FileSystem.AppDataDirectory, "notes.txt");
public NotePage()
{
InitializeComponent();
if (File.Exists(_fileName))
TextEditor.Text = File.ReadAllText(_fileName);
}
private void SaveButton_Clicked(object sender, EventArgs e)
{
// Save the file.
File.WriteAllText(_fileName, TextEditor.Text);
}
private void DeleteButton_Clicked(object sender, EventArgs e)
{
// Delete the file.
if (File.Exists(_fileName))
File.Delete(_fileName);
TextEditor.Text = string.Empty;
}
}
打开指定网址
private async void LearnMore_Clicked(object sender, EventArgs e)
{
// Navigate to the specified URL in the system browser.
await Launcher.Default.OpenAsync("https://aka.ms/maui");
}
Grid
<Grid RowDefinitions="100,auto,*" //表示三行 第一行100,第二行自动,第三行占用余下空间
ColumnDefinitions=".75*,.25*" //表示两列第一列占75% 第二列占25%
Padding="10"
>
<Image GridColumnSpan="2" //跨两列
Source="1.png"
BackgroudColor="Orange">
...其他代码见下图
</Grid>
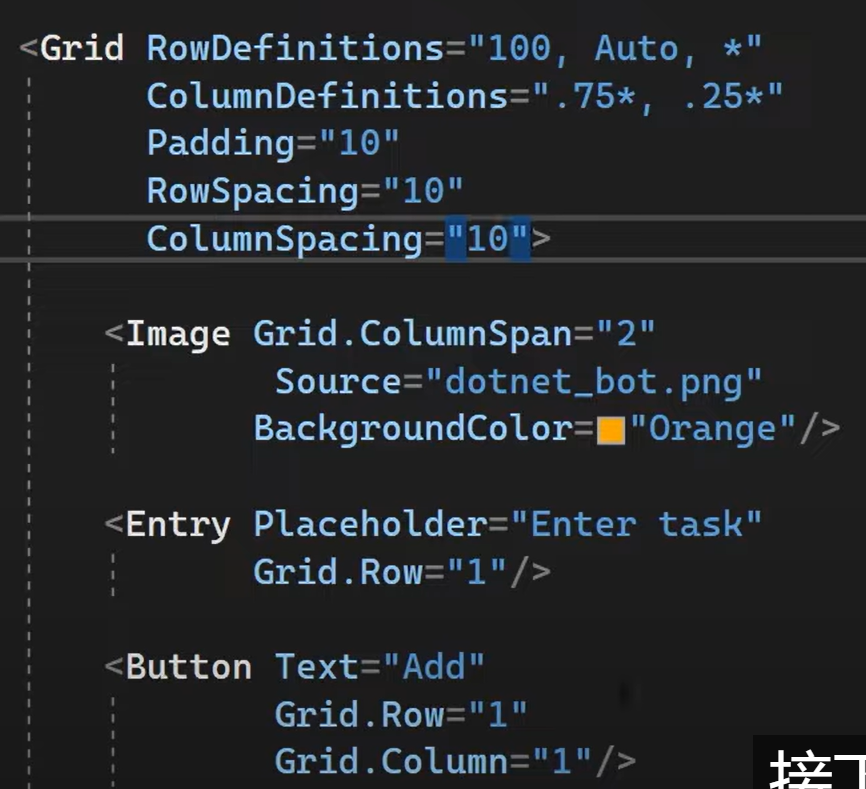
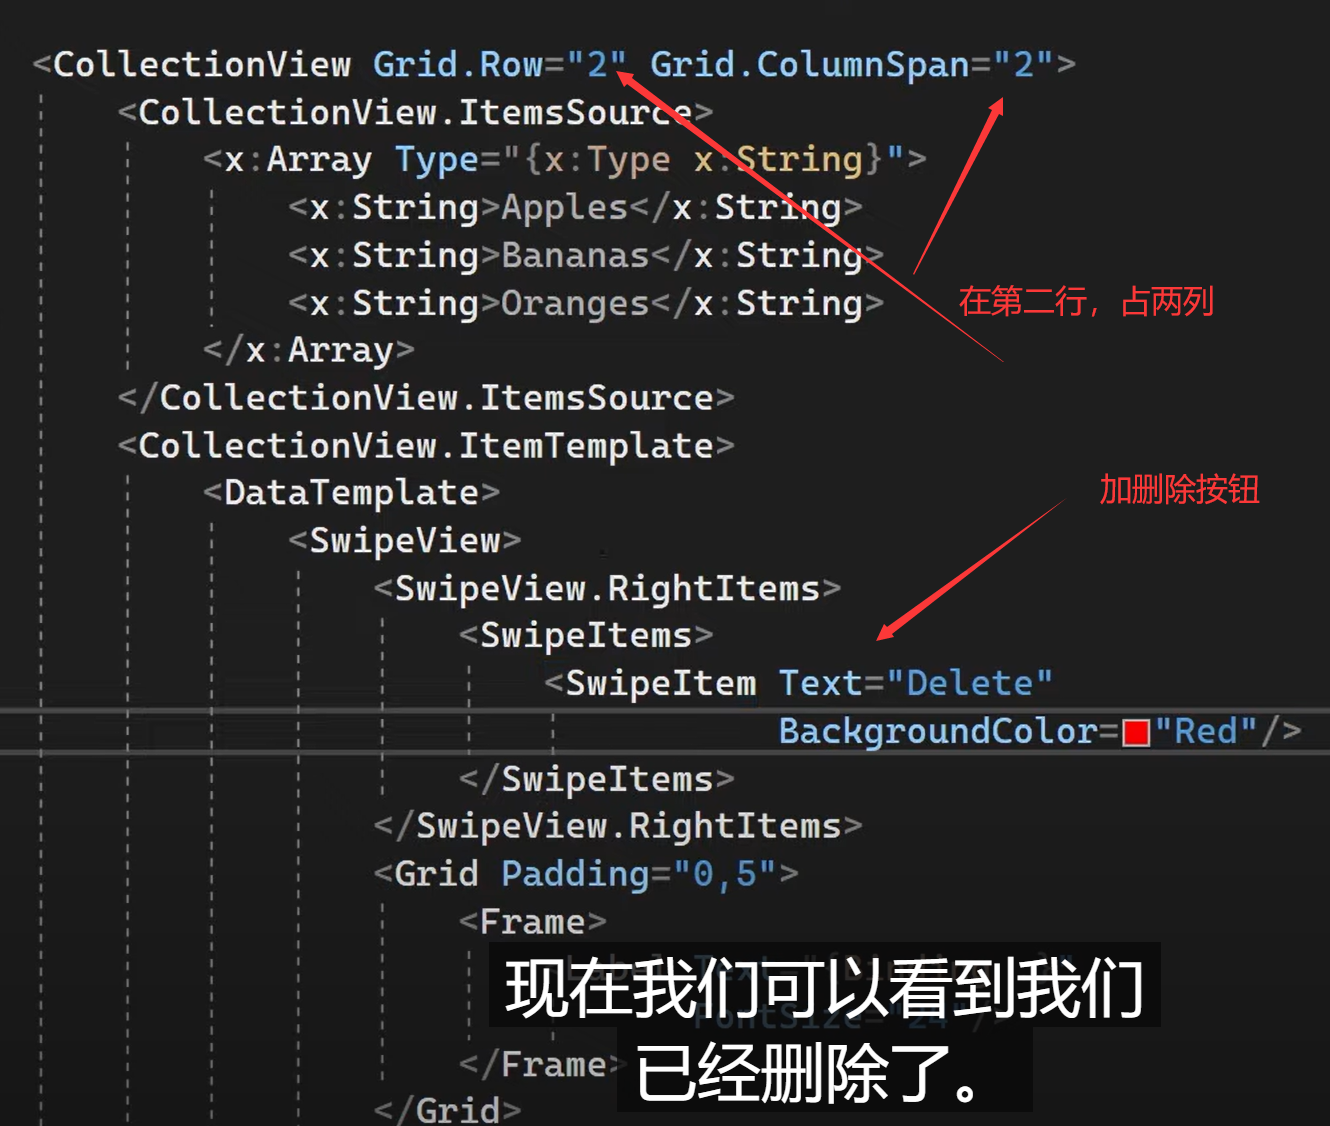
NET 多平台应用 UI (.NET MAUI) SwipeView 是一个容器控件,它环绕内容项,并提供通过轻扫手势显示的上下文菜单项:
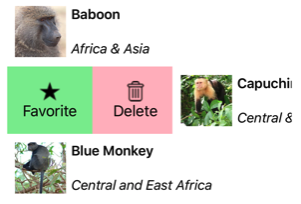
SwipeView 设计用于触摸接口。 在 Windows 上,它只能在触摸界面中轻扫,不适用于鼠标等指针设备。
SwipeView 定义以下属性:
LeftItems,类型 SwipeItems为 ,表示从左侧轻扫控件时可以调用的轻扫项。
RightItems,类型 SwipeItems为 ,表示从右侧轻扫控件时可以调用的轻扫项。
TopItems,类型 SwipeItems为 ,表示从上向下轻扫控件时可以调用的轻扫项。
BottomItems,类型 SwipeItems为 ,表示从下向上轻扫控件时可以调用的轻扫项。
Threshold,类型 double为 ,表示触发轻扫手势以完全显示轻扫项的与设备无关的单位数。
这些属性由 BindableProperty 对象提供支持;也就是说,它们可以作为数据绑定的目标,并能进行样式设置。
此外, 从 SwipeViewContentView 类继承 Content 属性。 由于 Content 属性是 SwipeView 类的内容属性,因此不需要显式设置。
类 SwipeView 还定义了三个事件:
SwipeStarted 在轻扫开始时引发。 SwipeStartedEventArgs此事件附带的 对象具有 一个 SwipeDirection 属性,类型为 SwipeDirection。
SwipeChanging 在轻扫移动时引发。 SwipeChangingEventArgs此事件附带的 对象具有 SwipeDirection 类型的 SwipeDirection属性和 Offset 类型的 double属性。
SwipeEnded 在轻扫结束时引发。 SwipeEndedEventArgs此事件附带的 对象具有 SwipeDirection 类型的 SwipeDirection属性和 IsOpen 类型的 bool属性。
此外, SwipeView 包括 Open 和 Close 方法,分别以编程方式打开和关闭轻扫项。
创建 SwipeView
SwipeView必须定义 环绕的内容SwipeView,以及轻扫手势显示的轻扫项。 轻扫项是放置在四SwipeView个方向集合之一中的一个的一个或多个SwipeItem对象 - LeftItems、RightItems、 TopItems或 BottomItems。
以下示例演示如何在 XAML 中实例化 :SwipeView
<SwipeView>
<SwipeView.LeftItems>
<SwipeItems>
<SwipeItem Text="Favorite"
IconImageSource="favorite.png"
BackgroundColor="LightGreen"
Invoked="OnFavoriteSwipeItemInvoked" />
<SwipeItem Text="Delete"
IconImageSource="delete.png"
BackgroundColor="LightPink"
Invoked="OnDeleteSwipeItemInvoked" />
</SwipeItems>
</SwipeView.LeftItems>
<!-- Content -->
<Grid HeightRequest="60"
WidthRequest="300"
BackgroundColor="LightGray">
<Label Text="Swipe right"
HorizontalOptions="Center"
VerticalOptions="Center" />
</Grid>
</SwipeView>
等效 C# 代码如下:
// SwipeItems
SwipeItem favoriteSwipeItem = new SwipeItem
{
Text = "Favorite",
IconImageSource = "favorite.png",
BackgroundColor = Colors.LightGreen
};
favoriteSwipeItem.Invoked += OnFavoriteSwipeItemInvoked;
SwipeItem deleteSwipeItem = new SwipeItem
{
Text = "Delete",
IconImageSource = "delete.png",
BackgroundColor = Colors.LightPink
};
deleteSwipeItem.Invoked += OnDeleteSwipeItemInvoked;
List<SwipeItem> swipeItems = new List<SwipeItem>() { favoriteSwipeItem, deleteSwipeItem };
// SwipeView content
Grid grid = new Grid
{
HeightRequest = 60,
WidthRequest = 300,
BackgroundColor = Colors.LightGray
};
grid.Add(new Label
{
Text = "Swipe right",
HorizontalOptions = LayoutOptions.Center,
VerticalOptions = LayoutOptions.Center
});
SwipeView swipeView = new SwipeView
{
LeftItems = new SwipeItems(swipeItems),
Content = grid
};
在此示例中, SwipeView 内容是包含 GridLabel的 :

轻扫项用于对 SwipeView 内容执行操作,在从左侧轻扫控件时显示:

默认情况下,当用户点击轻扫项时,会执行该轻扫项。 但是,可以更改这种行为。 有关详细信息,请参阅 轻扫模式。
执行轻扫项后,将隐藏轻扫项并 SwipeView 重新显示内容。 但是,可以更改这种行为。 有关详细信息,请参阅 轻扫行为。
轻扫内容和轻扫项目可以内联放置,也可以定义为资源。
轻扫项目
LeftItems、RightItems、 TopItems和 BottomItems 集合均为 类型SwipeItems。 SwipeItems 类定义了以下属性:
Mode,类型 SwipeMode为 ,指示轻扫交互的效果。 有关轻扫模式的详细信息,请参阅 轻扫模式。
SwipeBehaviorOnInvoked,类型 SwipeBehaviorOnInvoked为 ,指示在调用轻扫项后的行为方式 SwipeView 。 有关轻扫行为的详细信息,请参阅 轻扫行为。
这些属性由 BindableProperty 对象提供支持;也就是说,它们可以作为数据绑定的目标,并能进行样式设置。
每个轻扫项都定义为放置在四SwipeItems个方向集合之一中的一个SwipeItem的对象。 类 SwipeItem 派生自 MenuItem 类,并添加以下成员:
类型 BackgroundColor 为 的属性 Color,用于定义轻扫项的背景色。 此属性由可绑定属性提供支持。
执行 Invoked 轻扫项时引发的事件。
类 MenuItem 定义多个属性,包括 Command、 CommandParameter、 IconImageSource和 Text。 可以在 对象上 SwipeItem 设置这些属性以定义其外观,并定义 ICommand 在调用轻扫项时执行的 。 有关详细信息,请参阅 显示菜单项。
以下示例显示了 的集合中的LeftItems两SwipeItem个 SwipeView对象:
<SwipeView>
<SwipeView.LeftItems>
<SwipeItems>
<SwipeItem Text="Favorite"
IconImageSource="favorite.png"
BackgroundColor="LightGreen"
Invoked="OnFavoriteSwipeItemInvoked" />
<SwipeItem Text="Delete"
IconImageSource="delete.png"
BackgroundColor="LightPink"
Invoked="OnDeleteSwipeItemInvoked" />
</SwipeItems>
</SwipeView.LeftItems>
<!-- Content -->
</SwipeView>
每个SwipeItem的外观由 、 IconImageSource和 BackgroundColor 属性的组合Text定义:

SwipeItem点击 时,其Invoked事件将触发,并由其已注册的事件处理程序处理。 此外,事件还会 MenuItem.Clicked 触发。 或者, Command 可以将 属性设置为 ICommand 在调用 时 SwipeItem 执行的实现。
仅使用 Text 或 IconImageSource 属性定义 的外观SwipeItem时,内容始终居中。
除了将轻扫项 SwipeItem 定义为对象之外,还可以定义自定义轻扫项视图。 有关详细信息,请参阅 自定义轻扫项。
轻扫方向
SwipeView 支持四个不同的轻扫方向,轻扫方向由对象添加到的方向 SwipeItems 集合 SwipeItem 定义。 每个轻扫方向都可以保留其自己的轻扫项。 例如,以下示例显示 SwipeView 其轻扫项取决于轻扫方向的 :
<SwipeView>
<SwipeView.LeftItems>
<SwipeItems>
<SwipeItem Text="Delete"
IconImageSource="delete.png"
BackgroundColor="LightPink"
Command="{Binding DeleteCommand}" />
</SwipeItems>
</SwipeView.LeftItems>
<SwipeView.RightItems>
<SwipeItems>
<SwipeItem Text="Favorite"
IconImageSource="favorite.png"
BackgroundColor="LightGreen"
Command="{Binding FavoriteCommand}" />
<SwipeItem Text="Share"
IconImageSource="share.png"
BackgroundColor="LightYellow"
Command="{Binding ShareCommand}" />
</SwipeItems>
</SwipeView.RightItems>
<!-- Content -->
</SwipeView>
在此示例中, SwipeView 可以向右或向左轻扫内容。 向右轻扫将显示 “删除 ”轻扫项,而向左轻扫将显示“ 收藏夹 ”和“ 共享” 轻扫项。
一次只能设置方向 SwipeItems 集合的一个 SwipeView实例。 因此,不能对 有两 LeftItems 个 SwipeView定义。
SwipeStarted、 SwipeChanging和 SwipeEnded 事件通过 SwipeDirection 事件参数中的 属性报告轻扫方向。 此属性的类型 SwipeDirection为 ,它是一个由四个成员组成的枚举:
Right 指示发生向右轻扫。
Left 指示发生了向左轻扫。
Up 指示发生了向上轻扫。
Down 指示发生了向下轻扫。
轻扫阈值
SwipeView 包括类型的 Thresholddouble属性,该属性表示触发轻扫手势以完全显示轻扫项的设备无关单位的数量。
以下示例演示 SwipeView 设置 属性的 Threshold :
<SwipeView Threshold="200">
<SwipeView.LeftItems>
<SwipeItems>
<SwipeItem Text="Favorite"
IconImageSource="favorite.png"
BackgroundColor="LightGreen" />
</SwipeItems>
</SwipeView.LeftItems>
<!-- Content -->
</SwipeView>
在此示例中, SwipeView 在完全显示 之前 SwipeItem ,必须为 200 个与设备无关的单位轻扫 。
轻扫模式
类 SwipeItems 具有 一个 Mode 属性,该属性指示轻扫交互的效果。 此属性应设置为枚举成员之 SwipeMode 一:
Reveal 指示轻扫显示轻扫项。 这是 SwipeItems.Mode 属性的默认值。
Execute 指示轻扫执行轻扫项。
在显示模式下,用户轻扫 以 SwipeView 打开由一个或多个轻扫项组成的菜单,并且必须显式点击轻扫项才能执行它。 执行轻扫项后,将关闭轻扫项并 SwipeView 重新显示内容。 在执行模式下,用户轻扫 以 SwipeView 打开包含一个多一个轻扫项的菜单,然后自动执行。 执行后,将关闭轻扫项并 SwipeView 重新显示内容。
以下示例演示 SwipeView 配置为使用执行模式的 :
<SwipeView>
<SwipeView.LeftItems>
<SwipeItems Mode="Execute">
<SwipeItem Text="Delete"
IconImageSource="delete.png"
BackgroundColor="LightPink"
Command="{Binding DeleteCommand}" />
</SwipeItems>
</SwipeView.LeftItems>
<!-- Content -->
</SwipeView>
在此示例中, SwipeView 可以向右轻扫内容以显示立即执行的轻扫项。 执行后, SwipeView 将重新显示内容。
轻扫行为
类 SwipeItems 具有 属性 SwipeBehaviorOnInvoked ,该属性指示在调用轻扫项后的行为方式 SwipeView 。 此属性应设置为枚举成员之 SwipeBehaviorOnInvoked 一:
Auto 指示在显示模式下, SwipeView 在调用轻扫项后关闭;在执行模式下, SwipeView 在调用轻扫项后保持打开状态。 这是 SwipeItems.SwipeBehaviorOnInvoked 属性的默认值。
Close 指示 SwipeView 在调用轻扫项后关闭。
RemainOpen 指示 SwipeView 在调用轻扫项后保持打开状态。
以下示例显示 SwipeView 配置为在调用轻扫项后保持打开状态的 :
<SwipeView>
<SwipeView.LeftItems>
<SwipeItems SwipeBehaviorOnInvoked="RemainOpen">
<SwipeItem Text="Favorite"
IconImageSource="favorite.png"
BackgroundColor="LightGreen"
Invoked="OnFavoriteSwipeItemInvoked" />
<SwipeItem Text="Delete"
IconImageSource="delete.png"
BackgroundColor="LightPink"
Invoked="OnDeleteSwipeItemInvoked" />
</SwipeItems>
</SwipeView.LeftItems>
<!-- Content -->
</SwipeView>
自定义轻扫项目
可以使用 类型定义 SwipeItemView 自定义轻扫项。 类 SwipeItemView 派生自 ContentView 类,并添加以下属性:
Command,属于 类型 ICommand,在点击轻扫项时执行。
CommandParameter,属于 object 类型,是传递给 Command 的参数。
这些属性由 BindableProperty 对象提供支持;也就是说,它们可以作为数据绑定的目标,并能进行样式设置。
类 SwipeItemView 还定义在执行 Invoked 后点击 Command 项时引发的事件。
以下示例演示 SwipeItemView 的 集合中的 LeftItems 对象 SwipeView:
<SwipeView>
<SwipeView.LeftItems>
<SwipeItems>
<SwipeItemView Command="{Binding CheckAnswerCommand}"
CommandParameter="{Binding Source={x:Reference resultEntry}, Path=Text}">
<StackLayout Margin="10"
WidthRequest="300">
<Entry x:Name="resultEntry"
Placeholder="Enter answer"
HorizontalOptions="CenterAndExpand" />
<Label Text="Check"
FontAttributes="Bold"
HorizontalOptions="Center" />
</StackLayout>
</SwipeItemView>
</SwipeItems>
</SwipeView.LeftItems>
<!-- Content -->
</SwipeView>
在此示例中, SwipeItemView 由包含 Entry 和 Label组成的 StackLayout 。 当用户将输入输入到 Entry后,可以点击 的其余部分 SwipeViewItem ,以执行 ICommand 由 SwipeItemView.Command 属性定义的 。
以编程方式打开和关闭 SwipeView
SwipeView 包括 Open 和 Close 方法,分别以编程方式打开和关闭轻扫项。 默认情况下,这些方法会在打开或关闭时对其进行 SwipeView 动画处理。
方法 Open 需要参数 OpenSwipeItem ,以指定打开 的方向 SwipeView 。 枚举 OpenSwipeItem 有四个成员:
LeftItems,指示 SwipeView 将从左侧打开 以显示集合中的 LeftItems 轻扫项。
TopItems,指示 SwipeView 将从顶部打开 以显示集合中的 TopItems 轻扫项。
RightItems,指示 SwipeView 将从右侧打开 以显示集合中的 RightItems 轻扫项。
BottomItems,指示 SwipeView 将从底部打开 以显示集合中的 BottomItems 轻扫项。
此外, Open 方法还接受一个可选 bool 参数,该参数定义在打开时是否 SwipeView 进行动画处理。
给定名为 SwipeViewswipeView的 ,以下示例演示如何打开 SwipeView 以显示集合中的 LeftItems 轻扫项:
swipeView.Open(OpenSwipeItem.LeftItems);
swipeView然后,可以使用 方法关闭 Close :
swipeView.Close();
方法 Close 还接受一个可选 bool 参数,该参数定义 SwipeView 是否在关闭时进行动画处理。
禁用 SwipeView
应用可能进入一种状态,即轻扫内容项不是有效操作。 在这种情况下,可以通过将 SwipeView 的 IsEnabled 属性设置为 false 来对其进行禁用。 这将阻止用户轻扫内容以显示轻扫项目。
此外,在定义 Command 或 SwipeItemView的 SwipeItem 属性时,CanExecute可以指定 的ICommand委托来启用或禁用轻扫项。
选择器点击查看原文
.NET 多平台应用 UI (.NET MAUI) Picker 显示项的简短列表,用户可以从中选择项。
Picker 定义以下属性:
CharacterSpacing,属于 类型 double,是 所 Picker显示项的字符之间的间距。
FontAttributes 类型 FontAttributes为 ,默认为 FontAtributes.None。
FontAutoScalingEnabled,类型 bool为 ,用于确定文本是否遵循在操作系统中设置的缩放首选项。 此属性的默认值为 true。
FontFamily 类型 string为 ,默认为 null。
FontSize 类型 double为 ,默认为 -1.0。
HorizontalTextAlignment,属于 类型 TextAlignment,是 显示 Picker的文本的水平对齐方式。
ItemsSource 类型 IList为 ,要显示的项的源列表,默认为 null。
SelectedIndex 类型 int为 ,所选项的索引,默认为 -1。
SelectedItem 类型 object为 的选定项,默认为 null。
TextColor 类型 Color为 ,用于显示文本的颜色。
TextTransform,类型 TextTransform为 ,用于定义是否转换文本的大小写。
Title 类型 string为 ,默认为 null。
TitleColor 类型 Color为 ,用于显示 Title 文本的颜色。
VerticalTextAlignment,属于 类型 TextAlignment,是 所 Picker显示文本的垂直对齐方式
有两种使用数据填充 Picker 的方法:
将 ItemsSource 属性设置为要显示的数据。 这是将数据添加到 的建议 Picker方法。 有关详细信息,请参阅 设置 ItemsSource 属性。
将要显示的数据添加到集合。Items 有关详细信息,请参阅 将数据添加到 Items 集合。
设置 ItemsSource 属性
Picker可以通过将 属性ItemsSource设置为IList集合来填充数据。 集合中的每个项都必须属于或派生自类型 object。 可以通过从项数组初始化 ItemsSource 属性,在 XAML 中添加项:
<Picker x:Name="picker"
Title="Select a monkey">
<Picker.ItemsSource>
<x:Array Type="{x:Type x:String}">
<x:String>Baboon</x:String>
<x:String>Capuchin Monkey</x:String>
<x:String>Blue Monkey</x:String>
<x:String>Squirrel Monkey</x:String>
<x:String>Golden Lion Tamarin</x:String>
<x:String>Howler Monkey</x:String>
<x:String>Japanese Macaque</x:String>
</x:Array>
</Picker.ItemsSource>
</Picker>
元素 x:Array 需要一个 Type 属性,该属性指示数组中项的类型。
等效 C# 代码如下:
var monkeyList = new List<string>();
monkeyList.Add("Baboon");
monkeyList.Add("Capuchin Monkey");
monkeyList.Add("Blue Monkey");
monkeyList.Add("Squirrel Monkey");
monkeyList.Add("Golden Lion Tamarin");
monkeyList.Add("Howler Monkey");
monkeyList.Add("Japanese Macaque");
Picker picker = new Picker { Title = "Select a monkey" };
picker.ItemsSource = monkeyList;
响应项选择
Picker支持一次选择一项。 当用户选择某个项时, SelectedIndexChanged 事件将触发,该 SelectedIndex 属性将更新为表示列表中选定项的索引的整数,并将 SelectedItem 该属性更新为 object 表示选定项的 。 属性 SelectedIndex 是从零开始的数字,指示用户选择的项。 如果未选择任何项(首次创建并初始化 SelectedIndex 时Picker的情况)将为 -1。
以下 XAML 示例演示如何从 Picker检索 SelectedItem 属性值:
<Label Text="{Binding Source={x:Reference picker}, Path=SelectedItem}" />
等效 C# 代码如下:
Label monkeyNameLabel = new Label();
monkeyNameLabel.SetBinding(Label.TextProperty, new Binding("SelectedItem", source: picker));
此外,当事件触发时 SelectedIndexChanged ,可以执行事件处理程序:
void OnPickerSelectedIndexChanged(object sender, EventArgs e)
{
var picker = (Picker)sender;
int selectedIndex = picker.SelectedIndex;
if (selectedIndex != -1)
{
monkeyNameLabel.Text = (string)picker.ItemsSource[selectedIndex];
}
}
在此示例中,事件处理程序获取 SelectedIndex 属性值,并使用 值从集合中 ItemsSource 检索所选项。 这在功能上等效于从 SelectedItem 属性检索所选项。 集合中的每个 ItemsSource 项的类型均为 object,因此必须强制转换为 string 才能显示。
Picker可以通过设置 SelectedIndex 或 SelectedItem 属性来初始化 以显示特定项。 但是,必须在初始化 ItemsSource 集合后设置这些属性。
使用数据绑定使用数据填充选取器
Picker还可以通过使用数据绑定将其 ItemsSource 属性IList绑定到集合来填充数据。 在 XAML 中,这是通过标记扩展实现的 Binding :
<Picker Title="Select a monkey"
ItemsSource="{Binding Monkeys}"
ItemDisplayBinding="{Binding Name}" />
等效 C# 代码如下所示:
Picker picker = new Picker { Title = "Select a monkey" };
picker.SetBinding(Picker.ItemsSourceProperty, "Monkeys");
picker.ItemDisplayBinding = new Binding("Name");
在此示例中,属性 ItemsSource 数据绑定到 Monkeys 绑定上下文的 属性,该属性返回集合 IList<Monkey> 。 下面的代码示例演示 Monkey 了 类,该类包含四个属性:
public class Monkey
{
public string Name { get; set; }
public string Location { get; set; }
public string Details { get; set; }
public string ImageUrl { get; set; }
}
绑定到对象列表时, Picker 必须告知 要从每个对象显示哪个属性。 这是通过将 属性设置为 ItemDisplayBinding 每个 对象中的必需属性来实现的。 在上面的代码示例中, Picker 设置为显示每个 Monkey.Name 属性值。
响应项选择
数据绑定可用于在属性值更改时将对象设置为 SelectedItem 属性值:
<Picker Title="Select a monkey"
ItemsSource="{Binding Monkeys}"
ItemDisplayBinding="{Binding Name}"
SelectedItem="{Binding SelectedMonkey}" />
<Label Text="{Binding SelectedMonkey.Name}" ... />
<Label Text="{Binding SelectedMonkey.Location}" ... />
<Image Source="{Binding SelectedMonkey.ImageUrl}" ... />
<Label Text="{Binding SelectedMonkey.Details}" ... />
等效 C# 代码如下:
Picker picker = new Picker { Title = "Select a monkey" };
picker.SetBinding(Picker.ItemsSourceProperty, "Monkeys");
picker.SetBinding(Picker.SelectedItemProperty, "SelectedMonkey");
picker.ItemDisplayBinding = new Binding("Name");
Label nameLabel = new Label { ... };
nameLabel.SetBinding(Label.TextProperty, "SelectedMonkey.Name");
Label locationLabel = new Label { ... };
locationLabel.SetBinding(Label.TextProperty, "SelectedMonkey.Location");
Image image = new Image { ... };
image.SetBinding(Image.SourceProperty, "SelectedMonkey.ImageUrl");
Label detailsLabel = new Label();
detailsLabel.SetBinding(Label.TextProperty, "SelectedMonkey.Details");
属性 SelectedItem 数据绑定到 SelectedMonkey 绑定上下文的 属性,该属性 Monkey的类型为 。 因此,当用户选择 中的 Picker项时, SelectedMonkey 属性将设置为所选 Monkey 对象。 对象 SelectedMonkey 数据通过 Label 和 Image 视图显示在用户界面中。
默认情况下, SelectedItem 和 SelectedIndex 属性都支持双向绑定。
将数据添加到 Items 集合
使用数据填充 Picker 的替代过程是将要显示的数据添加到只读 Items 集合,该集合的类型 IList<string>为 。 集合中的每个项都必须为 类型 string。 可以通过使用项列表x:String初始化 Items 属性,在 XAML 中添加项:
<Picker Title="Select a monkey">
<Picker.Items>
<x:String>Baboon</x:String>
<x:String>Capuchin Monkey</x:String>
<x:String>Blue Monkey</x:String>
<x:String>Squirrel Monkey</x:String>
<x:String>Golden Lion Tamarin</x:String>
<x:String>Howler Monkey</x:String>
<x:String>Japanese Macaque</x:String>
</Picker.Items>
</Picker>
等效 C# 代码如下:
Picker picker = new Picker { Title = "Select a monkey" };
picker.Items.Add("Baboon");
picker.Items.Add("Capuchin Monkey");
picker.Items.Add("Blue Monkey");
picker.Items.Add("Squirrel Monkey");
picker.Items.Add("Golden Lion Tamarin");
picker.Items.Add("Howler Monkey");
picker.Items.Add("Japanese Macaque");
除了使用 Items.Add 方法添加数据外,还可以使用 Items.Insert 方法将数据插入到集合中。
响应项选择
Picker支持一次选择一项。 当用户选择某个项时, SelectedIndexChanged 将触发 事件,并将 SelectedIndex 属性更新为表示列表中选定项的索引的整数。 属性 SelectedIndex 是从零开始的数字,指示用户选择的项。 如果未选择任何项(首次创建并初始化 SelectedIndex 时Picker的情况)将为 -1。
下面的代码示例演示 OnPickerSelectedIndexChanged 事件处理程序方法,该方法在事件触发时 SelectedIndexChanged 执行:
void OnPickerSelectedIndexChanged(object sender, EventArgs e)
{
var picker = (Picker)sender;
int selectedIndex = picker.SelectedIndex;
if (selectedIndex != -1)
{
monkeyNameLabel.Text = picker.Items[selectedIndex];
}
}
此方法获取 SelectedIndex 属性值,并使用 值从集合中 Items 检索所选项。 由于集合中的每个 Items 项都是 , string因此它们可由 显示 Label ,而无需强制转换。
Picker可以通过设置 SelectedIndex 属性来初始化 以显示特定项。 但是, SelectedIndex 必须在初始化 Items 集合后设置 属性。
弹出新页返回页
弹出新页
await Navigation.PushModalAsync(new DetailsPage());
返回页面
await Navigation.PopModalAsync();
通过页面构造函数传递数据
在导航期间将数据传递到另一个页面的最简单方法是通过页面构造函数参数:
Contact contact = new Contact
{
Name = "Jane Doe",
Age = 30,
Occupation = "Developer",
Country = "USA"
};
...
await Navigation.PushModalAsync(new DetailsPage(contact));
通过 BindingContext 传递数据
Contact contact = new Contact
{
Name = "Jane Doe",
Age = 30,
Occupation = "Developer",
Country = "USA"
};
await Navigation.PushAsync(new DetailsPage
{
BindingContext = contact
});
通过页面 BindingContext 的 传递导航数据的优点是,新页面可以使用数据绑定来显示数据:
<ContentPage xmlns="http://schemas.microsoft.com/dotnet/2021/maui"
xmlns:x="http://schemas.microsoft.com/winfx/2009/xaml"
x:Class="MyMauiApp.DetailsPage"
Title="Details">
<StackLayout>
<Label Text="{Binding Name}" />
<Label Text="{Binding Occupation}" />
</StackLayout>
</ContentPage>
在导航栏中显示视图
<ContentPage xmlns="http://schemas.microsoft.com/dotnet/2021/maui"
xmlns:x="http://schemas.microsoft.com/winfx/2009/xaml"
x:Class="NavigationPageTitleView.TitleViewPage">
<NavigationPage.TitleView>
<Slider HeightRequest="44"
WidthRequest="300" />
</NavigationPage.TitleView>
...
</ContentPage>
等效 C# 代码如下:
Slider titleView = new Slider { HeightRequest = 44, WidthRequest = 300 };
NavigationPage.SetTitleView(this, titleView);
在此示例中, Slider 显示在 的 NavigationPage导航栏中,用于控制缩放。
NET 多平台应用 UI (.NET MAUI) ToolbarItem 类是一种特殊类型的按钮,可以添加到 Page 对象的 ToolbarItems 集合中。 Shell由于 类派生自 Page,ToolbarItem因此也可以将 对象添加到 ToolbarItems 对象的集合Shell中。 每个 ToolbarItem 对象都将在应用的导航栏中显示为一个按钮。 ToolbarItem对象可以具有图标,并显示为主项或辅助项。 ToolbarItem 类继承自 MenuItem。
以下屏幕截图显示了 ToolbarItem iOS 导航栏中的对象:

ToolbarItem 类定义了以下属性:
Order类型 ToolbarItemOrder为 ,确定对象是显示在主菜单还是 ToolbarItem 辅助菜单中。
Priority类型 int为 ,确定集合中 ToolbarItems 项的显示顺序。
类 ToolbarItem 从 MenuItem 类继承以下通常使用的属性:
Command,类型 ICommand为 ,允许将用户操作(如手指点击或单击)绑定到 viewmodel 上定义的命令。
CommandParameter,类型 object为 ,指定应传递给 的参数 Command。
IconImageSource,类型 ImageSource为 ,用于确定对象上的 ToolbarItem 显示图标。
Text类型 string为 ,确定对象上的 ToolbarItem 显示文本。
这些属性由 BindableProperty 对象提供支持,这意味着它们可以成为数据绑定的目标。
从 ToolbarItem 对象创建工具栏的替代方法是将 TitleViewProperty 附加属性设置为包含多个视图的布局类。 有关详细信息,请参阅 在导航栏中显示视图。
创建 ToolbarItem
若要创建工具栏项,请创建对象 ToolbarItem 并设置其属性以定义其外观和行为。 以下示例演示如何创建 ToolbarItem 具有最小属性集的 ,并将其添加到 ContentPage的 ToolbarItems 集合中:
<ContentPage.ToolbarItems>
<ToolbarItem Text="Add item"
IconImageSource="add.png" />
</ContentPage.ToolbarItems>
此示例将生成包含 ToolbarItem 文本和图标的 对象。 但是,的外观 ToolbarItem 因平台而异。
ToolbarItem还可以在代码中创建并添加到集合中ToolbarItems:
ToolbarItem item = new ToolbarItem
{
Text = "Add item",
IconImageSource = ImageSource.FromFile("add.png")
};
// "this" refers to a Page object
this.ToolbarItems.Add(item);
图像可以存储在应用项目中的单个位置。 有关详细信息,请参阅 将图像添加到 .NET MAUI 项目。
定义按钮行为
类ToolbarItem从 MenuItem 类继承 Clicked 事件。 事件处理程序可以附加到 事件, Clicked 以响应对对象的点击或单击 ToolbarItem :
<ToolbarItem ...
Clicked="OnItemClicked" />
还可以在代码中附加事件处理程序:
ToolbarItem item = new ToolbarItem { ... };
item.Clicked += OnItemClicked;
这些示例引用事件处理程序 OnItemClicked ,如以下示例所示:
void OnItemClicked(object sender, EventArgs e)
{
ToolbarItem item = (ToolbarItem)sender;
messageLabel.Text = $"You clicked the \"{item.Text}\" toolbar item.";
}
ToolbarItem 对象还可以使用 Command 和 CommandParameter 属性来响应用户输入,而无需事件处理程序。
在运行时启用或禁用 ToolbarItem
若要在运行时启用或禁用 , ToolbarItem 请将其 Command 属性绑定到 ICommand 实现,并确保其 canExecute 委托根据需要启用或禁用 ICommand 。
使用 Command 属性启用或禁用 ToolbarItem时,不要将 属性绑定到IsEnabled另一个属性。
主要和辅助工具栏项
枚举 ToolbarItemOrder 具有 Default、 Primary和 Secondary 值。
当 属性 Order 设置为 Primary时, ToolbarItem 对象将显示在所有平台上的导航栏中。 ToolbarItem 对象优先于页面标题,页面标题将被截断,为项目腾出空间。
当 属性 Order 设置为 Secondary时,行为因平台而异。 在 iOS 和 Mac Catalyst 上, Secondary 工具栏项将显示为水平列表。 在 Android 和 Windows 上 Secondary ,项菜单显示为可点击的三个点:

点击这三个点会显示垂直列表中的项:
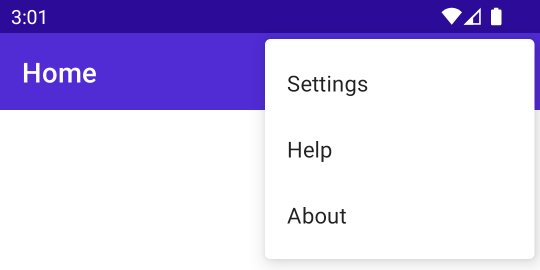
显示工具提示
NET 多平台应用 UI (.NET MAUI) 工具提示是一个小矩形弹出窗口,当用户将指针停留在 视图上时,它显示视图用途的简短说明。 通常当用户将指针悬停在关联的视图上时,工具提示会自动显示:
在 Android 上,当用户长按视图时,将显示工具提示。 长按释放后,工具提示在几秒钟内保持可见。
在 iOS 上,若要显示工具提示,你的应用必须是在 Mac 上运行的具有 Apple 芯片的 iPhone 或 iPad 应用。 如果满足此条件,则当指针位于视图上方几秒钟时,将显示工具提示,直到指针离开视图为止保持可见。 iOS 上的工具提示需要使用 iOS 15.0+。 有关在 Mac 上使用带有 Apple 芯片的 iPhone 和 iPad 应用的详细信息,请参阅 在 Mac 上使用 iPhone 和 iPad 应用与 Apple silicon。
在 Mac Catalyst 上,当指针位于视图上几秒钟时,将显示工具提示。 在指针离开视图之前,工具提示将保持可见。 Mac Catalyst 上的工具提示需要使用 Mac Catalyst 15.0+。
在 Windows 上,当指针悬停在视图上时,将显示工具提示。 工具提示在几秒钟内保持可见,或者直到指针停止悬停在视图上为止。
通过将视图上的附加属性设置为 ToolTipProperties.Textstring来定义工具提示:
<Button Text="Save"
ToolTipProperties.Text="Click to Save your data" />
等效 C# 代码如下:
Button button = new Button { Text = "Save" };
ToolTipProperties.SetText(button, "Click to Save your data");
有关附加属性的详细信息,请参阅 附加属性。
默认情况下,工具提示显示在指针上方居中:
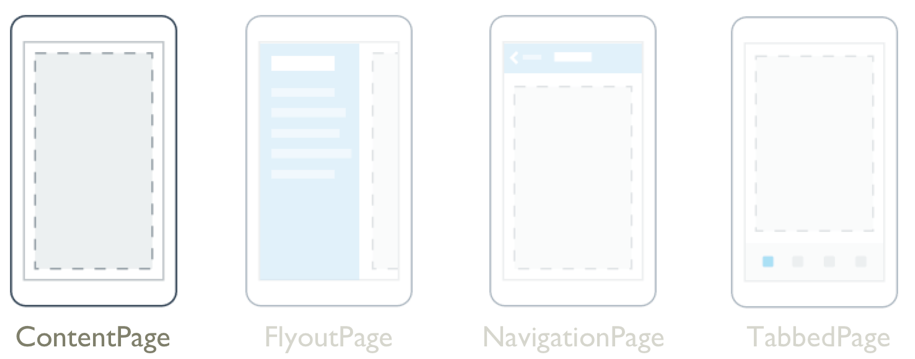
<ContentPage xmlns="http://schemas.microsoft.com/dotnet/2021/maui"
xmlns:x="http://schemas.microsoft.com/winfx/2009/xaml"
x:Class="MyMauiApp.MyPage"
Title="MyPage"
BackgroundColor="White">
<StackLayout>
<Label Text="Welcome to .NET MAUI!"
VerticalOptions="Center"
HorizontalOptions="Center" />
<!-- Other views go here -->
</StackLayout>
</ContentPage>
的子级 ContentPage 通常是布局,例如 Grid 或 StackLayout,其布局通常包含多个视图。 但是, 的子级 ContentPage 可以是显示集合的视图,例如 CollectionView。
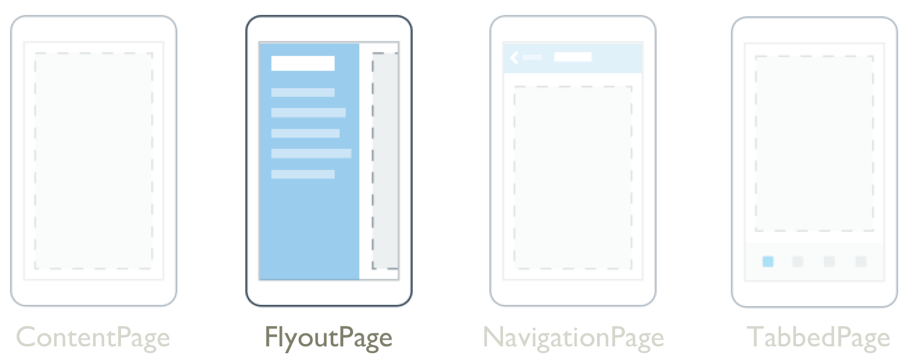
有两种 FlyoutPage 布局行为:
在弹出式布局中,详细信息页覆盖或部分覆盖浮出控件页面。 选择浮出控件页面上的项将导航到相应的详细信息页。 在手机上运行的应用始终使用此布局行为。
在拆分布局中,浮出控件页面显示在左侧,详细信息页显示在右侧。 在平板电脑或桌面上运行的应用可以使用此布局行为,Windows 默认使用此行为。
有关布局行为的详细信息,请参阅 布局行为。
FlyoutPage 定义以下属性:
Detail类型 Page为 ,定义为浮出控件页中所选项显示的详细信息页。
Flyout类型 Page为 ,定义浮出控件页。
FlyoutLayoutBehavior,类型 FlyoutLayoutBehavior为 ,指示浮出控件和详细信息页的布局行为。
IsGestureEnabled类型 bool为 ,确定轻扫手势是否会在浮出控件和详细信息页之间切换。 此属性的默认值为 true。
IsPresented类型 bool为 ,确定是显示浮出控件页还是详细信息页。 此属性的默认值为 false,它显示详细信息页。 它应设置为 true 以显示浮出控件页。
创建 FlyoutPage
若要创建浮出控件页,请创建 一个 FlyoutPage 对象并设置它的 Flyout 和 Detail 属性。 属性 Flyout 应设置为 ContentPage object,而 Detail 属性应设置为 TabbedPage、 NavigationPage或 ContentPage 对象。 这将有助于确保在所有平台上都有一致的用户体验。
<FlyoutPage xmlns="http://schemas.microsoft.com/dotnet/2021/maui"
xmlns:x="http://schemas.microsoft.com/winfx/2009/xaml"
xmlns:local="clr-namespace:FlyoutPageNavigation"
x:Class="FlyoutPageNavigation.MainPage">
<FlyoutPage.Flyout>
<local:FlyoutMenuPage x:Name="flyoutPage" />
</FlyoutPage.Flyout>
<FlyoutPage.Detail>
<NavigationPage>
<x:Arguments>
<local:ContactsPage />
</x:Arguments>
</NavigationPage>
</FlyoutPage.Detail>
</FlyoutPage>
在此示例中, Flyout 属性设置为 对象 ContentPage ,将 Detail 属性设置为 NavigationPage 包含 ContentPage 对象的
下面的示例演示 对象的定义 FlyoutMenuPage ,该对象的类型 ContentPage为 :
<ContentPage xmlns="http://schemas.microsoft.com/dotnet/2021/maui"
xmlns:x="http://schemas.microsoft.com/winfx/2009/xaml"
xmlns:local="clr-namespace:FlyoutPageNavigation"
x:Class="FlyoutPageNavigation.FlyoutMenuPage"
Padding="0,40,0,0"
IconImageSource="hamburger.png"
Title="Personal Organiser">
<CollectionView x:Name="collectionView"
x:FieldModifier="public"
SelectionMode="Single">
<CollectionView.ItemsSource>
<x:Array Type="{x:Type local:FlyoutPageItem}">
<local:FlyoutPageItem Title="Contacts"
IconSource="contacts.png"
TargetType="{x:Type local:ContactsPage}" />
<local:FlyoutPageItem Title="TodoList"
IconSource="todo.png"
TargetType="{x:Type local:TodoListPage}" />
<local:FlyoutPageItem Title="Reminders"
IconSource="reminders.png"
TargetType="{x:Type local:ReminderPage}" />
</x:Array>
</CollectionView.ItemsSource>
<CollectionView.ItemTemplate>
<DataTemplate>
<Grid Padding="5,10">
<Grid.ColumnDefinitions>
<ColumnDefinition Width="30"/>
<ColumnDefinition Width="*" />
</Grid.ColumnDefinitions>
<Image Source="{Binding IconSource}" />
<Label Grid.Column="1"
Margin="20,0"
Text="{Binding Title}"
FontSize="20"
FontAttributes="Bold"
VerticalOptions="Center" />
</Grid>
</DataTemplate>
</CollectionView.ItemTemplate>
</CollectionView>
</ContentPage>
在此示例中,浮出控件页由 CollectionView 通过将 属性 ItemsSource 设置为 对象数组 FlyoutPageItem 来填充数据的 。 以下示例显示了 类的定义 FlyoutPageItem :
public class FlyoutPageItem
{
public string Title { get; set; }
public string IconSource { get; set; }
public Type TargetType { get; set; }
}
DataTemplate 指定为 CollectionView.ItemTemplate 属性以显示每个 FlyoutPageItem。 DataTemplate 包含由 Image 和 Label 组成的 Grid。 Image 显示 IconSource 属性值,Label 显示每个 FlyoutPageItem 的 Title 属性值。 此外,浮出控件页还设置了其 Title 和 IconImageSource 属性。 如果详细信息页有标题栏,则图标将显示在详细信息页上。
以下屏幕截图显示了生成的浮出控件:
创建并显示详细信息页
对象 FlyoutMenuPage 包含 CollectionView 从 MainPage 类引用的 。 这允许 MainPage 类为 SelectionChanged 事件注册处理程序。 MainPage这使 对象能够将 Detail 属性设置为表示选定CollectionView项的页面。 以下示例演示 事件处理程序:
public partial class MainPage : FlyoutPage
{
public MainPage()
{
...
flyoutPage.collectionView.SelectionChanged += OnSelectionChanged;
}
void OnSelectionChanged(object sender, SelectionChangedEventArgs e)
{
var item = e.CurrentSelection.FirstOrDefault() as FlyoutPageItem;
if (item != null)
{
Detail = new NavigationPage((Page)Activator.CreateInstance(item.TargetType));
if (!((IFlyoutPageController)this).ShouldShowSplitMode)
IsPresented = false;
}
}
}
在此示例中,OnSelectionChanged事件处理程序从 CollectionView 对象中检索 CurrentSelection ,并将详细信息页设置为存储在 的 FlyoutPageItem属性中的TargetType页类型的实例。 通过将 属性设置为 FlyoutPage.IsPresentedfalse来显示详细信息页,前提是 FlyoutPage 不使用拆分布局。 FlyoutPage使用拆分布局时,将显示浮出控件和详细信息页,因此无需设置 FlyoutPage.IsPresented 属性。
布局行为
FlyoutPage浮出控件和详细信息页面的显示方式取决于运行应用的设备的外形规格、设备的方向以及 属性的值FlyoutLayoutBehavior。 此属性应设置为 枚举的值 FlyoutLayoutBehavior ,该枚举定义以下成员:
Default - 页面使用平台默认值显示。
Popover – 详细信息页封面,或部分覆盖浮出控件页。
Split – 浮出控件页面显示在左侧,详细信息页显示在右侧。
SplitOnLandscape – 当设备处于横向方向时,使用拆分屏幕。
SplitOnPortrait – 当设备处于纵向方向时,使用拆分屏幕。
以下示例演示如何在 上FlyoutPage设置 FlyoutLayoutBehavior 属性:
<FlyoutPage ...
FlyoutLayoutBehavior="Split">
...
</FlyoutPage>
属性的值 FlyoutLayoutBehavior 仅影响在平板电脑或台式机上运行的应用。 在手机上运行的应用始终具有 该 Popover 行为。
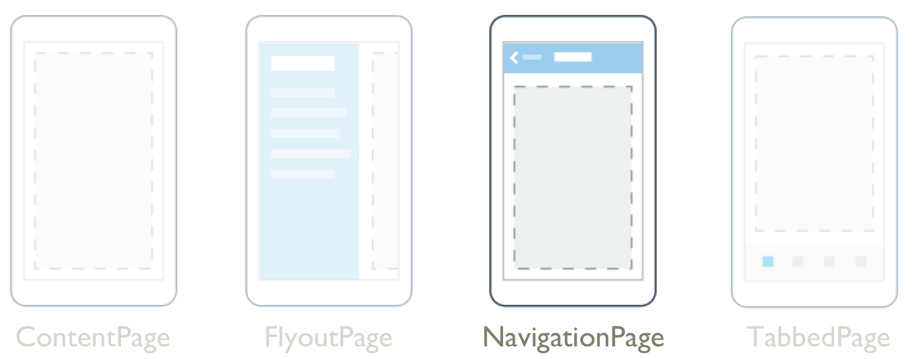
.NET 多平台应用 UI (.NET MAUI) NavigationPage 提供了分层导航体验,你可以在页面中根据需要向前和向后导航。 NavigationPage 将导航作为后进先出 (LIFO) 对象堆栈提供 Page 。
NavigationPage 定义以下属性:
BarBackground,属于 类型 Brush,将导航栏的背景指定为 Brush。
BarBackgroundColor,属于 类型 Color,指定导航栏的背景色。
BackButtonTitle,属于 类型 string,表示用于后退按钮的文本。 这是一个附加属性。
BarTextColor,类型 Color为 ,指定导航栏上文本的颜色。
CurrentPage,属于 类型 Page,表示位于导航堆栈顶部的页面。 这是只读属性。
HasNavigationBar,类型 bool为 ,表示 上 NavigationPage是否存在导航栏。 此属性的默认值为 true。 这是一个附加属性。
HasBackButton,类型 bool为 ,表示导航栏是否包含后退按钮。 此属性的默认值为 true。 这是一个附加属性。
IconColor,类型 Color为 ,定义导航栏中图标的背景色。 这是一个附加属性。
RootPage,属于 类型 Page,表示导航堆栈的根页。 这是只读属性。
TitleIconImageSource,属于 类型 ImageSource,定义表示导航栏上标题的图标。 这是一个附加属性。
TitleView,属于 类型 View,定义可在导航栏中显示的视图。 这是一个附加属性。
这些属性由 BindableProperty 对象提供支持;也就是说,它们可以作为数据绑定的目标,并能进行样式设置。
类 NavigationPage 还定义了三个事件:
Pushed 在将页面推送到导航堆栈时引发 。
Popped 当从导航堆栈中弹出页面时引发 。
PoppedToRoot 当从导航堆栈中弹出最后一个非根页面时,将引发 。
这三个事件都接收 NavigationEventArgs 定义只读 Page 属性的对象,该属性检索从导航堆栈弹出的页面或堆栈上新可见的页面。
执行无模式导航
.NET MAUI 支持无模式页面导航。 无模式页面将保留在屏幕上,并且在你导航到另一个页面之前保持可用
创建根页
围绕多个页面构建的应用始终具有 根 页面,这是添加到导航堆栈的第一个页面。 这是通过创建其 NavigationPage 构造函数参数是应用的根页的 对象,并将生成的 对象设置为 属性的值来实现的 App.MainPage :
public partial class App : Application
{
public App()
{
InitializeComponent();
MainPage = new NavigationPage(new MainPage());
}
}
将页面推送到导航堆栈
通过在当前页的 属性上Navigation调用 PushAsync 方法,可以导航到页面:
await Navigation.PushAsync(new DetailsPage());
导航堆栈中的弹出页面
await Navigation.PopAsync();
操作导航堆栈
Navigation的 Page 属性公开一个NavigationStack属性,可从中获取导航堆栈中的页面。 虽然 .NET MAUI 保持对导航堆栈的访问, Navigation 但 属性提供 InsertPageBefore 和 RemovePage 方法,用于通过插入页面或删除页面来操作堆栈。
执行模式导航
.NET MAUI 支持模式页面导航。 模式页面鼓励用户完成独立任务,在完成或取消该任务之前,不允许导航离开该任务。
将页面推送到模式堆栈
可以通过对当前页的 属性调用 PushModalAsync 方法 Navigation ,以模式方式导航到页面:
await Navigation.PushModalAsync(new DetailsPage());
模式堆栈中的弹出页面
无论这是设备上的物理按钮还是屏幕按钮,都可以通过按设备上的“ 后退 ”按钮从模式堆栈中弹出活动页面。
若要以编程方式返回到原始页面, PopModalAsync 应在当前页的 属性上 Navigation 调用 方法
await Navigation.PopModalAsync();
在导航栏中显示视图
任何 .NET MAUI View 都可以显示在 的 NavigationPage导航栏中。 这是通过将 NavigationPage.TitleView 附加属性设置为 View 来实现的。 此附加属性可以在任何 Page 上设置,当 Page 被推送到 NavigationPage 上后,NavigationPage 会遵守属性的值。
以下示例演示如何设置 NavigationPage.TitleView 附加属性:
<ContentPage xmlns="http://schemas.microsoft.com/dotnet/2021/maui"
xmlns:x="http://schemas.microsoft.com/winfx/2009/xaml"
x:Class="NavigationPageTitleView.TitleViewPage">
<NavigationPage.TitleView>
<Slider HeightRequest="44"
WidthRequest="300" />
</NavigationPage.TitleView>
...
</ContentPage>
等效 C# 代码如下:
Slider titleView = new Slider { HeightRequest = 44, WidthRequest = 300 };
NavigationPage.SetTitleView(this, titleView);
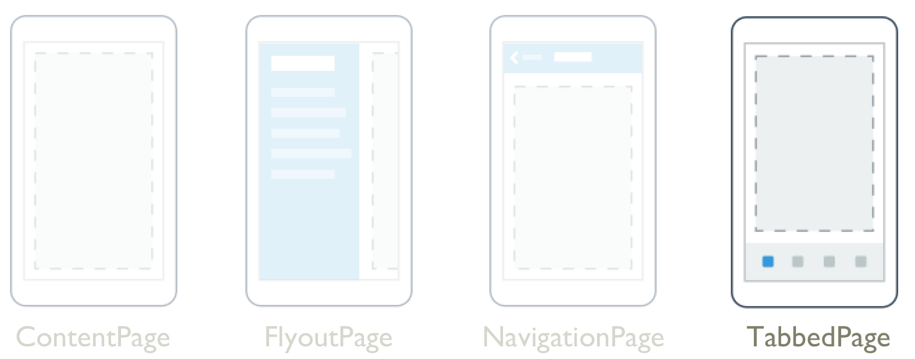
NET 多平台应用 UI (.NET MAUI) TabbedPage 维护类型 Page为的子级集合,其中一次只有一个完全可见。 每个子级由页面顶部或底部的一系列选项卡标识。 通常,每个子级都是 , ContentPage 当选择其选项卡时,将显示页面内容。
TabbedPage 定义以下属性:
BarBackground类型 Brush为 ,定义选项卡栏的背景。
BarBackgroundColor,类型 Color为 ,定义选项卡栏的背景色。
BarTextColor,类型 Color为 ,表示选项卡栏上文本的颜色。
SelectedTabColor,类型 Color为 ,指示选中选项卡时选项卡的颜色。
UnselectedTabColor,类型 Color为 ,表示选项卡在未选中时的颜色。
这些属性由 BindableProperty 对象提供支持;也就是说,它们可以作为数据绑定的目标,并能进行样式设置。
选项卡的标题由 Page.Title 子页的 属性定义,选项卡图标由 Page.IconImageSource 子页的 属性定义。
在 TabbedPage 中,构造 Page 时,将创建每个 TabbedPage 对象。 这可能会导致用户体验不佳,尤其是当 是应用的根页面时 TabbedPage 。 但是,.NET MAUI Shell 允许通过选项卡栏访问的页面按需创建,以响应导航。 有关 Shell 应用的详细信息,请参阅 Shell。
创建 TabbedPage
可以使用两种方法创建 TabbedPage:
使用子 Page 对象的集合(例如 ContentPage 的集合)来填充 TabbedPage。 有关详细信息,请参阅 使用 Page 集合填充 TabbedPage。
将集合分配给 ItemsSource 属性,并将 DataTemplate 分配给 ItemTemplate 属性以返回集合中对象的页面。 有关详细信息,请参阅 使用 DataTemplate 填充 TabbedPage。
无论采用哪种方法,选项卡栏在 中 TabbedPage 的位置都依赖于平台:
在 iOS 上,选项卡列表显示在屏幕底部,页面内容位于上面。 每个选项卡由一个标题和一个图标组成。 在纵向方向,选项卡栏图标显示在选项卡标题上方。 在横向方向,图标和标题并排显示。 此外,可以根据设备和方向显示常规或精简选项卡栏。 如果有五个以上的选项卡,会显示“更多”选项卡,可用于访问其他选项卡。
在 Android 上,选项卡列表显示在屏幕顶部,页面内容如下所示。 每个选项卡由一个标题和一个图标组成。 但是,可以使用特定于平台布局将选项卡移动至屏幕底部。 如果有五个以上的选项卡,并且选项卡列表位于屏幕底部,会显示“更多”选项卡,可用于访问其他选项卡。 有关将选项卡移动到屏幕底部的信息,请参阅 Android 上的 TabbedPage 工具栏位置。
在 Windows 上,选项卡列表显示在屏幕顶部,页面内容如下所示。 每个选项卡都包含一个标题。
使用页集合填充 TabbedPage
TabbedPage可以使用子Page对象的集合填充 ,这些子对象通常为 ContentPage 对象。 这是通过将 对象添加 ContentPage 为 的子级来实现的 TabbedPage:
<TabbedPage xmlns="http://schemas.microsoft.com/dotnet/2021/maui"
xmlns:x="http://schemas.microsoft.com/winfx/2009/xaml"
xmlns:local="clr-namespace:TabbedPageWithNavigationPage"
x:Class="TabbedPageWithNavigationPage.MainPage">
<local:TodayPage />
<local:SchedulePage />
<local:SettingsPage />
</TabbedPage>
Page 添加为 的子元素的对象 TabbedPage 将添加到 集合中 Children 。 派生出 的 TabbedPageMultiPage<T> 类的 Children 属性是 MultiPage<T> 的 ContentProperty。 因此,在 XAML 中,无需将 Page 对象显式分配给 Children 属性。
以下屏幕截图显示了 在 上 TabbedPage生成的选项卡栏的外观:

使用 DataTemplate 填充 TabbedPage
TabbedPageItemsSource从 MultiPage<T> 类继承 、 ItemTemplate和 SelectedItem 可绑定属性。 通过这些属性,可以将 属性设置为IEnumerableItemsSource具有适合数据绑定的公共属性的对象集合,并将 属性设置为ItemTemplate具有页面类型作为根元素的 ,DataTemplate从而动态生成TabbedPage子级。
以下示例演示如何动态生成 TabbedPage 子级:
<TabbedPage xmlns="http://schemas.microsoft.com/dotnet/2021/maui"
xmlns:x="http://schemas.microsoft.com/winfx/2009/xaml"
xmlns:local="clr-namespace:TabbedPageDemo"
x:Class="TabbedPageDemo.MainPage"
ItemsSource="{x:Static local:MonkeyDataModel.All}">
<TabbedPage.ItemTemplate>
<DataTemplate>
<ContentPage Title="{Binding Name}"
IconImageSource="monkeyicon.png">
<StackLayout Padding="5, 25">
<Label Text="{Binding Name}"
FontAttributes="Bold"
FontSize="18"
HorizontalOptions="Center" />
<Image Source="{Binding PhotoUrl}"
HorizontalOptions="Center"
WidthRequest="200"
HeightRequest="200" />
<StackLayout Padding="50, 10">
<StackLayout Orientation="Horizontal">
<Label Text="Family: "
FontAttributes="Bold" />
<Label Text="{Binding Family}" />
</StackLayout>
...
</StackLayout>
</StackLayout>
</ContentPage>
</DataTemplate>
</TabbedPage.ItemTemplate>
</TabbedPage>
在此示例中,每个选项卡都包含一个 ContentPage 对象,该对象使用 Image 和 Label 对象来显示该选项卡的数据:
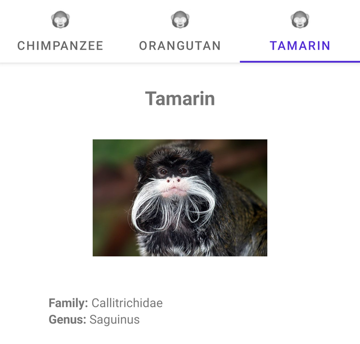
在选项卡中导航
导航可以在选项卡中执行,前提是对象 ContentPage 包装在 对象中 NavigationPage :
<TabbedPage xmlns="http://schemas.microsoft.com/dotnet/2021/maui"
xmlns:x="http://schemas.microsoft.com/winfx/2009/xaml"
xmlns:local="clr-namespace:TabbedPageWithNavigationPage"
x:Class="TabbedPageWithNavigationPage.MainPage">
<local:TodayPage />
<NavigationPage Title="Schedule"
IconImageSource="schedule.png">
<x:Arguments>
<local:SchedulePage />
</x:Arguments>
</NavigationPage>
</TabbedPage>
在此示例中,使用两个 Page 对象填充 TabbedPage。 第一个 ContentPage 子级是对象,第二个 NavigationPage 子级是包含 ContentPage 对象的对象。
ContentPage当 包装在 中时NavigationPage,可以通过对 对象的 属性ContentPage调用 PushAsync 方法来Navigation执行转发页导航:
await Navigation.PushAsync(new UpcomingAppointmentsPage());
有关使用 NavigationPage 类执行导航的详细信息,请参阅 NavigationPage。
.NET 多平台应用 UI (.NET MAUI) Border 是一个容器控件,用于在另一个控件周围绘制边框和/或背景。 只能 Border 包含一个子对象。 如果要在多个对象周围放置边框,请将它们包装在容器对象(如布局)中
Border 定义以下属性:
Content,类型 IView为 ,表示要显示在边框中的内容。 此属性是 ContentProperty 类的 Border ,因此不需要从 XAML 显式设置。
Padding,类型 Thickness为 ,表示边框与其子元素之间的距离。
StrokeShape类型 IShape为 ,描述边框的形状。 此属性应用了一个类型转换器,该转换器可将字符串转换为其等效 IShape的 。 默认值为 Rectangle。 因此, Border 默认为矩形。
Stroke,类型 Brush为 ,指示用于绘制边框的画笔。
StrokeThickness,类型 double为 ,指示边框的宽度。 此属性的默认值为 1.0。
StrokeDashArray,类型 DoubleCollection为 ,表示表示构成边框的短划线和间隙模式的值集合 double 。
StrokeDashOffset,类型 double为 ,指定短划线模式中短划线开始的距离。 此属性的默认值为 0.0。
StrokeLineCap,类型 PenLineCap为 ,描述其线条开头和末尾的形状。 此属性的默认值为 PenLineCap.Flat。
StrokeLineJoin,类型 PenLineJoin为 ,指定在笔划形状的顶点上使用的联接类型。 此属性的默认值为 PenLineJoin.Miter。
StrokeMiterLimit类型 double为 ,指定斜面长度与笔划粗细一半之比的限制。 此属性的默认值为 10.0。
创建边框
若要绘制边框,请创建对象 Border 并设置其属性以定义其外观。 然后,将其子级设置为应向其添加边框的控件。
以下 XAML 示例演示如何在 周围 Label绘制边框:
<Border Stroke="#C49B33"
StrokeThickness="4"
StrokeShape="RoundRectangle 40,0,0,40"
Background="#2B0B98"
Padding="16,8"
HorizontalOptions="Center">
<Label Text=".NET MAUI"
TextColor="White"
FontSize="18"
FontAttributes="Bold" />
</Border>
或者, StrokeShape 可以使用属性标记语法指定属性值:
<Border Stroke="#C49B33"
StrokeThickness="4"
Background="#2B0B98"
Padding="16,8"
HorizontalOptions="Center">
<Border.StrokeShape>
<RoundRectangle CornerRadius="40,0,0,40" />
</Border.StrokeShape>
<Label Text=".NET MAUI"
TextColor="White"
FontSize="18"
FontAttributes="Bold" />
</Border>
等效 C# 代码如下:
using Microsoft.Maui.Controls.Shapes;
using GradientStop = Microsoft.Maui.Controls.GradientStop;
...
Border border = new Border
{
Stroke = Color.FromArgb("#C49B33"),
Background = Color.FromArgb("#2B0B98"),
StrokeThickness = 4,
Padding = new Thickness(16, 8),
HorizontalOptions = LayoutOptions.Center,
StrokeShape = new RoundRectangle
{
CornerRadius = new CornerRadius(40, 0, 0, 40)
},
Content = new Label
{
Text = ".NET MAUI",
TextColor = Colors.White,
FontSize = 18,
FontAttributes = FontAttributes.Bold
}
};
在此示例中,将围绕 绘制带有左上角和右下角的圆角的 Label边框。 边框形状定义为 RoundRectangle 对象,其 CornerRadius 属性设置为一个 Thickness 值,该值允许对矩形的每个角进行独立控制:

Stroke由于 属性的类型为 Brush,因此也可以使用渐变绘制边框:
XAML
复制
<Border StrokeThickness="4"
StrokeShape="RoundRectangle 40,0,0,40"
Background="#2B0B98"
Padding="16,8"
HorizontalOptions="Center">
<Border.Stroke>
<LinearGradientBrush EndPoint="0,1">
<GradientStop Color="Orange"
Offset="0.1" />
<GradientStop Color="Brown"
Offset="1.0" />
</LinearGradientBrush>
</Border.Stroke>
<Label Text=".NET MAUI"
TextColor="White"
FontSize="18"
FontAttributes="Bold" />
</Border>
等效 C# 代码如下:
C#
复制
using Microsoft.Maui.Controls.Shapes;
using GradientStop = Microsoft.Maui.Controls.GradientStop;
...
Border gradientBorder = new Border
{
StrokeThickness = 4,
Background = Color.FromArgb("#2B0B98"),
Padding = new Thickness(16, 8),
HorizontalOptions = LayoutOptions.Center,
StrokeShape = new RoundRectangle
{
CornerRadius = new CornerRadius(40, 0, 0, 40)
},
Stroke = new LinearGradientBrush
{
EndPoint = new Point(0, 1),
GradientStops = new GradientStopCollection
{
new GradientStop { Color = Colors.Orange, Offset = 0.1f },
new GradientStop { Color = Colors.Brown, Offset = 1.0f }
},
},
Content = new Label
{
Text = ".NET MAUI",
TextColor = Colors.White,
FontSize = 18,
FontAttributes = FontAttributes.Bold
}
};
在此示例中,将围绕 绘制使用线性渐变的 Label边框:

使用字符串定义边框形状
在 XAML 中,可以使用属性标记语法或 作为 string定义属性的值StrokeShape。 属性的有效 string 值为 StrokeShape :
Ellipse
Line,后跟一两个 x 和 y 坐标对。 例如, Line 10 20 绘制一条从 (10,20) 到 (0,0) 的线条,并 Line 10 20, 100 120 绘制一条从 (10,20) 到 (100,120) 的线条。
Path,后跟路径标记语法数据。 例如, Path M 10,100 L 100,100 100,50Z 将绘制三角形边框。 有关路径标记语法的详细信息,请参阅 路径标记语法。
Polygon,后跟 x 和 y 坐标对的集合。 例如,Polygon 40 10, 70 80, 10 50。
Polyline,后跟集合 x 和 y 坐标对。 例如,Polyline 0,0 10,30 15,0 18,60 23,30 35,30 40,0 43,60 48,30 100,30。
Rectangle
RoundRectangle,后跟角半径(可选)。 例如 RoundRectangle 40 或 RoundRectangle 40,0,0,40。
NET 多平台应用 UI (.NET MAUI) BoxView 绘制具有指定宽度、高度和颜色的简单矩形或正方形。
BoxView 定义以下属性:
Color,类型 Color为 ,用于定义 的颜色 BoxView。
CornerRadius,类型 CornerRadius为 ,用于定义 的 BoxView角半径。 此属性可以设置为单个double统一的角半径值,或者由应用于 的左上角、右上角、左下角和右BoxView下角的四double个CornerRadius值定义的结构。
创建 BoxView
若要绘制矩形或正方形,请创建 对象 BoxView 并设置其 Color、 WidthRequest和 HeightRequest 属性。 (可选)还可以设置其 CornerRadius 属性。
以下 XAML 示例演示如何创建 BoxView:
<ContentPage xmlns="http://schemas.microsoft.com/dotnet/2021/maui"
xmlns:x="http://schemas.microsoft.com/winfx/2009/xaml"
xmlns:local="clr-namespace:BasicBoxView"
x:Class="BasicBoxView.MainPage">
<BoxView Color="CornflowerBlue"
CornerRadius="10"
WidthRequest="160"
HeightRequest="160"
VerticalOptions="Center"
HorizontalOptions="Center" />
</ContentPage>
在此示例中,页面中心显示一朵玉米花蓝色 BoxView :

WidthRequest和 HeightRequest 属性以与设备无关的单位度量。
BoxView还可以调整 大小,以类似于特定宽度和粗细的线条。
.NET 多平台应用 UI (.NET MAUI) Frame 用于包装带有边框的视图或布局,该边框可使用颜色、阴影和其他选项进行配置。 框架可用于在控件周围创建边框,但也可用于创建更复杂的 UI。
Frame 类定义了以下属性:
BorderColor类型 Color为 ,确定边框的颜色 Frame 。
CornerRadius类型 float为 ,确定角的圆角半径。
HasShadow类型 bool为 ,确定帧是否具有投影。
这些属性由 BindableProperty 对象提供支持;也就是说,它们可以作为数据绑定的目标,并能进行样式设置。
类 Frame 继承自 ContentView,后者提供 Content 可绑定属性。 属性 Content 是 ContentProperty 类的 Frame ,因此不需要从 XAML 显式设置。
创建框架
对象 Frame 通常包装另一个 Label控件,例如 :
<Frame>
<Label Text="Frame wrapped around a Label" />
</Frame>
可以通过设置属性自定义对象的外观 Frame :
<Frame BorderColor="Gray"
CornerRadius="10">
<Label Text="Frame wrapped around a Label" />
</Frame>
等效 C# 代码如下:
Frame frame = new Frame
{
BorderColor = Colors.Gray,
CornerRadius = 10,
Content = new Label { Text = "Frame wrapped around a Label" }
};
以下屏幕截图显示了示例 Frame:

使用 Frame 创建卡
将 Frame 对象与布局(如 )相结合, StackLayout 可以创建更复杂的 UI。
以下 XAML 演示如何使用 Frame创建卡:
<Frame BorderColor="Gray"
CornerRadius="5"
Padding="8">
<StackLayout>
<Label Text="Card Example"
FontSize="14"
FontAttributes="Bold" />
<BoxView Color="Gray"
HeightRequest="2"
HorizontalOptions="Fill" />
<Label Text="Frames can wrap more complex layouts to create more complex UI components, such as this card!"/>
</StackLayout>
</Frame>
以下屏幕截图显示了示例卡:

圆形元素
控件 CornerRadius 的 Frame 属性是创建圆形图像的一种方法。 以下 XAML 演示如何使用 Frame创建圆形图像:
<Frame Margin="10"
BorderColor="Black"
CornerRadius="50"
HeightRequest="60"
WidthRequest="60"
IsClippedToBounds="True"
HorizontalOptions="Center"
VerticalOptions="Center">
<Image Source="outdoors.jpg"
Aspect="AspectFill"
Margin="-20"
HeightRequest="100"
WidthRequest="100" />
</Frame>
以下屏幕截图显示了示例圆圈图像:

.NET 多平台应用 UI (.NET MAUI) GraphicsView 是一个图形画布,可以使用命名空间中的 Microsoft.Maui.Graphics 类型绘制 2D 图形。 有关 的详细信息 Microsoft.Maui.Graphics,请参阅 图形。
GraphicsView 定义 Drawable 类型的 IDrawable属性,该属性指定要绘制的内容。 此属性由 BindableProperty提供支持,这意味着它可以是数据绑定的目标,并设置了样式。
GraphicsView 定义以下事件:
StartHoverInteraction,具有 TouchEventArgs,这是当指针进入 的命中测试区域时引发的 GraphicsView。
MoveHoverInteraction,具有 TouchEventArgs,当指针移动时,当指针保留在 的命中测试区域内时, GraphicsView将引发 。
EndHoverInteraction,当指针离开 的命中测试区域时引发。GraphicsView
StartInteraction,具有 TouchEventArgs,这是在按下 时 GraphicsView 引发的。
DragInteraction,具有 TouchEventArgs,这是在拖动 时 GraphicsView 引发的。
EndInteraction,具有 TouchEventArgs,这是在释放引发事件的按下时引发的 StartInteraction 。
CancelInteraction,当与 GraphicsView 进行接触的媒体失去接触时引发。
创建 GraphicsView
GraphicsView必须定义一个 IDrawable 对象,该对象指定将在 控件上绘制的内容。 这可以通过创建派生自 IDrawable的对象,并通过实现其 Draw 方法来实现:
namespace MyMauiApp
{
public class GraphicsDrawable : IDrawable
{
public void Draw(ICanvas canvas, RectF dirtyRect)
{
// Drawing code goes here
}
}
}
方法 Draw 具有 ICanvas 和 RectF 参数。 ICanvas参数是绘制图形对象的绘图画布。 参数 RectF 是一个 struct ,它包含有关绘图画布的大小和位置的数据。 有关在 上 ICanvas绘图的详细信息,请参阅 绘制图形对象。
在 XAML 中IDrawable, 对象可以声明为资源,然后通过将其键指定为 属性的值Drawable来使用 GraphicsView :
<ContentPage xmlns=http://schemas.microsoft.com/dotnet/2021/maui
xmlns:x=http://schemas.microsoft.com/winfx/2009/xaml
xmlns:drawable="clr-namespace:MyMauiApp"
x:Class="MyMauiApp.MainPage">
<ContentPage.Resources>
<drawable:GraphicsDrawable x:Key="drawable" />
</ContentPage.Resources>
<VerticalStackLayout>
<GraphicsView Drawable="{StaticResource drawable}"
HeightRequest="300"
WidthRequest="400" />
</VerticalStackLayout>
</ContentPage>
图形对象的位置和大小
页面上 的位置ICanvas和大小可以通过在 方法中Draw检查 参数的属性RectF来确定。
结构 RectF 定义以下属性:
Bottom,类型 float为 ,表示画布下边缘的 y 坐标。
Center,类型 PointF为 ,指定画布中心坐标。
Height,类型 float为 ,用于定义画布的高度。
IsEmpty,类型 bool为 ,指示画布的大小和位置是否为零。
Left,类型 float为 ,表示画布左边缘的 x 坐标。
Location,类型 PointF为 ,用于定义画布左上角的坐标。
Right,类型 float为 ,表示画布右边缘的 x 坐标。
Size,类型 SizeF为 ,用于定义画布的宽度和高度。
Top,类型 float为 ,表示画布上边缘的 y 坐标。
Width,类型 float为 ,用于定义画布的宽度。
X,类型 float为 ,用于定义画布左上角的 x 坐标。
Y,类型 float为 ,用于定义画布左上角的 y 坐标。
这些属性可用于在 上 ICanvas定位图形对象并调整其大小。 例如,通过将 和 Center.Y 值用作绘图方法的参数CanvasCenter.X,可以将图形对象置于 的中心。 有关在 上 ICanvas绘制的信息,请参阅 绘制图形对象。
使画布失效
GraphicsView 具有一个 Invalidate 方法,该方法通知画布需要重绘自身。 必须在实例上 GraphicsView 调用此方法:
graphicsView.Invalidate();
.NET MAUI 会根据 UI 的需要自动使 GraphicsView 失效。 例如,当元素首次显示、进入视图或通过从元素顶部移动元素来显示该元素时,将重绘该元素。 需要调用 Invalidate 的唯一时间是想要强制 GraphicsView 重绘自身,例如,在它仍然可见时更改了其内容。
MAUI自定义绘图
在新建的项目里面,新建一个类型,让这个类型继承 Microsoft.Maui.Graphics.IDrawable 接口。于是此类型即可通过实现 Draw 方法,被框架层调用到,从而在 Draw 方法里面执行绘图。例如和官方的例子一样,将此类型命名为 GraphicsDrawable 如以下代码
public class GraphicsDrawable : IDrawable
{
public void Draw(ICanvas canvas, RectF dirtyRect)
{
canvas.FillColor = Colors.Black;//填充背景色
Rect bgRect = new Rect(0, 0, 100, 100);//坐标x,y Width,Heigh
canvas.FillRectangle(bgRect);//填充矩形
}
}
MAUI 框架里提供了 GraphicsView 元素用来对接 Microsoft.Maui.Graphics 的绘图功能。
<Grid RowDefinitions="*,160" Padding="10">
<GraphicsView x:Name="gView"/>
</Grid>
方法调用
GraphicsDrawable drawable;
public MainPage()
{
InitializeComponent();
drawable = new GraphicsDrawable();
gView.Drawable = drawable;
}
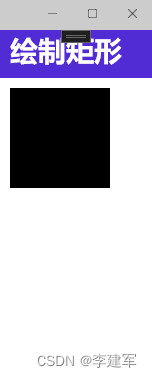
.NET 多平台应用 UI (.NET MAUI) Image 显示可从本地文件、URI 或流加载的图像。 还支持标准平台图像格式,包括动画 GIF 和本地可缩放矢量图形 (SVG) 文件。 有关将图像添加到 .NET MAUI 应用项目的详细信息,请参阅 将图像添加到 .NET MAUI 应用项目。
Image 定义以下属性:
Aspect,属于 类型 Aspect,定义图像的缩放模式。
IsAnimationPlaying类型的 bool确定动画 GIF 是正在播放还是停止。 此属性的默认值为 false。
IsLoading,类型 bool为 ,指示图像的加载状态。 此属性的默认值为 false。
IsOpaque类型 bool为 ,指示呈现引擎在呈现图像时是否可将图像视为不透明。 此属性的默认值为 false。
Source,属于 类型 ImageSource,指定图像的源。
类 ImageSource 定义可用于从不同源加载图像的以下方法:
FromFile 返回 FileImageSource 从本地文件读取图像的 。
FromUri 返回从 UriImageSource 指定 URI 下载和读取图像的 。
FromStream 返回一个 , StreamImageSource 它从提供图像数据的流中读取图像。
在 XAML 中,可以通过将文件名或 URI 指定为 属性的 Source 字符串值,从文件和 URI 加载图像。
加载本地映像
<Image Source="dotnet_bot.png" /><Image Source="dotnet_bot.png" />
等效 C# 代码如下:
Image image = new Image
{
Source = ImageSource.FromFile("dotnet_bot.png")
};
方法 ImageSource.FromFile 需要参数 string ,并返回从文件读取图像的新 FileImageSource 对象。 还有一个隐式转换运算符,它允许将文件名指定为 string 属性的参数 Image.Source :
Image image = new Image { Source = "dotnet_bot.png" };
加载远程映像
可以通过将 URI 指定为 属性的值 Source 来下载和显示远程图像:
<Image Source="https://aka.ms/campus.jpg" />
等效 C# 代码如下:
Image image = new Image
{
Source = ImageSource.FromUri(new Uri("https://aka.ms/campus.jpg"))
};
方法 ImageSource.FromUri 需要参数 Uri ,并返回一个新的 UriImageSource 对象,该对象从 Uri中读取图像。 基于字符串的 URI 还有隐式转换:
Image image = new Image { Source = "https://aka.ms/campus.jpg" };
图像缓存
默认情况下,缓存已下载的映像处于启用状态,缓存的映像存储 1 天。 可以通过设置 类的属性 UriImageSource 来更改此行为。
UriImageSource 类定义了以下属性:
Uri,属于 类型 Uri,表示要下载以供显示的图像的 URI。
CacheValidity,类型 TimeSpan为 ,指定图像在本地存储的时间。 此属性的默认值为 1 天。
CachingEnabled类型的 bool定义是否启用图像缓存。 此属性的默认值为 true。
这些属性由 BindableProperty 对象支持,这意味着它们可以设置样式,并成为数据绑定的目标。
若要设置特定的缓存周期,请将 属性 Source 设置为 UriImageSource 设置其 CacheValidity 属性的对象:
<Image>
<Image.Source>
<UriImageSource Uri="https://aka.ms/campus.jpg"
CacheValidity="10:00:00:00" />
</Image.Source>
</Image>
等效 C# 代码如下:
Image image = new Image();
image.Source = new UriImageSource
{
Uri = new Uri("https://aka.ms/campus.jpg"),
CacheValidity = new TimeSpan(10,0,0,0)
};
在此示例中,缓存期限设置为 10 天。
从流加载图像
可以使用 方法从流 ImageSource.FromStream 加载图像:
Image image = new Image
{
Source = ImageSource.FromStream(() => stream)
};
加载字体图标
标记 FontImage 扩展使你可以在任何可以显示 的视图中显示 ImageSource字体图标。 它提供与 类相同的功能 FontImageSource ,但具有更简洁的表示形式。
FontImageExtension 类支持 FontImage 标记扩展,并定义以下属性:
FontFamily 类型 string为 ,字体图标所属的字体系列。
Glyph , string字体图标的 unicode 字符值。
Color 类型 Color为 ,显示字体图标时要使用的颜色。
Size 类型 double为 ,以设备无关单位表示的呈现字体图标的大小。 默认值为 30。 此外,此属性可以设置为命名字号。
备注
XAML 分析程序允许将 FontImageExtension 类缩写为 FontImage。
属性 Glyph 是 的内容 FontImageExtension属性。 因此,对于用大括号表示的 XAML 标记表达式,如果表达式是第一个参数,则可以消除 Glyph= 表达式的 部分。
以下 XAML 示例演示如何使用 FontImage 标记扩展:
<Image BackgroundColor="#D1D1D1"
Source="{FontImage , FontFamily=Ionicons, Size=44}" />
在此示例中,类名的 FontImageExtension 缩写版本用于在 中显示 Ionicons 字体系列中的 ImageXBox 图标:

虽然图标的 unicode 字符为 \uf30c,但它必须在 XAML 中转义,因此 变为 。
有关通过在 对象中 FontImageSource 指定字体图标数据来显示字体图标的信息,请参阅 显示字体图标。
加载动画 GIF
.NET MAUI 支持显示小型动画 GIF。 这是通过将 属性设置为 Source 动态 GIF 文件来实现的:
<Image Source="demo.gif" />
虽然 .NET MAUI 中的动画 GIF 支持包括下载文件的功能,但它不支持缓存或流式处理动画 GIF。
默认情况下,加载动画 GIF 时不会播放它。 这是因为 IsAnimationPlaying 控制动态 GIF 是正在播放还是停止的 属性的默认值 false为 。 因此,当加载动态 GIF 时,除非 将 属性设置为 true,否则不会播放IsAnimationPlaying该动态 GIF。 可以通过将 属性重置 IsAnimationPlaying 为 来 false停止播放。 请注意,当显示非 GIF 图像源时,此属性不起作用。
控制图像缩放
属性 Aspect 确定如何缩放图像以适应显示区域,并且应设置为 枚举的成员之 Aspect 一:
AspectFit - 根据需要) 将图像 (,以便整个图像适合显示区域,并将空白空间添加到顶部/底部或两侧,具体取决于图像是宽还是高。
AspectFill - 剪裁图像,使其填充显示区域,同时保持纵横比。
Fill - 拉伸图像,以完全、准确填充显示区域。 这可能会导致图像失真。
Center - 在保持纵横比的同时,将图像居中显示区域。
.NET 多平台应用 UI (.NET MAUI) Label 显示单行和多行文本。 显示 Label 的文本可以着色、分隔,并且可以具有文本修饰。
Label 定义以下属性:
CharacterSpacing,属于 类型 double,设置所显示文本中字符之间的间距。
FontAttributes,属于 类型 FontAttributes,确定文本样式。
FontAutoScalingEnabled类型 bool为 ,定义文本是否反映操作系统中设置的缩放首选项。 此属性的默认值为 true。
FontFamily,属于 类型 string,定义字体系列。
FontSize,属于 类型 double,定义字号。
FormattedText,类型 FormattedString为 ,指定具有多种表示选项(如字体和颜色)的文本的呈现。
HorizontalTextAlignment类型 TextAlignment为 ,定义所显示文本的水平对齐方式。
LineBreakMode类型 LineBreakMode为 ,确定当文本无法容纳在一行时应如何处理文本。
LineHeight类型 double为 ,指定要在显示文本时应用于默认行高的乘数。
MaxLines,属于 类型 int,指示 中 Label允许的最大行数。
Padding,属于 类型 Thickness,确定标签的填充。
Text类型 string为 ,将显示为标签内容的文本定义。
TextColor,属于 类型 Color,定义所显示文本的颜色。
TextDecorations类型 TextDecorations为 ,指定可应用 (下划线和删除线) 的文本修饰。
TextTransform,属于 类型 TextTransform,指定所显示文本的大小写。
TextType类型 TextType为 ,确定 应显示纯文本还是 Label HTML 文本。
VerticalTextAlignment类型 TextAlignment为 ,定义所显示文本的垂直对齐方式。
创建标签
以下示例演示如何创建 Label:
<Label Text="Hello world" />
等效 C# 代码如下:
Label label = new Label { Text = "Hello world" };
设置颜色
可以通过 属性将标签设置为使用特定文本颜色 TextColor 。
以下示例设置 的文本颜色 Label:
<Label TextColor="#77d065"
Text="This is a green label." />
有关颜色的详细信息,请参阅 颜色。
设置字符间距
通过将 属性设置为值,CharacterSpacing可以将字符间距应用于 Labeldouble 对象:
<Label Text="Character spaced text"
CharacterSpacing="10" />
结果是, 显示 Label 的文本中的字符是分隔 CharacterSpacing 的与设备无关的单位。
添加新行
可通过 XAML 将 中的Label文本强制到新行的两种main方法:
使用 unicode 换行符,即“ ”。
使用 属性元素 语法指定文本。
以下代码演示这两种方法的示例:
<!-- Unicode line feed character -->
<Label Text="First line Second line" />
<!-- Property element syntax -->
<Label>
<Label.Text>
First line
Second line
</Label.Text>
</Label>
在 C# 中,文本可以强制转换为带有“\n”字符的新行:
Label label = new Label { Text = "First line\nSecond line" };
控制文本截断和换行
通过将 属性设置为 LineBreakMode 枚举的值 LineBreakMode ,可以控制文本换行和截断:
NoWrap — 不使文本换行,只显示一行可以容纳的尽可能多的文本。 这是 LineBreakMode 属性的默认值。
WordWrap — 在字边界处换行文本。
CharacterWrap — 将文本换行到字符边界处的新行上。
HeadTruncation — 截断文本的标题,显示结尾。
MiddleTruncation — 显示文本的开头和结尾,中间用省略号替换。
TailTruncation — 显示文本的开头,截断结尾。
显示特定数量的行
通过将 属性设置为MaxLinesint值,可以指定 显示的Label行数:
当 为 -1(这是其默认值)时 MaxLines , Label 将遵循 属性的值 LineBreakMode ,以便只显示一行(可能截断),或者显示包含所有文本的所有行。
当 MaxLines 为 0 时, Label 不显示 。
当 MaxLines 为 1 时,结果与将 LineBreakMode 属性设置为 NoWrap、 HeadTruncation、 MiddleTruncation或 TailTruncation相同。 但是, Label 将遵循与省略号放置相关的 属性的值 LineBreakMode (如果适用)。
当 大于 1 时 MaxLines , Label 将最多显示指定的行数,同时遵循与省略号放置相关的 属性的值 LineBreakMode (如果适用)。 但是, MaxLines 如果将 属性设置为 ,则将 LineBreakMode 属性设置为 NoWrap大于 1 的值将不起作用。
以下 XAML 示例演示如何在 上Label设置 MaxLines 属性:
<Label Text="Lorem ipsum dolor sit amet, consectetur adipiscing elit. In facilisis nulla eu felis fringilla vulputate. Nullam porta eleifend lacinia. Donec at iaculis tellus."
LineBreakMode="WordWrap"
MaxLines="2" />
设置行高
通过将 属性设置为Label.LineHeightdouble值,可以自定义 的垂直高度Label。
在 iOS 上 Label.LineHeight , 属性更改适合单行的文本的行高,以及换行到多行上的文本。
在 Android 上, Label.LineHeight 属性仅更改换行到多行上的文本的行高。
在 Windows 上, Label.LineHeight 属性更改环绕到多行的文本的行高。
以下示例演示如何在 上Label设置 LineHeight 属性:
<Label Text="Lorem ipsum dolor sit amet, consectetur adipiscing elit. In facilisis nulla eu felis fringilla vulputate. Nullam porta eleifend lacinia. Donec at iaculis tellus."
LineBreakMode="WordWrap"
LineHeight="1.8" />
以下屏幕截图显示了将 属性设置为 Label.LineHeight 1.8 的结果:
显示 HTML
类 Label 具有 属性 TextType ,该属性确定对象应显示纯文本还是 Label HTML 文本。 此属性应设置为 枚举的成员之 TextType 一:
Text 指示 Label 将显示纯文本, 是 属性的 TextType 默认值。
Html 指示 Label 将显示 HTML 文本。
因此, Label 对象可以通过将 TextType 属性设置为 Html,将 Text 属性设置为 HTML 字符串来显示 HTML:
Label label = new Label
{
Text = "This is <strong style=\"color:red\">HTML</strong> text.",
TextType = TextType.Html
};
在上面的示例中,必须使用 符号对 HTML 中的双引号字符进行 \ 转义。
在 XAML 中,由于另外转义 和 > 符号,<HTML 字符串可能变得不可读:
<Label Text="This is <strong style="color:red">HTML</strong> text."
TextType="Html" />
或者,为了提高可读性,可以在节中 CDATA 内联 HTML:
<Label TextType="Html">
<![CDATA[
This is <strong style="color:red">HTML</strong> text.
]]>
</Label>
在此示例中, Text 属性设置为 节中内 CDATA 联的 HTML 字符串。 这有效, Text 因为 属性是 ContentProperty 类的 Label 。
在 中 Label 显示 HTML 仅限于基础平台支持的 HTML 标记。
修饰文本
通过将 属性设置为TextDecorations一个或多个TextDecorations枚举成员,可以将下划线和删除线文本修饰应用于Label对象:
None
Underline
Strikethrough
以下示例演示如何设置 TextDecorations 属性:
<Label Text="This is underlined text." TextDecorations="Underline" />
<Label Text="This is text with strikethrough." TextDecorations="Strikethrough" />
<Label Text="This is underlined text with strikethrough." TextDecorations="Underline, Strikethrough" />
等效 C# 代码如下:
Label underlineLabel = new Label { Text = "This is underlined text.", TextDecorations = TextDecorations.Underline };
Label strikethroughLabel = new Label { Text = "This is text with strikethrough.", TextDecorations = TextDecorations.Strikethrough };
Label bothLabel = new Label { Text = "This is underlined text with strikethrough.", TextDecorations = TextDecorations.Underline | TextDecorations.Strikethrough };
以下屏幕截图显示了应用于Label实例的TextDecorations枚举成员:

文本修饰也可以应用于 Span 实例。 有关 类的详细信息 Span ,请参阅 使用格式化文本。
转换文本
Label通过将 属性设置为 TextTransform 枚举的值,可以转换存储在 属性中的Text文本的大小TextTransform写。 此枚举有四个值:
None 指示不会转换文本。
Default 指示将使用平台的默认行为。 这是 TextTransform 属性的默认值。
Lowercase 指示文本将转换为小写。
Uppercase 指示文本将转换为大写。
以下示例演示如何将文本转换为大写:
<Label Text="This text will be displayed in uppercase."
TextTransform="Uppercase" />
使用格式化文本
Label 公开一个属性,该属性允许在同一 FormattedText 视图中显示具有多个字体和颜色的文本。 属性 FormattedText 的类型为 FormattedString,由一个或多个 Span 实例组成,通过 Spans 属性设置。
无法在 中 Span显示 HTML。
Span 定义以下属性:
BackgroundColor,类型 Color为 ,表示跨度背景的颜色。
CharacterSpacing,类型 double为 ,设置所显示文本中字符之间的间距。
FontAttributes类型 FontAttributes为 ,确定文本样式。
FontAutoScalingEnabled类型 bool为 ,定义文本是否将反映操作系统中设置的缩放首选项。 此属性的默认值为 true。
FontFamily,类型 string为 ,定义字体系列。
FontSize,类型 double为 ,定义字号。
LineHeight,类型 double为 ,指定要在显示文本时应用于默认行高的乘数。
Style,类型 Style为 ,这是要应用于范围的样式。
Text,类型 string为 ,定义显示为 的内容 Span的文本。
TextColor类型 Color为 ,定义所显示文本的颜色。
TextDecorations类型 TextDecorations为 ,指定可应用 (下划线和删除线) 的文本修饰。
TextTransform,类型 TextTransform为 ,指定所显示文本的大小写。
这些属性由 BindableProperty 对象提供支持;也就是说,它们可以作为数据绑定的目标,并能进行样式设置。
属性 Span.LineHeight 对 Windows 没有影响。
此外, GestureRecognizers 属性可用于定义手势识别器集合,这些手势识别器将响应 上的 Span手势。
以下 XAML 示例演示由三Span个FormattedText实例组成的属性:
<Label LineBreakMode="WordWrap">
<Label.FormattedText>
<FormattedString>
<Span Text="Red Bold, " TextColor="Red" FontAttributes="Bold" />
<Span Text="default, " FontSize="14">
<Span.GestureRecognizers>
<TapGestureRecognizer Command="{Binding TapCommand}" />
</Span.GestureRecognizers>
</Span>
<Span Text="italic small." FontAttributes="Italic" FontSize="12" />
</FormattedString>
</Label.FormattedText>
</Label>
等效 C# 代码如下:
FormattedString formattedString = new FormattedString ();
formattedString.Spans.Add (new Span { Text = "Red bold, ", TextColor = Colors.Red, FontAttributes = FontAttributes.Bold });
Span span = new Span { Text = "default, " };
span.GestureRecognizers.Add(new TapGestureRecognizer { Command = new Command(async () => await DisplayAlert("Tapped", "This is a tapped Span.", "OK")) });
formattedString.Spans.Add(span);
formattedString.Spans.Add (new Span { Text = "italic small.", FontAttributes = FontAttributes.Italic, FontSize = 14 });
Label label = new Label { FormattedText = formattedString };
以下屏幕截图显示了包含三Span个 对象的结果Label:
 。
。
Span还可以响应添加到范围GestureRecognizers集合的任何手势。 例如, TapGestureRecognizer 已添加到上述示例中的第二个 Span 示例中。 因此,当点击此项 Span 时, TapGestureRecognizer 将通过执行 ICommand 由 Command 属性定义的 进行响应。 有关点击手势识别的详细信息,请参阅 识别点击手势。
创建超链接
和 Span 实例显示Label的文本可使用以下方法转换为超链接:
TextColor设置 或 Span的 Label 和 TextDecoration 属性。
TapGestureRecognizer将 添加到 或 Span的Label集合中GestureRecognizers,其Command属性绑定到 ICommand,其CommandParameter属性包含要打开的 URL。
ICommand定义将由 执行的 TapGestureRecognizer。
编写将由 执行 ICommand的代码。
以下示例演示 Label 了从多个 Span 对象设置其内容的 :
<Label>
<Label.FormattedText>
<FormattedString>
<Span Text="Alternatively, click " />
<Span Text="here"
TextColor="Blue"
TextDecorations="Underline">
<Span.GestureRecognizers>
<TapGestureRecognizer Command="{Binding TapCommand}"
CommandParameter="https://learn.microsoft.com/dotnet/maui/" />
</Span.GestureRecognizers>
</Span>
<Span Text=" to view .NET MAUI documentation." />
</FormattedString>
</Label.FormattedText>
</Label>
在此示例中,第一个和第三 Span 个实例包含文本,而第二 Span 个实例表示可应用超链接。 其文本颜色设置为蓝色,并具有下划线文本修饰。 这将创建超链接的外观,如以下屏幕截图所示:

点击超链接时, TapGestureRecognizer 将通过执行 ICommand 由其 Command 属性定义的 进行响应。 此外,由 CommandParameter 属性指定的 URL 将作为参数传递给 ICommand 。
XAML 页的代码隐藏包含 TapCommand 实现:
using System.Windows.Input;
public partial class MainPage : ContentPage
{
// Launcher.OpenAsync is provided by Essentials.
public ICommand TapCommand => new Command<string>(async (url) => await Launcher.OpenAsync(url));
public MainPage()
{
InitializeComponent();
BindingContext = this;
}
}
执行 TapCommandLauncher.OpenAsync 方法,将 TapGestureRecognizer.CommandParameter 属性值作为参数传递。 方法 Launcher.OpenAsync 在 Web 浏览器中打开 URL。 因此,整体效果是,当点击页面上的超链接时,将显示一个 Web 浏览器,并与超链接关联的 URL 导航到。
创建可重用的超链接类
以前创建超链接的方法要求每次在应用中需要超链接时编写重复代码。 但是,LabelSpan和 类都可以通过添加手势识别器和文本格式代码进行子类类化以创建 HyperlinkLabel 和 HyperlinkSpan 类。
以下示例演示一个 HyperlinkSpan 类:
public class HyperlinkSpan : Span
{
public static readonly BindableProperty UrlProperty =
BindableProperty.Create(nameof(Url), typeof(string), typeof(HyperlinkSpan), null);
public string Url
{
get { return (string)GetValue(UrlProperty); }
set { SetValue(UrlProperty, value); }
}
public HyperlinkSpan()
{
TextDecorations = TextDecorations.Underline;
TextColor = Colors.Blue;
GestureRecognizers.Add(new TapGestureRecognizer
{
// Launcher.OpenAsync is provided by Essentials.
Command = new Command(async () => await Launcher.OpenAsync(Url))
});
}
}
类 HyperlinkSpan 定义 Url 属性和关联的 BindableProperty,构造函数设置超链接外观和 TapGestureRecognizer 在点击超链接时将做出响应的 。 HyperlinkSpan点击 时,TapGestureRecognizer将通过执行 Launcher.OpenAsync 方法在 Web 浏览器中打开 属性指定的 Url URL 来响应 。
HyperlinkSpan可以通过将 类的实例添加到 XAML 来使用 类:
<ContentPage xmlns="http://schemas.microsoft.com/dotnet/2021/maui"
xmlns:x="http://schemas.microsoft.com/winfx/2009/xaml"
xmlns:local="clr-namespace:HyperlinkDemo"
x:Class="HyperlinkDemo.MainPage">
<StackLayout>
...
<Label>
<Label.FormattedText>
<FormattedString>
<Span Text="Alternatively, click " />
<local:HyperlinkSpan Text="here"
Url="https://learn.microsoft.com/dotnet/" />
<Span Text=" to view .NET documentation." />
</FormattedString>
</Label.FormattedText>
</Label>
</StackLayout>
</ContentPage>
NET 多平台应用 UI (.NET MAUI) WebView 在应用中显示远程网页、本地 HTML 文件和 HTML 字符串。 显示 WebView 的内容包括支持级联样式表 (CSS) 和 JavaScript。 默认情况下,.NET MAUI 项目包括 显示远程网页所需的 WebView 平台权限。
WebView 定义以下属性:
Cookies类型 CookieContainer为 ,为 Cookie 集合提供存储。
CanGoBack类型 bool为 ,指示用户是否可以导航到以前的页面。 这是只读属性。
CanGoForward,类型 bool为 ,指示用户是否可以向前导航。 这是只读属性。
Source,类型 WebViewSource为 ,表示 显示的位置 WebView 。
这些属性由 BindableProperty 对象提供支持;也就是说,它们可以作为数据绑定的目标,并能进行样式设置。
属性 Source 可以设置为 UrlWebViewSource 对象或对象,这两者 HtmlWebViewSource 都派生自 WebViewSource。 UrlWebViewSource用于加载使用 URL 指定的网页,而 HtmlWebViewSource 对象用于加载本地 HTML 文件或本地 HTML。
WebView 定义页面 Navigating 导航启动时引发的事件,以及 Navigated 页面导航完成时引发的事件。 WebNavigatingEventArgs事件附带Navigating的对象定义Cancel可用于取消导航的 类型的bool属性。 WebNavigatedEventArgs事件附带Navigated的对象定义Result指示导航结果的 类型的WebNavigationResult属性。
当 WebView 包含在 、 或 VerticalStackLayout中HorizontalStackLayout时,StackLayout必须指定其 HeightRequest 和 WidthRequest 属性。 如果未能指定这些属性, WebView 将不会呈现 。
显示网页
若要显示远程网页,请将 Source 属性设置为 string 指定 URI 的 :
<WebView Source="https://learn.microsoft.com/dotnet/maui" />
等效 C# 代码如下:
WebView webvView = new WebView
{
Source = "https://learn.microsoft.com/dotnet/maui"
};
URI 必须使用指定的协议完全形成。
Source尽管 属性的类型为 WebViewSource,但属性可以设置为基于字符串的 URI。 这是因为 .NET MAUI 包含类型转换器和隐式转换运算符,用于将基于字符串的 URI 转换为 UrlWebViewSource 对象。
显示本地 HTML
若要显示内联 HTML,请将 Source 属性设置为 HtmlWebViewSource 对象:
<WebView>
<WebView.Source>
<HtmlWebViewSource Html="<HTML><BODY><H1>.NET MAUI</H1><P>Welcome to WebView.</P></BODY><HTML>" />
</WebView.Source>
</WebView>
在 XAML 中,HTML 字符串可能因转义 < 和 > 符号而变得不可读。 因此,为了提高可读性,可以在节 CDATA 中内联 HTML:
<WebView>
<WebView.Source>
<HtmlWebViewSource>
<HtmlWebViewSource.Html>
<![CDATA[
<HTML>
<BODY>
<H1>.NET MAUI</H1>
<P>Welcome to WebView.</P>
</BODY>
</HTML>
]]>
</HtmlWebViewSource.Html>
</HtmlWebViewSource>
</WebView.Source>
</WebView>
等效 C# 代码如下:
WebView webView = new WebView
{
Source = new HtmlWebViewSource
{
Html = @"<HTML><BODY><H1>.NET MAUI</H1><P>Welcome to WebView.</P></BODY></HTML>"
}
};
显示本地 HTML 文件
若要显示本地 HTML 文件,请将该文件添加到应用项目的 Resources\Raw 文件夹,并将其生成操作设置为 MauiAsset。 然后,可以从内联 HTML 加载文件,该 HTML 在设置为 属性的值Source的 对象中HtmlWebViewSource定义:
<WebView>
<WebView.Source>
<HtmlWebViewSource>
<HtmlWebViewSource.Html>
<![CDATA[
<html>
<head>
</head>
<body>
<h1>.NET MAUI</h1>
<p>The CSS and image are loaded from local files!</p>
<p><a href="localfile.html">next page</a></p>
</body>
</html>
]]>
</HtmlWebViewSource.Html>
</HtmlWebViewSource>
</WebView.Source>
</WebView>
本地 HTML 文件可以加载级联样式表 (CSS) 、JavaScript 和图像(如果它们也已使用 MauiAsset 生成操作添加到应用项目)。
有关原始资产的详细信息,请参阅 原始资产。
重新加载内容
WebView 具有一个 Reload 可调用方法来重新加载其源:
WebView webView = new WebView();
...
webView.Reload();
执行导航
WebView支持使用 和 GoForward 方法进行GoBack编程导航。 这些方法支持在页面堆栈中WebView导航,并且仅应在检查 和 CanGoForward 属性的值CanGoBack后调用:
WebView webView = new WebView();
...
// Go backwards, if allowed.
if (webView.CanGoBack)
{
webView.GoBack();
}
// Go forwards, if allowed.
if (webView.CanGoForward)
{
webView.GoForward();
}
在 中 WebView以编程方式启动或由用户启动的页面导航时,会发生以下事件:
Navigating,在页面导航启动时引发。 WebNavigatingEventArgs事件附带Navigating的对象定义Cancel可用于取消导航的 类型的bool属性。
Navigated,在页面导航完成时引发。 WebNavigatedEventArgs事件附带Navigated的对象定义Result指示导航结果的 类型的WebNavigationResult属性。
处理 Android 上的权限
浏览到请求访问设备录制硬件(如相机或麦克风)的页面时,必须由控件授予 WebView 权限。 控件 WebView 使用 Android.Webkit.WebChromeClient Android 上的 类型来响应权限请求。 但是, WebChromeClient .NET MAUI 提供的实现会忽略权限请求。 必须创建继承自 MauiWebChromeClient 并批准权限请求的新类型。
WebView使用此方法自定义 以批准权限请求需要 Android API 26 或更高版本。
从网页向 WebView 控件发出的权限请求不同于 .NET MAUI 应用对用户的权限请求。 用户针对整个应用请求和批准 .NET MAUI 应用权限。 该 WebView 控件依赖于应用访问硬件的能力。 为了说明此概念,请考虑一个网页,该网页请求访问设备的相机。 即使该请求已获得 WebView 控件的批准,但 .NET MAUI 应用尚未获得用户访问相机的批准,网页也无法访问该相机。
以下步骤演示如何截获来自 WebView 控件的权限请求以使用相机。 如果尝试使用麦克风,步骤将类似,只是使用麦克风相关权限而不是相机相关权限。
1.首先,将所需的应用权限添加到 Android 清单。 打开 “平台/Android/AndroidManifest.xml ”文件,并在节点中添加 manifest 以下内容:
<uses-permission android:name="android.permission.CAMERA" />
2.在应用中的某个时间点(例如加载包含 WebView 控件的页面时),请求用户授予权限以允许应用访问相机。
private async Task RequestCameraPermission()
{
PermissionStatus status = await Permissions.CheckStatusAsync<Permissions.Camera>();
if (status != PermissionStatus.Granted)
await Permissions.RequestAsync<Permissions.Camera>();
}
3.将以下类添加到 “平台/Android ”文件夹,更改根命名空间以匹配项目的命名空间:
using Android.Webkit;
using Microsoft.Maui.Handlers;
using Microsoft.Maui.Platform;
namespace MauiAppWebViewHandlers.Platforms.Android;
internal class MyWebChromeClient: MauiWebChromeClient
{
public MyWebChromeClient(IWebViewHandler handler) : base(handler)
{
}
public override void OnPermissionRequest(PermissionRequest request)
{
// Process each request
foreach (var resource in request.GetResources())
{
// Check if the web page is requesting permission to the camera
if (resource.Equals(PermissionRequest.ResourceVideoCapture, StringComparison.OrdinalIgnoreCase))
{
// Get the status of the .NET MAUI app's access to the camera
PermissionStatus status = Permissions.CheckStatusAsync<Permissions.Camera>().Result;
// Deny the web page's request if the app's access to the camera is not "Granted"
if (status != PermissionStatus.Granted)
request.Deny();
else
request.Grant(request.GetResources());
return;
}
}
base.OnPermissionRequest(request);
}
}
在前面的代码片段中 MyWebChromeClient , 类继承自 MauiWebChromeClient,并重写 OnPermissionRequest 方法以截获网页权限请求。 检查每个权限项以查看它是否与表示相机的 PermissionRequest.ResourceVideoCapture 字符串常量匹配。 如果相机权限匹配,代码将检查应用是否有权使用该相机。 如果具有权限,则会授予网页的请求。
4.SetWebChromeClient使用 Android WebView 控件上的 方法将 Chrome 客户端设置为 MyWebChromeClient。 以下两项演示了如何设置 Chrome 客户端:
给定名为 theWebViewControl的 .NET MAUI WebView 控件,可以直接在平台视图(即 Android 控件)上设置 Chrome 客户端:
((IWebViewHandler)theWebViewControl.Handler).PlatformView.SetWebChromeClient(new MyWebChromeClient((IWebViewHandler)theWebViewControl.Handler));
还可以使用处理程序属性映射来强制所有 WebView 控件使用 Chrome 客户端。 有关详细信息,请参阅 处理程序。
当应用启动时(例如在 方法中MauiProgram.CreateMauiApp)时,应调用以下代码片段CustomizeWebViewHandler的 方法。
private static void CustomizeWebViewHandler()
{
#if ANDROID26_0_OR_GREATER
Microsoft.Maui.Handlers.WebViewHandler.Mapper.ModifyMapping(
nameof(Android.Webkit.WebView.WebChromeClient),
(handler, view, args) => handler.PlatformView.SetWebChromeClient(new MyWebChromeClient(handler)));
#endif
}
设置 Cookie
可以在 上 WebView 设置 Cookie,以便它们随 Web 请求一起发送到指定的 URL。 通过将 对象添加到 Cookie 来 CookieContainer设置 Cookie,然后将容器设置为可绑定属性的值 WebView.Cookies 。 请参阅以下代码示例:
using System.Net;
CookieContainer cookieContainer = new CookieContainer();
Uri uri = new Uri("https://learn.microsoft.com/dotnet/maui", UriKind.RelativeOrAbsolute);
Cookie cookie = new Cookie
{
Name = "DotNetMAUICookie",
Expires = DateTime.Now.AddDays(1),
Value = "My cookie",
Domain = uri.Host,
Path = "/"
};
cookieContainer.Add(uri, cookie);
webView.Cookies = cookieContainer;
webView.Source = new UrlWebViewSource { Url = uri.ToString() };
在此示例中,将一个 Cookie 添加到 CookieContainer 对象中,然后将该对象设置为 属性的值 WebView.Cookies 。 WebView当 将 Web 请求发送到指定的 URL 时,Cookie 随请求一起发送。
调用 JavaScript
WebView 包括从 C# 调用 JavaScript 函数并将任何结果返回到调用 C# 代码的功能。 此互操作是使用 EvaluateJavaScriptAsync 方法完成的,如以下示例所示:
Entry numberEntry = new Entry { Text = "5" };
Label resultLabel = new Label();
WebView webView = new WebView();
...
int number = int.Parse(numberEntry.Text);
string result = await webView.EvaluateJavaScriptAsync($"factorial({number})");
resultLabel.Text = $"Factorial of {number} is {result}.";
方法 WebView.EvaluateJavaScriptAsync 计算指定为 参数的 JavaScript,并将任何结果返回为 string。 在此示例中, factorial 调用 JavaScript 函数,该函数将返回 作为结果的 number 阶乘。 此 JavaScript 函数在 加载的本地 HTML 文件中 WebView 定义,并在以下示例中显示:
<html>
<body>
<script type="text/javascript">
function factorial(num) {
if (num === 0 || num === 1)
return 1;
for (var i = num - 1; i >= 1; i--) {
num *= i;
}
return num;
}
</script>
</body>
</html>
启动系统浏览器
可以使用 提供的 类Microsoft.Maui.Essentials在系统 Web 浏览器中Launcher打开 URI。 调用启动器的方法 OpenAsync 并传入 string 表示要打开的 URI 的 或 Uri 参数:
await Launcher.OpenAsync("https://learn.microsoft.com/dotnet/maui");
CollectionView横屏竖屏布局内容切换

设置方向控制
因为我演示的是Android所以我这里以Android为例子。
找到 Platforms/Android/MainActivity.cs 文件,添加枚举ScreenOrientation = ScreenOrientation.Sensor,这个选项是应用程序的方向由传感器确认
[Activity(Theme = "@style/Maui.SplashTheme", MainLauncher = true,ScreenOrientation = ScreenOrientation.Sensor ,ConfigurationChanges = ConfigChanges.ScreenSize | ConfigChanges.Orientation | ConfigChanges.UiMode | ConfigChanges.ScreenLayout | ConfigChanges.SmallestScreenSize | ConfigChanges.Density)]
页面
<?xml version="1.0" encoding="utf-8" ?>
<ContentPage xmlns="http://schemas.microsoft.com/dotnet/2021/maui"
xmlns:x="http://schemas.microsoft.com/winfx/2009/xaml"
x:Class="MauiCollectionViewChangeScreenExample.MainPage">
<StackLayout Spacing="10" x:Name="baseStack" Orientation="Horizontal" HorizontalOptions="Center">
<CollectionView ItemsSource="{Binding ListData}" x:Name="collectionView" HorizontalScrollBarVisibility="Never" VerticalScrollBarVisibility="Never" >
<CollectionView.ItemTemplate>
<DataTemplate>
<StackLayout Orientation="Horizontal" Padding="0">
<Border Stroke="White" StrokeThickness="0.5" WidthRequest="275">
<Grid Margin="5">
<Grid.RowDefinitions>
<RowDefinition />
<RowDefinition Height="25"/>
</Grid.RowDefinitions>
<Image Source="{Binding ImagePath}" ></Image>
<Label Grid.Row="1" TextColor="Black" FontSize="15" Text="{Binding Name}" FontAttributes="Bold" Margin="5,5,0,0"></Label>
</Grid>
</Border>
</StackLayout>
</DataTemplate>
</CollectionView.ItemTemplate>
</CollectionView>
</StackLayout>
</ContentPage>
逻辑代码
public partial class MainPage : ContentPage
{
public MainPage()
{
InitializeComponent();
var list = new List<ViewListData>();
list.Add(new ViewListData
{
Name = ".NET5",
ImagePath = "dotnet_bot"
});
list.Add(new ViewListData
{
Name = ".NET6",
ImagePath = "dotnet_bot"
});
list.Add(new ViewListData
{
Name = ".NET7",
ImagePath = "dotnet_bot"
});
list.Add(new ViewListData
{
Name = ".NET8",
ImagePath = "dotnet_bot"
});
list.Add(new ViewListData
{
Name = ".NET9",
ImagePath = "dotnet_bot"
});
this.ListData = new ObservableCollection<ViewListData>(list);
BindingContext = this;
}
public ObservableCollection<ViewListData> ListData { get; set; }
private double width = 0;
private double height = 0;
/// <summary>
/// 监听变化
/// </summary>
/// <param name="width"></param>
/// <param name="height"></param>
protected override void OnSizeAllocated(double width, double height)
{
base.OnSizeAllocated(width, height);
if (this.width != width || this.height != height)
{
this.width = width;
this.height = height;
Console.WriteLine("screen width " + width);
Console.WriteLine("screen height " + height);
// Get Metrics
var mainDisplayInfo = DeviceDisplay.MainDisplayInfo;
//Portrait 竖屏 Landscape 横屏
var orientation = mainDisplayInfo.Orientation;
if (orientation == DisplayOrientation.Portrait)
{
collectionView.ItemsLayout = null;
}
else if (orientation == DisplayOrientation.Landscape)
{
//横屏每行显示三个
collectionView.ItemsLayout = new GridItemsLayout(3, ItemsLayoutOrientation.Vertical);
}
}
}
}
请注意, OnSizeAllocated 当设备旋转时,可以多次调用该方法。 每次更改布局都会浪费资源,并可能导致闪烁,所以记录宽高,避免重复布局浪费资源。
public class ViewListData
{
public string Name { get; set; }
public string ImagePath { get; set; }
}
SQLite 数据库引擎允许 .NET 多平台应用 UI (.NET MAUI) 应用在共享代码中加载和保存数据对象。 可以通过执行以下步骤,将 SQLite.NET 集成到 .NET MAUI 应用中,以在本地数据库中存储和检索信息:
安装 SQLite NuGet 包
使用 NuGet 包管理器搜索 sqlite-net-pcl 包,并将最新版本添加到 .NET MAUI 应用项目。
安装SQLitePCLRaw.bundle_green
除了 sqlite-net-pcl 之外, 还需要暂时 安装在每个平台上公开 SQLite 的基础依赖项:
配置应用常量
配置数据(如数据库文件名和路径)可以作为常量存储在应用中。 示例项目包含一个提供常见配置数据的 Constants.cs 文件:
public static class Constants
{
public const string DatabaseFilename = "TodoSQLite.db3";
public const SQLite.SQLiteOpenFlags Flags =
// open the database in read/write mode
SQLite.SQLiteOpenFlags.ReadWrite |
// create the database if it doesn't exist
SQLite.SQLiteOpenFlags.Create |
// enable multi-threaded database access
SQLite.SQLiteOpenFlags.SharedCache;
public static string DatabasePath =>
Path.Combine(FileSystem.AppDataDirectory, DatabaseFilename);
}
在此示例中,常量文件指定用于初始化数据库连接的默认 SQLiteOpenFlag 枚举值。 枚举 SQLiteOpenFlag 支持以下值:
Create:连接将自动创建数据库文件(如果不存在)。
FullMutex:连接在序列化线程模式下打开。
NoMutex:连接在多线程模式下打开。
PrivateCache:连接不会参与共享缓存,即使已启用。
ReadWrite:连接可以读取和写入数据。
SharedCache:连接将参与共享缓存(如果已启用)。
ProtectionComplete:设备锁定时,文件已加密且无法访问。
ProtectionCompleteUnlessOpen:文件在打开前会进行加密,但即使用户锁定设备,该文件仍可访问。
ProtectionCompleteUntilFirstUserAuthentication:文件已加密,直到用户启动并解锁设备。
ProtectionNone:数据库文件未加密。
可能需要根据数据库的使用方式指定不同的标志。 有关 的详细信息 SQLiteOpenFlags,请参阅在 sqlite.org 上打开新的数据库连接 。
创建数据库访问类
数据库包装类从应用的其余部分提取数据访问层。 此类集中查询逻辑并简化了数据库初始化的管理,使得随着应用的增长,可以更轻松地重构或扩展数据操作。 示例应用为此定义了一个 TodoItemDatabase 类。
延迟初始化
TodoItemDatabase使用异步延迟初始化来延迟数据库初始化,直到首次访问数据库,并使用类中的每个方法调用的简单Init方法:
public class TodoItemDatabase
{
SQLiteAsyncConnection Database;
public TodoItemDatabase()
{
}
async Task Init()
{
if (Database is not null)
return;
Database = new SQLiteAsyncConnection(Constants.DatabasePath, Constants.Flags);
var result = await Database.CreateTableAsync<TodoItem>();
}
...
}
数据操作方法
类 TodoItemDatabase 包括四种类型的数据操作方法:创建、读取、编辑和删除。 SQLite.NET 库提供了一个简单的对象关系映射 (ORM) ,使你无需编写 SQL 语句即可存储和检索对象。
以下示例演示示例应用中的数据操作方法:
public class TodoItemDatabase
{
...
public async Task<List<TodoItem>> GetItemsAsync()
{
await Init();
return await Database.Table<TodoItem>().ToListAsync();
}
public async Task<List<TodoItem>> GetItemsNotDoneAsync()
{
await Init();
return await Database.Table<TodoItem>().Where(t => t.Done).ToListAsync();
// SQL queries are also possible
//return await Database.QueryAsync<TodoItem>("SELECT * FROM [TodoItem] WHERE [Done] = 0");
}
public async Task<TodoItem> GetItemAsync(int id)
{
await Init();
return await Database.Table<TodoItem>().Where(i => i.ID == id).FirstOrDefaultAsync();
}
public async Task<int> SaveItemAsync(TodoItem item)
{
await Init();
if (item.ID != 0)
return await Database.UpdateAsync(item);
else
return await Database.InsertAsync(item);
}
public async Task<int> DeleteItemAsync(TodoItem item)
{
await Init();
return await Database.DeleteAsync(item);
}
}
访问数据
类 TodoItemDatabase 可以注册为单一实例,如果使用依赖项注入,则可以在整个应用中使用该实例。 例如,可以使用 和 AddTransient 方法在 MauiProgram.csAddSingleton 中将页面和数据库访问类注册为 对象上的IServiceCollection服务:
builder.Services.AddSingleton<TodoListPage>();
builder.Services.AddTransient<TodoItemPage>();
builder.Services.AddSingleton<TodoItemDatabase>();
然后,这些服务可以自动注入到类构造函数中,并访问:
TodoItemDatabase database;
public TodoItemPage(TodoItemDatabase todoItemDatabase)
{
InitializeComponent();
database = todoItemDatabase;
}
async void OnSaveClicked(object sender, EventArgs e)
{
if (string.IsNullOrWhiteSpace(Item.Name))
{
await DisplayAlert("Name Required", "Please enter a name for the todo item.", "OK");
return;
}
await database.SaveItemAsync(Item);
await Shell.Current.GoToAsync("..");
}
或者,可以创建数据库访问类的新实例:
TodoItemDatabase database;
public TodoItemPage()
{
InitializeComponent();
database = new TodoItemDatabase();
}
与网路接口交互
HttpClient _client;
_client = new HttpClient();
_serializerOptions = new JsonSerializerOptions
{
PropertyNamingPolicy = JsonNamingPolicy.CamelCase,
WriteIndented = true
};
Items = new List<TodoItem>();
Uri uri = new Uri(string.Format(Constants.RestUrl, string.Empty));
try
{
HttpResponseMessage response = await _client.GetAsync(uri);
if (response.IsSuccessStatusCode)
{
string content = await response.Content.ReadAsStringAsync();
Items = JsonSerializer.Deserialize<List<TodoItem>>(content, _serializerOptions);
}
}
catch (Exception ex)
{
Debug.WriteLine(@"\tERROR {0}", ex.Message);
}
方法 HttpClient.PostAsync 用于向 URI 指定的 Web 服务发送 POST 请求,然后从 Web 服务接收响应:
Uri uri = new Uri(string.Format(Constants.RestUrl, string.Empty));
try
{
string json = JsonSerializer.Serialize<TodoItem>(item, _serializerOptions);
StringContent content = new StringContent(json, Encoding.UTF8, "application/json");
HttpResponseMessage response = null;
if (isNewItem)
response = await _client.PostAsync(uri, content);
else
response = await _client.PutAsync(uri, content);
if (response.IsSuccessStatusCode)
Debug.WriteLine(@"\tTodoItem successfully saved.");
}
catch (Exception ex)
{
Debug.WriteLine(@"\tERROR {0}", ex.Message);
}
MAUI调用Jar包,so文件
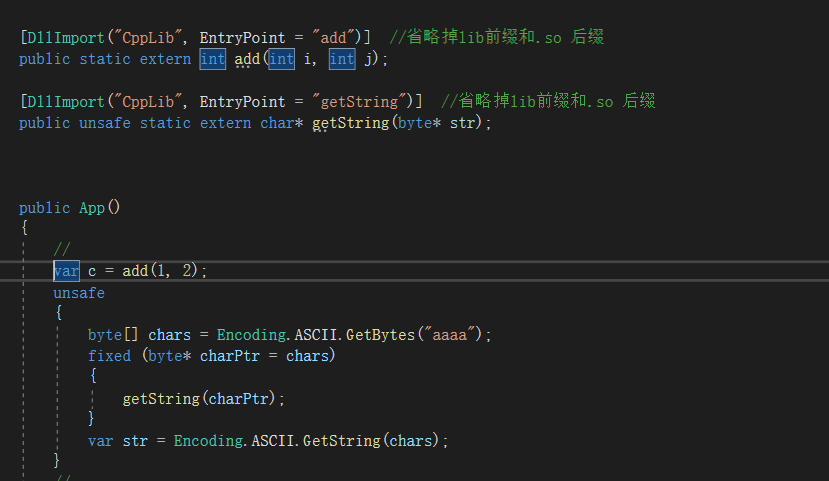
PDA功能:扫码打印一体机,扫物料标签,调用金蝶云星空ERP实现收发料,PDA打印功能主要是同一个料号物品只贴一个标签,打印功能是为了复制物料标签,下次再发料使用
打印SDK只提供jar包,需要封装为maui类库,直接上图
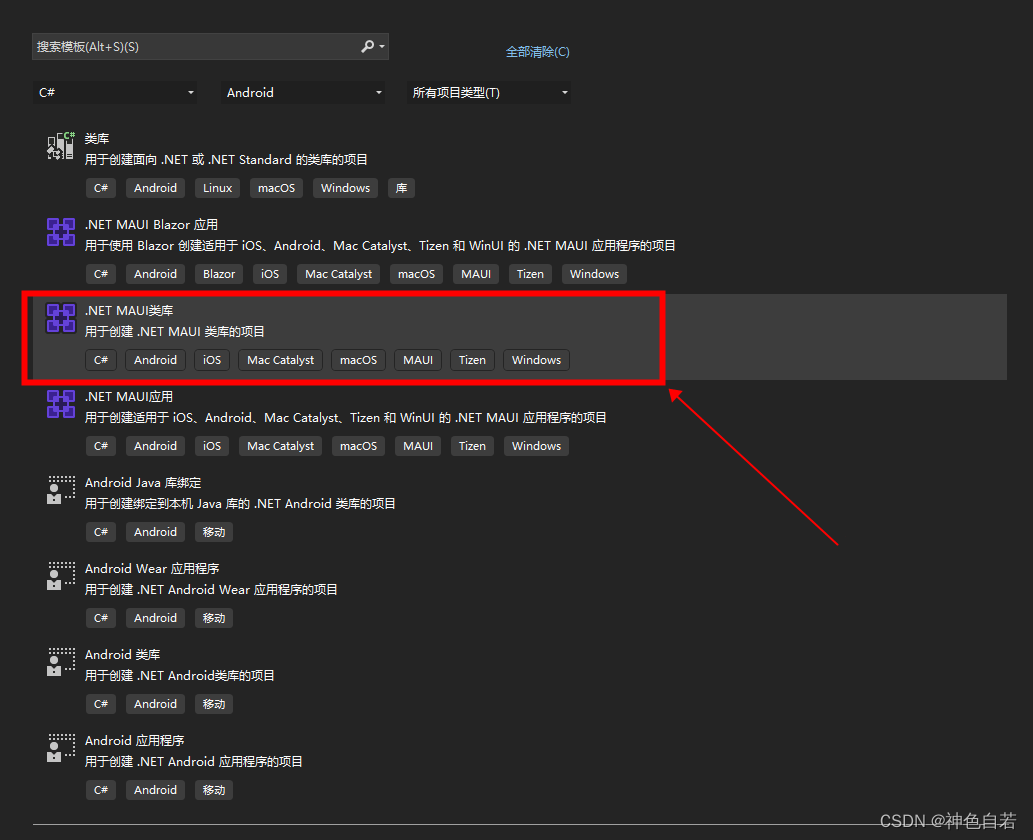
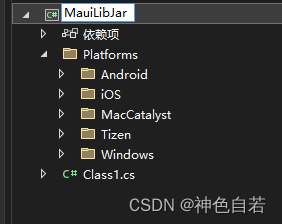
把生成的Class1.cs删除
右击添加现有项,添加jar包
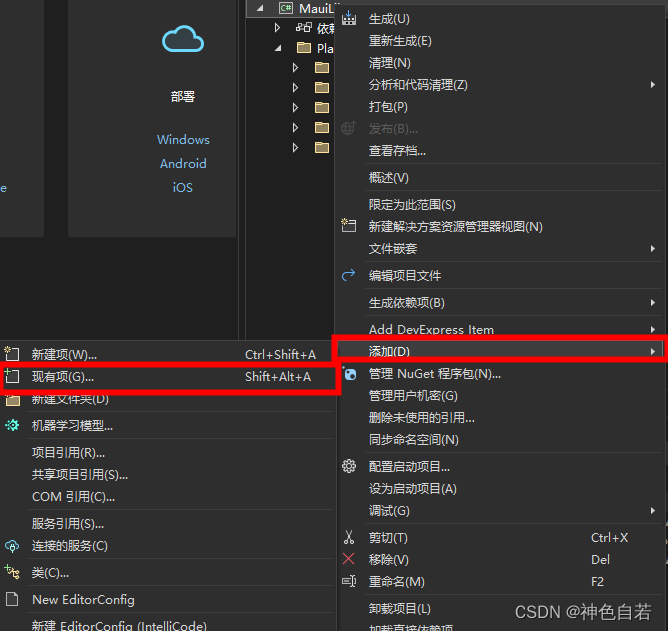
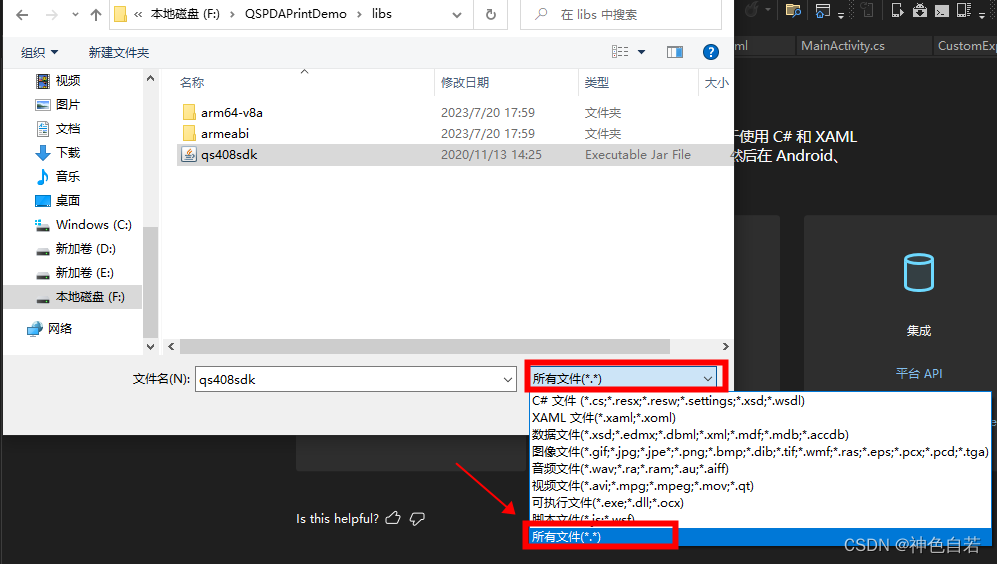
右键,“编辑项目文件”
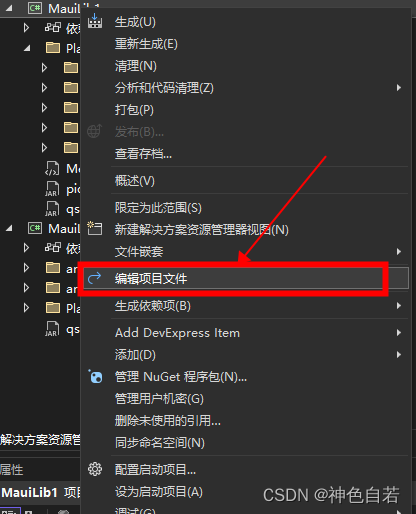
添加节点
<ItemGroup Condition="$(TargetFramework.Contains('-android'))">
<EmbeddedJar Include="qs408sdk.jar" />
</ItemGroup>

编译,报错
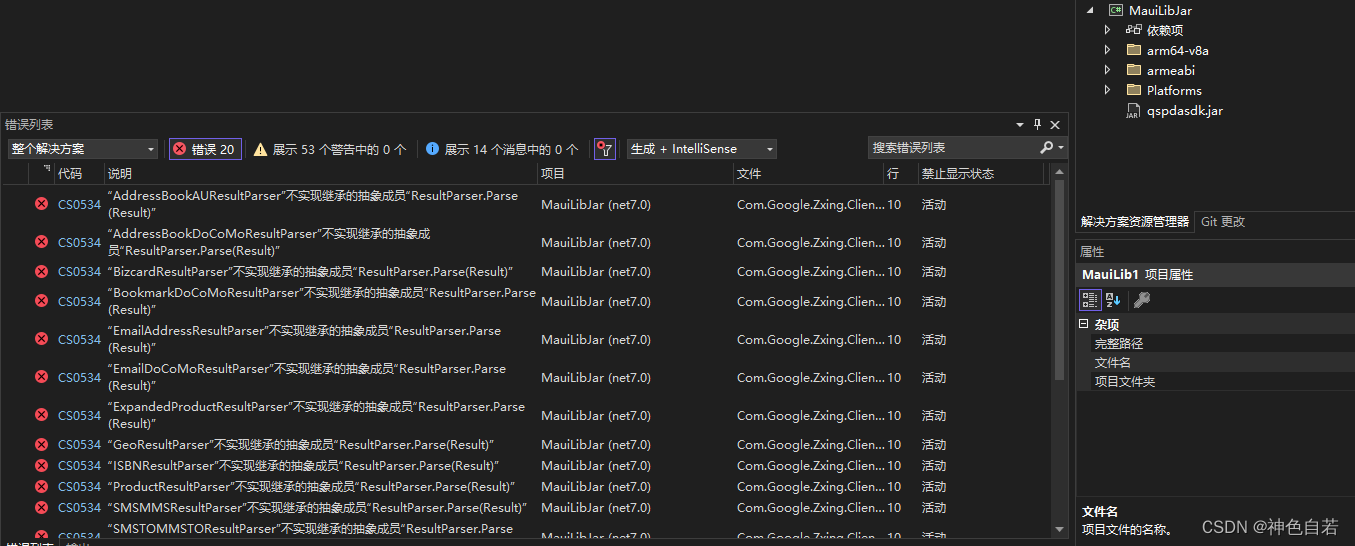
添加 Metadata.xml

增加<remove-node path="">
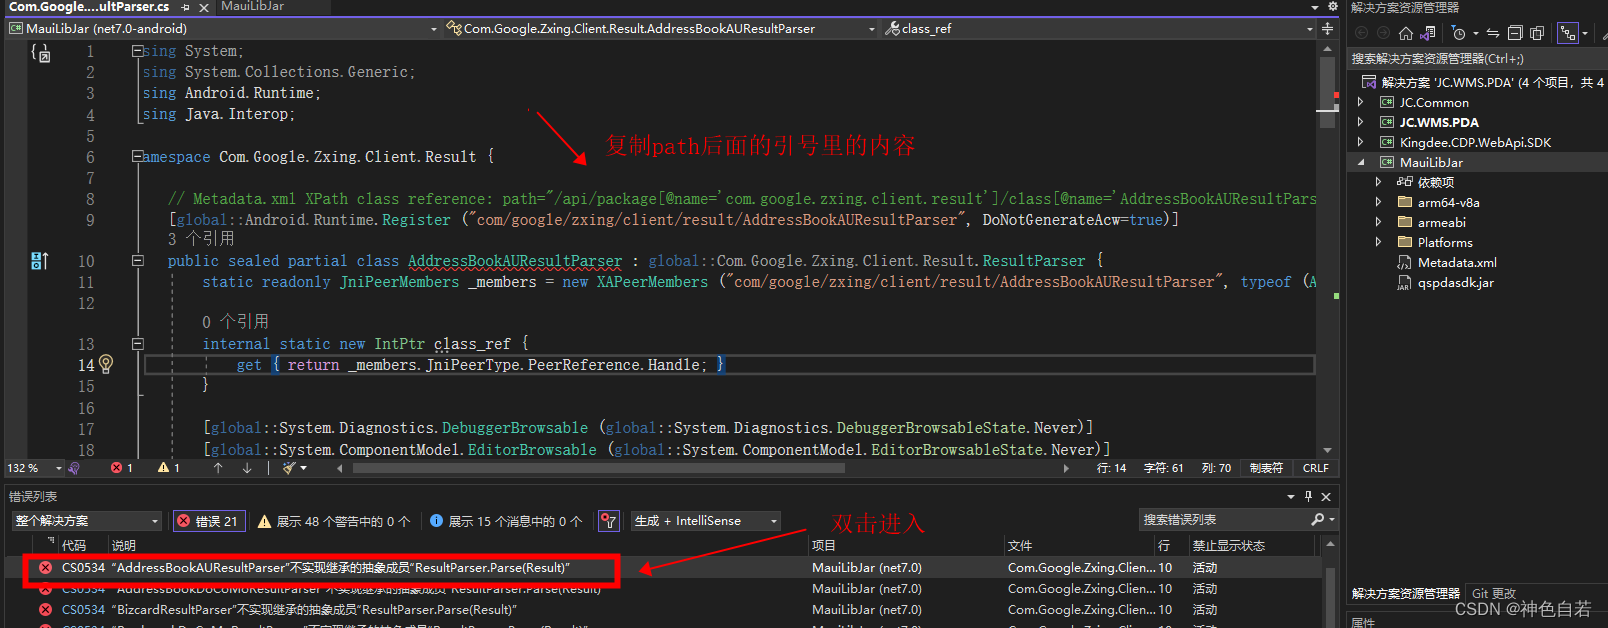
打开 Metadata.xml粘贴到path节点里,重复上步操作,把所有错误的,都添加到,如下图
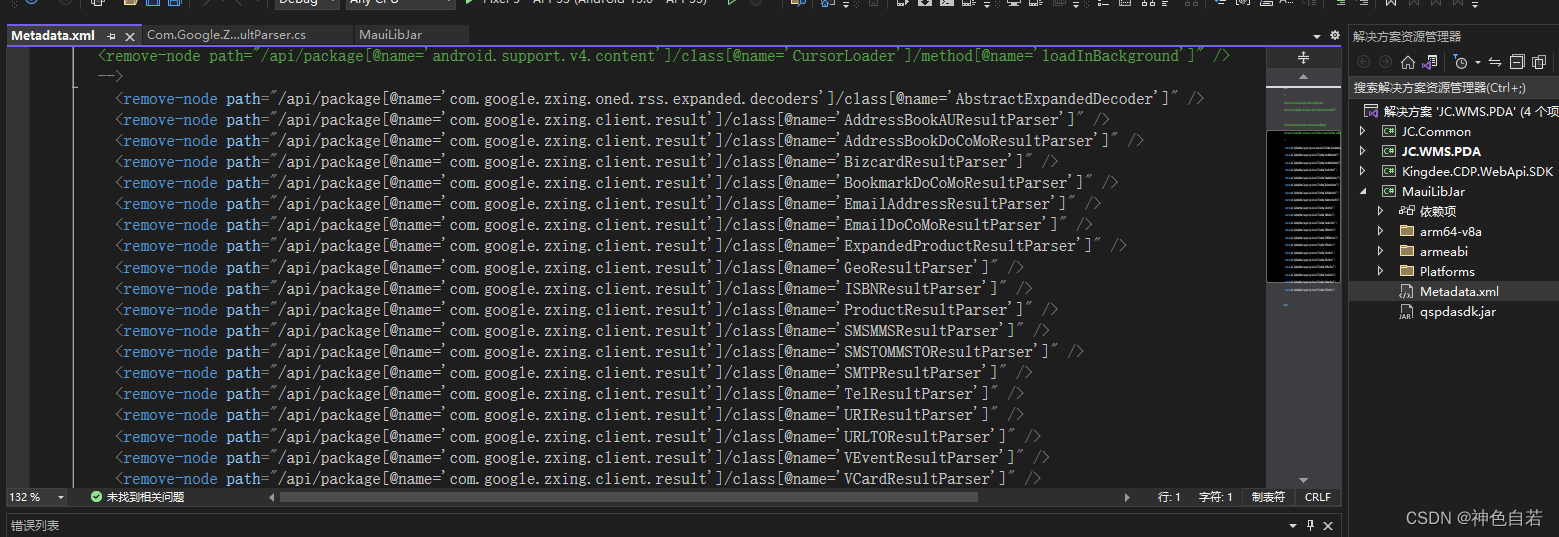
编辑项目文件,增加节点
<TransformFile Include="Metadata.xml" />

再次编译成功
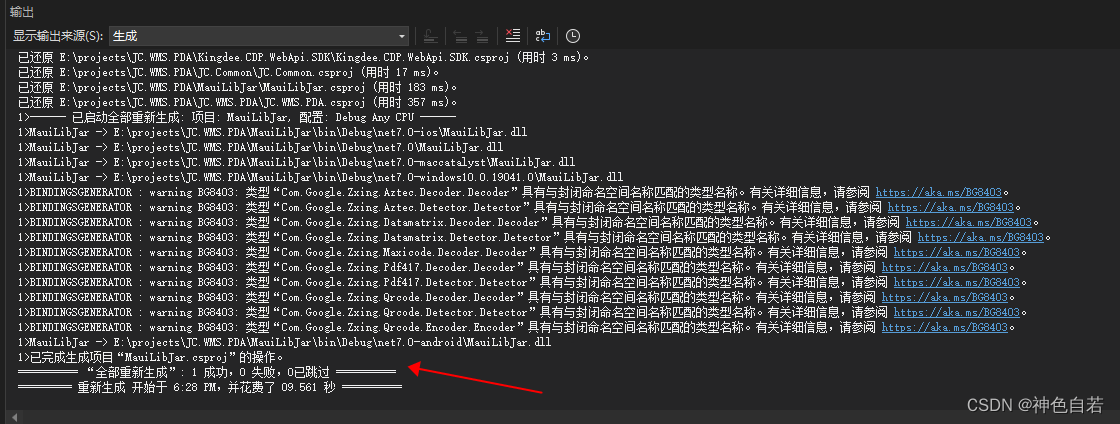
开心啊,终于编译成功了
在MAUI中调用连PDA联调,测试不打印,还是报错
查看原的sdk包,还有so文件需要调用


把这个文件夹复制到项目里,继续编辑项目文件
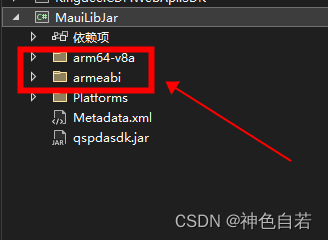
增加节点引用so文件
<ItemGroup>
<AndroidNativeLibrary Include="arm64-v8a/libzyapi_common.so">
<Abi>arm64-v8a</Abi>
</AndroidNativeLibrary>
<AndroidNativeLibrary Include="armeabi/libzyapi_common.so">
<Abi>armeabi</Abi>
</AndroidNativeLibrary>
</ItemGroup>

再编译,打印测试OK
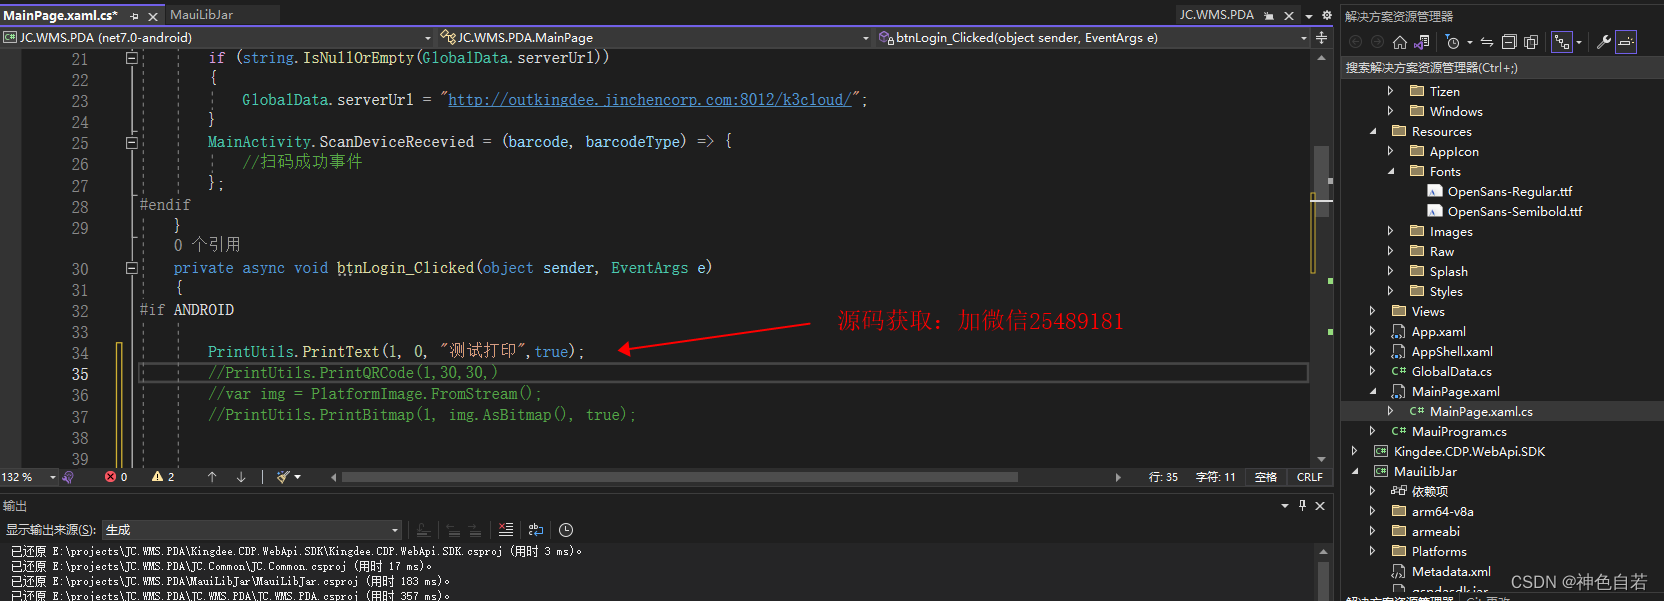
MAUI之Android记录设备号+动态授权
一、获取Android唯一标识的方法
android10以前的版本可以通过获取imei得到设备的唯一标识,但是android10以后的系统已无法获取到imei。那么我们该如何确定设备呢?
查阅了一些资料,个人看来下面的方法最为稳妥:
通过在app外部保存一个guid,每次打开app时读取该guid确定为设备号。
保存在app外部,可以防止重新安装app导致guid被清除。
具体代码:
/// <summary>
/// 机器码帮助类
/// </summary>
public class JQMHelper
{
/// <summary>
/// 获取机器码
/// </summary>
/// <returns></returns>
public static string GetJqm()
{
try
{
string path = System.IO.Path.Combine(GetPath(), "uuid.txt");
return File.ReadAllText(path);
}
catch (Exception ex)
{
}
return "";
}
/// <summary>
/// 保存机器码
/// </summary>
/// <param name="jqm"></param>
public static void SaveJqm(string jqm)
{
try
{
string path = System.IO.Path.Combine(GetPath(), "uuid.txt");
File.WriteAllText(path, jqm);
}
catch (Exception ex)
{
}
}
/// <summary>
/// 获取路径
/// </summary>
/// <returns></returns>
private static string GetPath()
{
try
{
#if ANDROID
string path = "";
if (Android.OS.Environment.IsExternalStorageEmulated)
{
path = Android.OS.Environment.ExternalStorageDirectory.AbsolutePath;
}
else
{
path = System.Environment.GetFolderPath(System.Environment.SpecialFolder.MyDocuments);
}
Java.IO.File myDir = new Java.IO.File(path + "/myapp");
if (!myDir.Exists())
myDir.Mkdir();
return path + "/myapp/";
#endif
}
catch (Exception ex)
{
}
return "";
}
}
调用代码:
//读取保存的机器码
string jqm = JQMHelper.GetJqm();
if (string.IsNullOrEmpty(jqm))
{
jqm = Guid.NewGuid().ToString();
JQMHelper.SaveJqm(jqm);
}
此时运行代码,你会发现无法读取和保存guid,什么原因?搞过android的同学肯定知道:缺少了权限。
二、动态授权
官方文档:https://learn.microsoft.com/zh-cn/dotnet/maui/platform-integration/appmodel/permissions?view=net-maui-7.0&tabs=android
直接上代码:
//写权限
PermissionStatus status = await Permissions.CheckStatusAsync<Permissions.StorageWrite>();
if (status != PermissionStatus.Granted)
status = await Permissions.RequestAsync<Permissions.StorageWrite>();//弹窗求授权
if (status != PermissionStatus.Granted)
{
await App.Current.MainPage.DisplayAlert("错误:", "必须给予存储访问权限!请手动给予权限后再重新登录!", "跳转到手动设置页面");
#if ANDROID
Intent intent = new Intent(Settings.ActionApplicationDetailsSettings);
Android.Net.Uri uri = Android.Net.Uri.FromParts("package", AppInfo.Current.PackageName, null);
intent.SetData(uri);
Android.App.Application.Context.StartActivity(intent);
#endif
return;
}
总结
至此完成。
大家是否看出了MAUI的最大优势?
可以直接调用原生API
希望对大家有所帮助。
NET与Android交互
应用开发人员希望能够调用本机 Android API,并使用用其中一种 .NET 托管语言编写的代码从 Android API 接收调用或响应事件。 .NET Android 在生成和运行时使用多种方法来桥接 Java Android OS) 中的 VM (ART,而托管 VM (MonoVM) 。
VM Java 和托管 VM 作为单独的实体共存在同一进程或应用中。 尽管共享相同的进程资源,但无法直接从 .NET 调用 Java/Kotlin API,并且 /Kotlin代码也没有直接方法来Java调用托管代码 API。 为了启用此通信,.NET Android 使用 Java 本机接口 (JNI) 。 此方法使本机代码 (.NET 托管代码在此上下文中是本机) 注册方法的Java实现,这些方法在 VM 外部Java以 或 Kotlin以外的Java语言编写。 需要在代码中 Java 声明这些方法,例如:
Java
复制
class MainActivity extends androidx.appcompat.app.AppCompatActivity
{
public void onCreate (android.os.Bundle p0)
{
n_onCreate (p0);
}
private native void n_onCreate (android.os.Bundle p0);
}
每个本机方法都是使用 native 关键字 (keyword) 声明的,每当从Java代码调用它时,JavaVM 都将使用 JNI 来调用目标方法。
可以通过提供本机共享库来动态或静态注册本机方法,该库导出具有指向实现 Java 方法的本机函数的适当名称的符号。
Java 可调用包装器
.NET Android 通过生成镜像 /Kotlin API 的 JavaC# 代码来包装 Android API。 与 / 类型对应的Java每个生成的类都派生自Java.Lang.Object程序集) 中Mono.Android实现 (类,该类将其标记为Java可互操作Kotlin类型。 这意味着它可以实现或替代虚拟 Java 方法。 若要使注册和调用这些方法成为可能,必须生成一个 Java 类,该类镜像托管类并提供到托管转换的入口点 Java 。 Java 类在应用生成期间以及 .NET Android 生成期间生成,称为 Java 可调用包装器 (JCW) 。 以下示例演示替代两 Java 个虚拟方法的托管类:
C#
复制
public class MainActivity : AppCompatActivity
{
public override Android.Views.View? OnCreateView(Android.Views.View? parent, string name, Android.Content.Context context, Android.Util.IAttributeSet attrs)
{
return base.OnCreateView(parent, name, context, attrs);
}
protected override void OnCreate(Bundle savedInstanceState)
{
base.OnCreate(savedInstanceState);
DoSomething(savedInstanceState);
}
void DoSomething(Bundle bundle)
{
// do something with the bundle
}
}
在此示例中,托管类将替代 OnCreateView 在 类型中找到AppCompatActivity的 和 OnCreateJava 虚拟方法。 方法 DoSomething 不对应于基 Java 类型中找到的任何方法,因此不会包含在 JCW 中。
以下示例演示为上述类生成的 JCW (,为清楚起见,省略了一些生成的方法) :
Java
复制
public class MainActivity extends androidx.appcompat.app.AppCompatActivity
{
public android.view.View onCreateView (android.view.View p0, java.lang.String p1, android.content.Context p2, android.util.AttributeSet p3)
{
return n_onCreateView (p0, p1, p2, p3);
}
private native android.view.View n_onCreateView (android.view.View p0, java.lang.String p1, android.content.Context p2, android.util.AttributeSet p3);
public void onCreate (android.os.Bundle p0)
{
n_onCreate (p0);
}
private native void n_onCreate (android.os.Bundle p0);
}
注册
这两种方法注册方法都依赖于 JCW 的生成,动态注册需要生成更多代码,以便在运行时执行注册。
JCW 仅针对派生自类型 Java.Lang.Object 的类型生成。 查找此类类型是 的任务 Java。互操作:读取应用及其库引用的所有程序集。 然后,返回的程序集列表由各种任务使用,其中 JCW 是其中之一。
找到所有类型后,将分析每个类型中的每个方法,以查找替代虚拟 Java 方法的方法,因此需要包含在包装器类代码中。 生成器还可以选择检查给定方法是否可以静态注册。
生成器查找用 Register 属性修饰的方法,这些方法最常通过使用方法名称、JNI 方法签名和连接器方法名称调用其构造函数 Java 来创建。 连接器是一种静态方法,用于创建一个委托,该委托随后允许调用本机回调方法:
C#
复制
public class MainActivity : AppCompatActivity
{
// Connector backing field
static Delegate? cb_onCreate_Landroid_os_Bundle_;
// Connector method
static Delegate GetOnCreate_Landroid_os_Bundle_Handler()
{
if (cb_onCreate_Landroid_os_Bundle_ == null)
cb_onCreate_Landroid_os_Bundle_ = JNINativeWrapper.CreateDelegate((_JniMarshal_PPL_V)n_OnCreate_Landroid_os_Bundle_);
return cb_onCreate_Landroid_os_Bundle_;
}
// Native callback
static void n_OnCreate_Landroid_os_Bundle_(IntPtr jnienv, IntPtr native__this, IntPtr native_savedInstanceState)
{
var __this = global::Java.Lang.Object.GetObject<Android.App.Activity>(jnienv, native__this, JniHandleOwnership.DoNotTransfer)!;
var savedInstanceState = global::Java.Lang.Object.GetObject<Android.OS.Bundle>(native_savedInstanceState, JniHandleOwnership.DoNotTransfer);
__this.OnCreate(savedInstanceState);
}
// Target method
[Register("onCreate", "(Landroid/os/Bundle;)V", "GetOnCreate_Landroid_os_Bundle_Handler")]
protected virtual unsafe void OnCreate(Android.OS.Bundle? savedInstanceState)
{
const string __id = "onCreate.(Landroid/os/Bundle;)V";
try
{
JniArgumentValue* __args = stackalloc JniArgumentValue[1];
__args[0] = new JniArgumentValue((savedInstanceState == null) ? IntPtr.Zero : ((global::Java.Lang.Object)savedInstanceState).Handle);
_members.InstanceMethods.InvokeVirtualVoidMethod(__id, this, __args);
}
finally
{
global::System.GC.KeepAlive(savedInstanceState);
}
}
}
上述代码是在生成 .NET Android 时在 类中 Android.App.Activity 生成的。 此代码会发生什么情况取决于注册方法。
NET 调用Android
void Start()
{
AndroidJavaClass unityPlayer = new AndroidJavaClass("com.unity3d.player.UnityPlayer");
AndroidJavaObject currentActivity = unityPlayer.GetStatic<AndroidJavaObject>("currentActivity");
AndroidJavaClass toast = new AndroidJavaClass("android.widget.Toast");
AndroidJavaObject context = currentActivity.Call<AndroidJavaObject>("getApplicationContext");
currentActivity.Call("runOnUiThread", new AndroidJavaRunnable(() =>
{
toast.CallStatic<AndroidJavaObject>("makeText", context, "Send Message",
toast.GetStatic<int>("LENGTH_LONG")).Call("show");
}));
}
使用 AndroidJavaProxy
public DateTime date = DateTime.Now;
// 模拟接口
class DateCallBack : AndroidJavaProxy
{
public DateCallBack() : base("android.app.DatePickerDialog$OnDateSetListener"){}
void OnDateSet(AndroidJavaObject view, int year, int month, int dayOfMonth)
{
// todo
}
}
void Start()
{
AndroidJavaObject currentActivity = new AndroidJavaClass("com.unity3d.player.UnityPlayer")
.GetStatic<AndroidJavaObject>("currentActivity");
currentActivity.Call("runOnUiThread", new AndroidJavaRunnable(()=>{
new AndoidJavaObject("android.app.DatePickerDialog", currentActivity, new DateCallBack(),
date.Year, date.Month-1, date.Day);
}));
}void Start()
{
AndroidJavaClass unityPlayer = new AndroidJavaClass("com.unity3d.player.UnityPlayer");
AndroidJavaObject currentActivity = unityPlayer.GetStatic<AndroidJavaObject>("currentActivity");
AndroidJavaClass toast = new AndroidJavaClass("android.widget.Toast");
AndroidJavaObject context = currentActivity.Call<AndroidJavaObject>("getApplicationContext");
currentActivity.Call("runOnUiThread", new AndroidJavaRunnable(() =>
{
toast.CallStatic<AndroidJavaObject>("makeText", context, "Send Message",
toast.GetStatic<int>("LENGTH_LONG")).Call("show");
}));
}
使用 AndroidJavaProxy
public DateTime date = DateTime.Now;
// 模拟接口
class DateCallBack : AndroidJavaProxy
{
public DateCallBack() : base("android.app.DatePickerDialog$OnDateSetListener"){}
void OnDateSet(AndroidJavaObject view, int year, int month, int dayOfMonth)
{
// todo
}
}
void Start()
{
AndroidJavaObject currentActivity = new AndroidJavaClass("com.unity3d.player.UnityPlayer")
.GetStatic<AndroidJavaObject>("currentActivity");
currentActivity.Call("runOnUiThread", new AndroidJavaRunnable(()=>{
new AndoidJavaObject("android.app.DatePickerDialog", currentActivity, new DateCallBack(),
date.Year, date.Month-1, date.Day);
}));
}
NET调用各平台原生代码例子
#if ANDROID
using Android.Content;
using Android.Views;
using Android.Runtime;
#elif IOS
using UIKit;
#endif
using InvokePlatformCodeDemos.Services;
namespace InvokePlatformCodeDemos.Services.ConditionalCompilation
{
public class DeviceOrientationService
{
public DeviceOrientation GetOrientation()
{
#if ANDROID
IWindowManager windowManager = Android.App.Application.Context.GetSystemService(Context.WindowService).JavaCast<IWindowManager>();
SurfaceOrientation orientation = windowManager.DefaultDisplay.Rotation;
bool isLandscape = orientation == SurfaceOrientation.Rotation90 || orientation == SurfaceOrientation.Rotation270;
return isLandscape ? DeviceOrientation.Landscape : DeviceOrientation.Portrait;
#elif IOS
UIInterfaceOrientation orientation = UIApplication.SharedApplication.StatusBarOrientation;
bool isPortrait = orientation == UIInterfaceOrientation.Portrait || orientation == UIInterfaceOrientation.PortraitUpsideDown;
return isPortrait ? DeviceOrientation.Portrait : DeviceOrientation.Landscape;
#else
return DeviceOrientation.Undefined;
//throw new PlatformNotSupportedException("GetOrientation is only supported on Android and iOS.");
#endif
}
}
}
使用.NETMaui创建和自定义控件的方法不止一种。下面的列表显示了五种不同的实现方法。
使用自定义渲染器(Xamarin.Forms Architecture)。
使用自定义处理程序。
使用ContentView。
使用TemplatedView(模板化控件)。
使用GraphicsView(绘制控件)。
处理程序
NET MAUI处理程序的一个关键概念是映射器。每个处理程序通常提供一个属性映射器,有时还提供一个命令映射器,将跨平台控件的API映射到本机视图的API。例如,在iOS上,处理程序将.NET MAUI按钮映射到iOS UIButton。在Android上,该按钮映射到AppCompatButton:
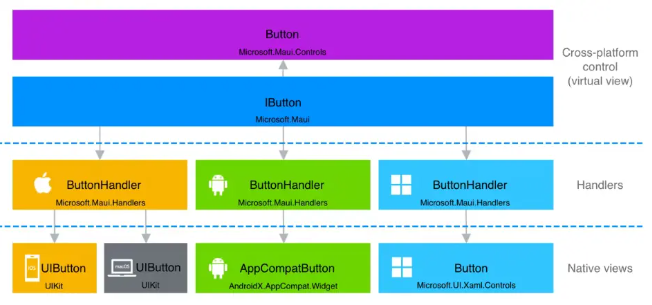
可以对处理程序进行自定义,以在跨平台控件的API中进行自定义之外,增强该控件的外观和行为。
处理程序可以通过从IView接口派生的控件特定接口访问,这意味着我们可以在实现接口IView的任何控件中使用处理程序。
创建ImageEntry控件
NETMaui条目是一个实现IEntry接口的单行文本输入控件。在iOS上,EntryHandler将条目映射到iosuitextfield。在Android上,条目映射到AppCompatEditText,在Windows上,条目映射到TextBox。
根据我们正在创建的控件,我们可以使用接口IView更通用或更具体的东西,如条目或按钮类。同样的想法也适用于处理程序,我们可以创建一个从ViewHandler继承的自定义处理程序,或者只使用像EntryHandler这样的特定处理程序。
我们将创建的ImageEntry控件是一个条目,它具有一些公共条目没有的属性,例如Image。这样做的目的是允许开发人员定义要显示在控件内部的图像和其他一些属性。
namespace Article_002.Controls
{
public class ImageEntry : Entry
{
public ImageEntry()
{
this.HeightRequest = 50;
}
public static readonly BindableProperty ImageProperty =
BindableProperty.Create(nameof(Image), typeof(string), typeof(ImageEntry), string.Empty);
public static readonly BindableProperty ImageHeightProperty =
BindableProperty.Create(nameof(ImageHeight), typeof(int), typeof(ImageEntry), 40);
public static readonly BindableProperty ImageWidthProperty =
BindableProperty.Create(nameof(ImageWidth), typeof(int), typeof(ImageEntry), 40);
public static readonly BindableProperty ImageAlignmentProperty =
BindableProperty.Create(nameof(ImageAlignment), typeof(ImageAlignment), typeof(ImageEntry), ImageAlignment.Left);
public int ImageWidth
{
get { return (int)GetValue(ImageWidthProperty); }
set { SetValue(ImageWidthProperty, value); }
}
public int ImageHeight
{
get { return (int)GetValue(ImageHeightProperty); }
set { SetValue(ImageHeightProperty, value); }
}
public string Image
{
get { return (string)GetValue(ImageProperty); }
set { SetValue(ImageProperty, value); }
}
public ImageAlignment ImageAlignment
{
get { return (ImageAlignment)GetValue(ImageAlignmentProperty); }
set { SetValue(ImageAlignmentProperty, value); }
}
}
public enum ImageAlignment
{
Left,
Right
}
}
创建自定义处理程序
下一步是创建处理程序,对于本篇文章,将只创建Android和iOS的处理程序。表单是使用ExportRenderer属性注册渲染器所必需的,在.NET MAUI中,处理程序注册略有不同,我们需要使用AppHostBuilder和AddHandler方法来注册处理程序。
以下代码是Android和iOS处理程序的实现。
using Android.Content;
using Android.Content.Res;
using Android.Graphics;
using Android.Graphics.Drawables;
using Android.Widget;
using AndroidX.AppCompat.Widget;
using AndroidX.Core.Content;
using AndroidX.Core.Graphics;
using Article_002.Controls;
using Microsoft.Maui.Controls.Compatibility.Platform.Android;
using Microsoft.Maui.Controls.Platform;
using Microsoft.Maui.Handlers;
using Microsoft.Maui.Platform;
namespace Article_002.Platforms.Android.Renderes
{
public class ImageEntryRenderer : EntryHandler
{
private ImageEntry element;
protected override AppCompatEditText CreatePlatformView()
{
var editText = new AppCompatEditText(Context);
element = VirtualView as ImageEntry;
if (!string.IsNullOrEmpty(element.Image))
{
switch (element.ImageAlignment)
{
case ImageAlignment.Left:
editText.SetCompoundDrawablesWithIntrinsicBounds(GetDrawable(element.Image), null, null, null);
break;
case ImageAlignment.Right:
editText.SetCompoundDrawablesWithIntrinsicBounds(null, null, GetDrawable(element.Image), null);
break;
}
}
editText.CompoundDrawablePadding = 25;
editText.Background.SetColorFilter(Colors.White.ToAndroid(), PorterDuff.Mode.SrcAtop);
return editText;
}
private BitmapDrawable GetDrawable(string imageEntryImage)
{
int resID = Context.Resources.GetIdentifier(imageEntryImage, "drawable", this.Context.PackageName);
var drawable = ContextCompat.GetDrawable(Context, resID);
var bitmap = drawableToBitmap(drawable);
return new BitmapDrawable(Bitmap.CreateScaledBitmap(bitmap, element.ImageWidth * 2, element.ImageHeight * 2, true));
}
public Bitmap drawableToBitmap(Drawable drawable)
{
if (drawable is BitmapDrawable) {
return ((BitmapDrawable)drawable).Bitmap;
}
int width = drawable.IntrinsicWidth;
width = width > 0 ? width : 1;
int height = drawable.IntrinsicHeight;
height = height > 0 ? height : 1;
Bitmap bitmap = Bitmap.CreateBitmap(width, height, Bitmap.Config.Argb8888);
Canvas canvas = new Canvas(bitmap);
drawable.SetBounds(0, 0, canvas.Width, canvas.Height);
drawable.Draw(canvas);
return bitmap;
}
}
}
using Article_002.Controls;
using Microsoft.Maui.Handlers;
using Microsoft.Maui.Platform;
using System.Drawing;
using UIKit;
namespace Article_002.Platforms.iOS.Renderes
{
public class ImageEntryRenderer : EntryHandler
{
private ImageEntry element;
protected override MauiTextField CreatePlatformView()
{
var textField = new MauiTextField();
element = VirtualView as ImageEntry;
if (!string.IsNullOrEmpty(element.Image))
{
switch (element.ImageAlignment)
{
case ImageAlignment.Left:
textField.LeftViewMode = UITextFieldViewMode.Always;
textField.LeftView = GetImageView(element.Image, element.ImageHeight, element.ImageWidth);
break;
case ImageAlignment.Right:
textField.RightViewMode = UITextFieldViewMode.Always;
textField.RightView = GetImageView(element.Image, element.ImageHeight, element.ImageWidth);
break;
}
}
textField.BorderStyle = UITextBorderStyle.Line;
textField.Layer.MasksToBounds = true;
return textField;
}
private UIView GetImageView(string imagePath, int height, int width)
{
var uiImageView = new UIImageView(UIImage.FromFile(imagePath))
{
Frame = new RectangleF(0, 0, width, height)
};
UIView objLeftView = new UIView(new System.Drawing.Rectangle(0, 0, width + 10, height));
objLeftView.AddSubview(uiImageView);
return objLeftView;
}
}
}
在.NETMaui中,要访问控件的本机实现,我们需要重写该方法CreatePlatformView,这样我们就可以实例化本机控件并更改我们需要/想要的属性。
总之,我们定义了图像对齐方式,并使用创建的属性按名称加载图像。
在.NETMaui中,我们处理图像的方式也有所不同。没有必要在平台项目中有图像,所有内容都位于资源文件夹中。
注册处理程序
现在是注册处理程序的时候了。我们可以使用MauiAppBuilder类中的ConfigureMauiHandlers方法来添加处理程序。
using Article_002.Controls;
namespace Article_002;
public static class MauiProgram
{
public static MauiApp CreateMauiApp()
{
var builder = MauiApp.CreateBuilder();
builder
.UseMauiApp<App>()
.ConfigureFonts(fonts =>
{
fonts.AddFont("OpenSans-Regular.ttf", "OpenSansRegular");
fonts.AddFont("OpenSans-Semibold.ttf", "OpenSansSemibold");
})
.ConfigureMauiHandlers((handlers) => {
#if ANDROID
handlers.AddHandler(typeof(ImageEntry), typeof(Platforms.Android.Renderes.ImageEntryRenderer));
#elif IOS
handlers.AddHandler(typeof(ImageEntry), typeof(Platforms.iOS.Renderes.ImageEntryRenderer));
#endif
});
return builder.Build();
}
}
使用编译指令将有助于将正确的处理程序应用到特定的平台。
使用ImageEntry
一切就绪后,我们就可以在应用程序中使用该控件,为此,我们只需在页面的XAML中添加名称空间,以便可以识别该控件。
<?xml version="1.0" encoding="utf-8" ?>
<ContentPage xmlns="http://schemas.microsoft.com/dotnet/2021/maui"
xmlns:x="http://schemas.microsoft.com/winfx/2009/xaml"
xmlns:local="clr-namespace:Article_002.Controls"
BackgroundColor="{StaticResource Primary}"
x:Class="Article_002.MainPage">
<ScrollView>
<VerticalStackLayout Spacing="10">
<local:ImageEntry TextColor="{StaticResource Black}"
PlaceholderColor="{StaticResource White}"
Image="user"
Placeholder="Email"
HorizontalOptions="FillAndExpand"/>
<local:ImageEntry TextColor="{StaticResource Black}"
PlaceholderColor="{StaticResource White}"
Image="password"
Placeholder="Password"
HorizontalOptions="FillAndExpand"/>
<Button HeightRequest="50"
TextColor="{StaticResource White}"
Text="Login"
BackgroundColor="{StaticResource primary}"
HorizontalOptions="FillAndExpand"/>
<Label Text="Forgot password"
HorizontalOptions="Center"
TextColor="{StaticResource White}"/>
<Label Margin="0,0,0,20" Text="I don't have an account" VerticalOptions="EndAndExpand"
HorizontalOptions="Center"
TextColor="{StaticResource White}">
</Label>
</VerticalStackLayout>
</ScrollView>
</ContentPage>
在.NET MAUI中使用CommunityToolkit.Mvvm显示ObservableCollection项的更改
我研究了关于这个主题的SO问题,并认为我仔细地遵循了这些示例,但当CollectionView中项目的属性更新时,我仍然没有看到UI更新。
首先,我确保我的模型中的房产装饰有ObservableProperty:
public partial class Student : ObservableObject
{
public int Id { get; set; }
public string Name { get; set; }
[ObservableProperty]
bool isRegistered;
}
然后,我在视图模型中使用了一个ObservableCollection,它也用ObservableProperty装饰:
public partial class MyViewModel : ObservableObject
{
public MyViewModel()
{
var student = new Student
{
Id = 123,
Name = "John Doe",
IsRegistered = false
};
Students.Add(student);
student = new Student
{
Id = 234,
Name = "Jane Doe",
IsRegistered = false
};
Students.Add(student);
}
[ObservableProperty]
ObservableCollection<Student> students = new();
[RelayCommand]
void UpdateRegistrations()
{
foreach(var item in Students)
item.IsRegistered = true;
}
}
以下是XAML:
<ContentPage...>
<Grid
RowDefinitions="*,50">
<CollectionView
Grid.Row="0"
ItemsSource="{Binding Students}">
<CollectionView.ItemTemplate>
<DataTemplate
x:DataType="model:Student">
<Grid
ColumnDefinitions="*,30">
<Label
Grid.Column="0"
Text="{Binding Name}" />
<Image
Grid.Column="1"
Source="checkmark.png"
IsVisible="{Binding IsRegistered}" />
</Grid>
</DataTemplate>
</CollectionView.ItemTemplate>
</CollectionView>
<Button
Grid.Row="1"
Text="Update Data"
Command="{Binding UpdateRegistrationsCommand}" />
</Grid>
</ContentPage>
在执行UpdateRegistrations()之后,我没有看到IsRegistered中的更改反映在UI中。我在这里错过了什么?我的印象是CommunityToolkit.Mvvm处理INotifyPropertyChanged逻辑。我需要手动处理更改吗?
最佳答案
1.ObservableCollection不需要[ObservableProperty]属性;当您调用它的方法(如.Add())时,它会自动调用NotifyPropertyChanged和NotifyCollectionChanged。这就是我们在MVVM中使用ObservableCollection<T>而不是List<T>的全部原因。
2.在.NET MAUI(和Xamarin)中,用于绑定的视图模型属性必须是公共的non-static属性,因此我们将把Students从字段提升为read-only属性(也称为添加{ get; })。
3.在XAML中,DataTemplate绑定使用了不正确的语法:Name绑定缺少Binding关键字,两者都应该用double-quotes(")包装。当XAMLC被启用时,这些错误应该会调用编译器(语法)错误,所以请确保您没有意外禁用XAMLC。
public partial class Student : ObservableObject
{
public int Id { get; set; }
public string Name { get; set; }
[ObservableProperty]
public bool isRegistered;
}
public partial class MyViewModel : ObservableObject
{
public MyViewModel()
{
Students.Add(new Student
{
Id = 123,
Name = "John Doe",
IsRegistered = false
});
Students.Add(new Student
{
Id = 234,
Name = "Jane Doe",
IsRegistered = false
});
}
public ObservableCollection<Student> Students { get; } = new();
[RelayCommand]
void UpdateRegistrations()
{
foreach(var item in Students)
item.IsRegistered = true;
}
}
<ContentPage...>
<Grid
RowDefinitions="*,50">
<CollectionView
Grid.Row="0"
ItemsSource="{Binding Students}">
<CollectionView.ItemTemplate>
<DataTemplate
x:DataType="model:Student">
<Grid
ColumnDefinitions="*,30">
<Label
Grid.Column="0"
Text="{Binding Name}" />
<Image
Grid.Column="1"
Source="checkmark.png"
IsVisible="{Binding IsRegistered}" />
</Grid>
</DataTemplate>
</CollectionView.ItemTemplate>
</CollectionView>
<Button
Grid.Row="1"
Text="Update Data"
Command="{Binding UpdateRegistrationsCommand}" />
</Grid>
</ContentPage>

using CommunityToolkit.Mvvm.ComponentModel;
using CommunityToolkit.Mvvm.Input;
.NET Core MAUI 中使用 WebView 控件
当在 .NET Core MAUI 中使用 WebView 控件时,你可以通过 JavaScript 与页面进行交互。下面是一个示例,展示如何在页面和 C# 代码之间进行通信:
在 MainPage.xaml 中,添加一个 WebView 控件和一个 Button 控件:
xaml
复制
<ContentPage xmlns="http://schemas.microsoft.com/dotnet/2021/maui"
xmlns:x="http://schemas.microsoft.com/winfx/2009/xaml"
x:Class="YourAppName.MainPage">
<Grid>
<WebView x:Name="webView" />
<Button Text="Call C#" Clicked="Button_Clicked" />
</Grid>
</ContentPage>
在 MainPage.xaml.cs 中,为 Button 控件的点击事件添加逻辑:
csharp
复制
using Microsoft.Maui.Controls;
namespace YourAppName
{
public partial class MainPage : ContentPage
{
public MainPage()
{
InitializeComponent();
webView.Source = "https://www.example.com";
webView.RegisterCallback("invokeCSharpMethod", (arg) =>
{
// 处理来自页面的请求
// 在这里可以执行 C# 代码逻辑,并将结果返回给页面
string messageFromPage = arg.ToString();
string response = "Hello from C#";
webView.InvokeScriptAsync("receiveCSharpResponse", new[] { response });
});
}
private void Button_Clicked(object sender, EventArgs e)
{
// 在这里调用页面中的 JavaScript 方法
webView.EvaluateJavaScriptAsync("javascriptMethodName()");
}
}
}
在页面的 JavaScript 代码中,你可以使用以下方法与 C# 代码进行通信:
调用 C# 方法:你可以使用 window.webkit.messageHandlers.invokeCSharpMethod.postMessage(message) 来调用 C# 代码中注册的回调方法。在上面的示例中,我们使用了 webView.RegisterCallback 方法注册了一个名为 "invokeCSharpMethod" 的回调方法。
接收 C# 方法的响应:你可以在 JavaScript 中定义一个接收 C# 方法的响应的函数,并使用 window.webkit.messageHandlers.invokeCSharpMethod.postMessage(message) 来发送响应。在上面的示例中,我们在 C# 代码中调用了 webView.InvokeScriptAsync 方法,并将响应作为参数传递给名为 "receiveCSharpResponse" 的 JavaScript 函数。
请注意,WebView 控件的使用可能需要平台特定的配置和权限设置,具体取决于你的目标平台。在 Android 和 iOS 上,你可能需要在应用程序清单文件或信息属性列表中设置适当的权限和配置。
.NET Core MAUI 对接界面数据的更新显示的简单实现代码
1. 首先,在项目中引入 `Xamarin.Essentials` 包来获取设备上的当前时间。
2. 创建一个模型类,用于存储和管理数据。例如:
public class TimeModel
{
public string CurrentTime { get; set; }
}
3. 在 `MainPage` 中定义界面布局以显示时间,并将其绑定到模型类的属性。例如:
<ContentPage xmlns="http://schemas.microsoft.com/dotnet/2021/maui" xmlns:x="http://schemas.microsoft.com/winfx/2009/xaml" x:Class="MauiApp1.MainPage">
<VerticalStackLayout>
<Label Text="{Binding CurrentTime}" />
</VerticalStackLayout>
</ContentPage>
4. 在 `MainPage` 中,实现数据绑定并更新界面显示。例如:
public partial class MainPage : ContentPage
{
public TimeModel Model { get; set; } = new();
public MainPage()
{
InitializeComponent();
BindingContext = this;
}
protected override async void OnAppearing()
{
base.OnAppearing();
await UpdateTimeAsync();
}
private async Task UpdateTimeAsync()
{
Model.CurrentTime = DateTime.Now.ToString("HH:mm:ss");
await Model.NotifyPropertyChanged(nameof(Model.CurrentTime));
}
}
在这段代码中,我们使用 `OnAppearing` 方法来更新界面显示。当页面出现时(即 `OnAppearing` 被调用),我们会通过 `UpdateTimeAsync()` 方法获取当前时间并将其绑定到界面上的 `Label` 控件中。同时,在 `Model.NotifyPropertyChanged(nameof(Model.CurrentTime))` 中,更新数据绑定以及刷新视图。
net core MAUI的Model.NotifyPropertyChanged函数的使用
在 .NET MAUI 中,Model.NotifyPropertyChanged 是一个用于实现属性更改通知的方法。它用于在属性值更改时通知相关的订阅者。以下是关于 Model.NotifyPropertyChanged 函数的详细介绍和使用方法:
Model.NotifyPropertyChanged 方法是 Microsoft.Maui.Controls.BindableObject 类的一个成员,它是一个基类,用于在 MAUI 应用程序中实现数据绑定和属性更改通知。Model.NotifyPropertyChanged 方法用于通知绑定到该属性的视图或其他对象,属性的值已经更改。
使用 Model.NotifyPropertyChanged 方法需要遵循以下步骤:
在你的模型类中定义属性,并在属性的 set 访问器中调用 Model.NotifyPropertyChanged 方法来触发属性更改通知。例如:
using Microsoft.Maui.Controls;
namespace YourAppName
{
public class MyModel : BindableObject
{
private string name;
public string Name
{
get { return name; }
set
{
if (name != value)
{
name = value;
OnPropertyChanged(); // 使用 Model.NotifyPropertyChanged 方法
}
}
}
}
}
在上面的示例中,当 Name 属性的值发生变化时,PropertyChange 事件将被触发,通知订阅了该属性的视图或其他对象。
在视图或其他对象中订阅属性更改通知事件。你可以在视图的代码-behind 中订阅 PropertyChanged 事件,以便在属性更改时执行相应的操作。例如:
using Microsoft.Maui.Controls;
namespace YourAppName
{
public partial class MainPage : ContentPage
{
private MyModel model;
public MainPage()
{
InitializeComponent();
model = new MyModel();
model.PropertyChanged += Model_PropertyChanged;
}
private void Model_PropertyChanged(object sender, PropertyChangedEventArgs e)
{
// 在这里处理属性更改事件
if (e.PropertyName == "Name")
{
// 当 Name 属性发生更改时执行特定的操作
string newName = model.Name;
// 执行其他逻辑...
}
}
}
}
在上面的示例中,我们在 MainPage 的构造函数中创建了一个 MyModel 实例,并订阅了该实例的 PropertyChanged 事件。当 Name 属性的值发生更改时,Model_PropertyChanged 方法将被调用,并根据属性名执行相应的操作。
通过使用 Model.NotifyPropertyChanged 方法,你可以确保在属性值更改时及时通知相关的订阅者,从而更新界面、执行其他逻辑或保持数据同步。
希望这个介绍能帮助你理解和使用 .NET MAUI 中的 Model.NotifyPropertyChanged 函数。如果你有任何进一步的问题,请随时提问。
.net core MAUI弹出新页面,返回就页面时候获得那个弹出页面的数据
在 .NET MAUI 中,你可以通过导航到新页面并在页面之间传递数据来实现弹出新页面并返回数据的功能。下面是一个示例代码,展示了如何在 .NET MAUI 中实现这个功能:
首先,假设你有两个页面:MainPage 和 PopupPage。MainPage 是你的主页面,而 PopupPage 是弹出的页面。
在 MainPage 页面中,添加一个按钮,点击按钮时导航到 PopupPage 页面:
using Microsoft.Maui.Controls;
namespace YourAppName
{
public partial class MainPage : ContentPage
{
public MainPage()
{
InitializeComponent();
}
private async void ShowPopupButton_Clicked(object sender, EventArgs e)
{
var result = await Navigation.PushAsync(new PopupPage());
// 处理从弹出页面返回的结果
if (result is string popupData)
{
// 在这里处理从弹出页面返回的数据
// 可以使用 popupData 变量来访问数据
}
}
}
}
在 PopupPage 页面中,添加一个返回按钮,并在按钮的点击事件处理程序中返回数据给 MainPage:
using Microsoft.Maui.Controls;
namespace YourAppName
{
public partial class PopupPage : ContentPage
{
public PopupPage()
{
InitializeComponent();
}
private async void ReturnButton_Clicked(object sender, EventArgs e)
{
string popupData = "Some data from PopupPage";
await Navigation.PopAsync(popupData);
}
}
}
在上面的示例中,我们在 MainPage 中的按钮点击事件处理程序中使用 Navigation.PushAsync 方法导航到 PopupPage 页面。当用户从 PopupPage 返回时,PushAsync 方法将返回一个 Task 对象,其中包含从 PopupPage 返回的数据。
在 MainPage 中,我们使用 if (result is string popupData) 来检查返回的数据类型,并在条件成立时处理从 PopupPage 返回的数据。
在 PopupPage 中的返回按钮点击事件处理程序中,我们使用 Navigation.PopAsync 方法返回到上一个页面,并将数据作为参数传递给 PopAsync 方法。
通过这种方式,你可以在 .NET MAUI 中实现弹出新页面并返回数据的功能。你可以根据需要自定义页面之间的数据传递方式和数据类型。
.net core MAUI中使用复杂listview的例子带数据绑定,删除编辑功能实现
当在.NET MAUI中使用复杂的ListView时,您可以实现数据绑定并添加删除和编辑功能。下面是一个示例,展示如何在.NET MAUI中实现这些功能。
首先,假设您有一个名为Item的数据模型,其中包含需要在ListView中显示的属性,例如Name和Description。创建一个名为ItemViewModel的视图模型类,它将包含您的数据源列表以及用于处理删除和编辑操作的命令。以下是示例代码:
public class Item
{
public string Name { get; set; }
public string Description { get; set; }
}
public class ItemViewModel : INotifyPropertyChanged
{
public ObservableCollection<Item> Items { get; } = new ObservableCollection<Item>();
public ICommand DeleteCommand { get; }
public ICommand EditCommand { get; }
public ItemViewModel()
{
DeleteCommand = new Command<Item>(DeleteItem);
EditCommand = new Command<Item>(EditItem);
}
private void DeleteItem(Item item)
{
Items.Remove(item);
}
private void EditItem(Item item)
{
// 在这里实现编辑逻辑
}
// 实现INotifyPropertyChanged接口的代码(略)
}
接下来,在XAML文件中,可以使用以下代码来创建包含复杂数据项和编辑/删除功能的ListView:
<ContentPage xmlns="http://schemas.microsoft.com/dotnet/2021/maui"
xmlns:x="http://schemas.microsoft.com/winfx/2009/xaml"
x:Class="YourNamespace.YourPage"
x:DataType="local:ItemViewModel">
<ContentPage.Content>
<ListView ItemsSource="{Binding Items}">
<ListView.ItemTemplate>
<DataTemplate>
<ViewCell>
<StackLayout>
<Label Text="{Binding Name}" />
<Label Text="{Binding Description}" />
<Button Text="Edit" Command="{Binding Source={x:Reference Name=MyPage}, Path=BindingContext.EditCommand}" CommandParameter="{Binding .}" />
<Button Text="Delete" Command="{Binding Source={x:Reference Name=MyPage}, Path=BindingContext.DeleteCommand}" CommandParameter="{Binding .}" />
</StackLayout>
</ViewCell>
</DataTemplate>
</ListView.ItemTemplate>
</ListView>
</ContentPage.Content>
</ContentPage>
在这个示例中,ItemsSource属性绑定到ItemViewModel中的Items属性,以显示数据项。ItemTemplate定义了每个数据项的视图,其中包含一个显示名称和描述的标签,以及一个用于编辑和删除的按钮。
注意,在按钮中,Command绑定到视图模型中的相应命令(DeleteCommand和EditCommand),CommandParameter绑定到当前数据项,以便在命令执行时传递给视图模型的方法。
这样,您就可以在.NET MAUI中使用复杂的ListView,并通过绑定和命令来实现删除和编辑功能。根据您的需求,您可以在视图模型的DeleteItem和EditItem方法中实现相应的逻辑。
listview实现通过右滑来显示编辑和删除按钮的功能
在.NET MAUI中,要实现通过右滑来显示编辑和删除按钮的功能,您可以使用SwipeView控件。SwipeView是一个用于实现滑动操作的容器,可以在滑动时显示自定义视图。以下是带有右滑编辑和删除按钮的复杂ListView的示例代码:
xaml
复制
<ContentPage xmlns="http://schemas.microsoft.com/dotnet/2021/maui"
xmlns:x="http://schemas.microsoft.com/winfx/2009/xaml"
x:Class="YourNamespace.YourPage"
x:DataType="local:ItemViewModel">
<ContentPage.Content>
<ListView ItemsSource="{Binding Items}">
<ListView.ItemTemplate>
<DataTemplate>
<ViewCell>
<SwipeView>
<SwipeView.RightItems>
<SwipeItems>
<SwipeItem Text="Edit" IconImageSource="edit_icon.png" BackgroundColor="LightBlue" Command="{Binding Source={x:Reference MyPage}, Path=BindingContext.EditCommand}" CommandParameter="{Binding .}" />
<SwipeItem Text="Delete" IconImageSource="delete_icon.png" BackgroundColor="LightPink" Command="{Binding Source={x:Reference MyPage}, Path=BindingContext.DeleteCommand}" CommandParameter="{Binding .}" />
</SwipeItems>
</SwipeView.RightItems>
<Grid>
<!-- 根据您的需求定义适当的布局 -->
<!-- 可以在这里添加任何复杂的视图元素,例如图片、标签等 -->
</Grid>
</SwipeView>
</ViewCell>
</DataTemplate>
</ListView.ItemTemplate>
</ListView>
</ContentPage.Content>
</ContentPage>
在上面的示例中,我们将SwipeView嵌套在ViewCell中,并在SwipeView的RightItems属性中定义了两个SwipeItem,分别用于编辑和删除操作。您可以根据需要设置每个SwipeItem的文本、图标、背景颜色和相应的命令。
请注意,Command和CommandParameter属性绑定到视图模型中的EditCommand和DeleteCommand,以及当前数据项,以便在命令执行时传递给视图模型的方法。
通过这种方式,您可以实现在.NET MAUI中使用复杂的ListView,并通过右滑来显示编辑和删除按钮的功能。
.NET Core MAUI打包APK方法
在使用 .NET Core MAUI 框架进行 Android 应用的开发后,您可以使用以下步骤将应用程序打包为 APK 文件:
确保您已经安装了 Android SDK 和 JDK,并正确配置了环境变量。
在命令行中,导航到您的 .NET MAUI 解决方案的根目录。
确保您的项目中包含了一个 Android 项目。如果没有,请使用以下命令创建一个新的 Android 项目:
dotnet new mauiandroid -n YourProjectName.Android
进入 Android 项目的文件夹:
cd YourProjectName.Android
使用以下命令生成 APK 文件:
dotnet build -t:Package
这将生成 APK 文件并将其放置在 bin/Debug/net6.0/android/bin 或 bin/Release/net6.0/android/bin 目录中,具体取决于您的构建配置。
使用适当的签名工具对 APK 文件进行签名。您可以使用 Android Studio 的签名工具或者使用命令行工具进行签名。
示例使用命令行工具进行签名:
jarsigner -verbose -sigalg SHA1withRSA -digestalg SHA1 -keystore YourKeystore.keystore YourAppName.apk AliasName
其中,YourKeystore.keystore 是您的密钥库文件,YourAppName.apk 是您生成的 APK 文件,AliasName 是您的密钥别名。
使用 Android SDK 中的 zipalign 工具对 APK 文件进行优化。这将生成一个最终的优化的 APK 文件。
zipalign -v 4 YourAppName.apk YourAppName-aligned.apk
其中,YourAppName.apk 是之前签名的 APK 文件,YourAppName-aligned.apk 是优化后的 APK 文件。
MAUI中ContentPage与ContentView的区别
在 MAUI 中,ContentPage 和 ContentView 都用于创建和组织用户界面,但它们有一些区别:
1. 继承关系:
- ContentPage 继承自 Page 类,是一个完整的页面。
- ContentView 继承自 View 类,是一个视图控件。
2. 用途:
- ContentPage 表示一个独立的页面,通常用作应用程序的主要内容页面。它可以包含其他视图和控件。
- ContentView 是一个轻量级的容器,用于组织和布局其他视图和控件。它通常用作 ContentPage 或其他容器控件的子视图。
3. 导航:
- ContentPage 可以参与应用程序的导航,可以通过 Navigation 进行页面之间的导航。
- ContentView 本身不参与导航,它是作为页面或其他容器的子视图存在的。
4. 生命周期:
- ContentPage 有自己的生命周期方法,如 OnAppearing、OnDisappearing 等,可以在这些方法中执行页面的初始化、清理等操作。
- ContentView 没有单独的生命周期方法,它的生命周期依赖于其所在的父容器。
5. 布局:
- ContentPage 默认使用 VerticalStackLayout 作为其内容的布局,可以通过设置 Content 属性来指定页面的主要内容。
- ContentView 没有默认的布局,需要手动设置其子视图的布局方式,可以使用各种布局容器如 StackLayout、Grid 等来组织其内容。
上一篇:微软新技术Blazor框架